Showing posts with label Butterfly Kayla. Show all posts

Monday, February 20, 2023

Heartfelt Sympathy

Hello and Happy President's Day crafty friends! 

Kris here sharing some inspiration with you, but first.... we have a HUGE President's Day Sale going on right now thru Friday, 24th!!  Save up to 70% OFF on selected CottageCutz dies in the store! Shop early for best assortment!


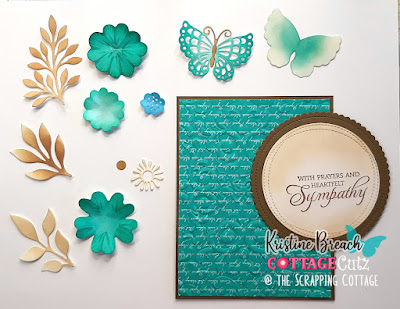
Today's card features flowers & leaves from the new Flowers & More Release -- which are still 30% off -- a great deal and these are a must-have for your all occasion stash!  All the CottageCutz products I've used on this card are pictured and linked at the end of my post.

CUTTING & SCORING:
  • Sand-colored Card Base = Cut 9-1/2" x 6" - then score the longest edge at 4-3/4"
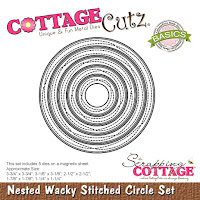
  • Patterned Paper (Teal) = Cut 4" x 5-1/4"
DESIGN STEPS:

1.  I embossed my teal patterned paper with a Parisian 3D embossing folder, and attached to Suede card panel (4-1/4" x 5-1/2")


2.  I stamped a sentiment on my white circle, then sponged some Gathered Twigs distress ink to tone down the white.  I glued it onto the scalloped circle, then onto my card front, over to the right edge.

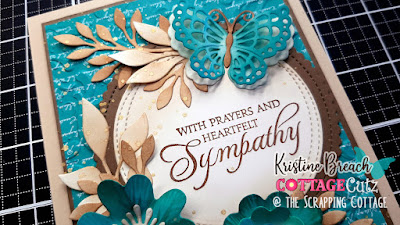
3.  I die cut Flower 3, Flower 5, Leafy Branches 1, 2, and 3, and the Butterfly Kayla from white cardstock and then added distress inks to color them; Gathered Twigs for branches & butterfly body.... Peacock Feathers for the blossoms and butterfly wings... Broken China for smallest blossom center.  


4.  I figured out placement of everything and glued in place, then adhered to center of my sand-colored card base. 

5.  I then spattered some metallic gold acrylic paint over my leafy branches (mostly).  I love the look this gives for a nice finishing touch.  


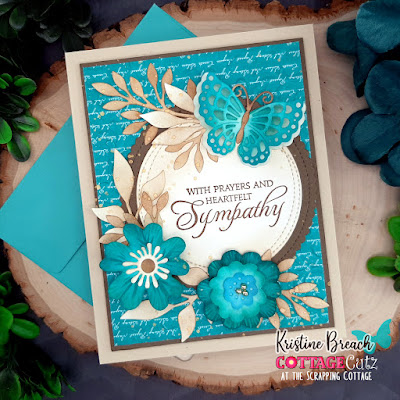
Here's one more look of the finished card...


COTTAGECUTZ PRODUCTS USED:


Want to watch CottageCutz designers in action? 

Follow the CottageCutz YouTube channel here.

~Kristine


Tuesday, September 06, 2022

Easy Birthday Card

Happy TuesDIE Cottage Cutz Friends!
Melinda here with you on another Terrific TuesDIE. Today I am sharing a fun and very easy card I created featuring dies that are part of the Great Labor Day Sale Happening Now!

Here's a look at my completed card. This is a shot of the outside and the inside.


Here is what it looks like when closed. It is a standard A2 side folding card. 

The base of the card is a piece of Kraft cardstock cut at 5.5 x 8.5. It is folded to make it a 4.25 x 5.5 size. I then cut two pieces of patterned paper at 4 x 5.25. I mounted them on to each side of the inside of the card. 

Next I cut a piece of Kraft cardstock to 1.75 x 8.5. I then folded it in half and then folded those two halves in half again. This made four equal panels. I then made sure the folds were valley, mountain and valley. I then cut a piece of patterned paper to 1 5/8 x 4. I folded that in half with a mountain fold. Once I did this, i adhered the patterned paper to the center of the Kraft paper strip. Mountain on mountain.


I then applied adhesive to the backs of the two end squares. I adhered one side down roughly in the center and about a half inch from the edge. I then held the folded squares down and closed the card. I burnished the card onto the square with the adhesive so that upon opening back up, it would be solidly adhered to the opposite flap.

I opened it back up and then decorated the flap. I added a scallop, eyelet stitched square from the die set to each end. To their centers I added a piece of matching paper and then a pretty butterfly from the Kayla butterfly die. To the center two squares, I added a smaller square in Kraft cardstock with two hearts from the Stitched heart die set.

Here is another photo of the card opened.

Here is a closer look at the front of the card opened. I added a mat of patterned paper and then two hearts, one white and one Kraft from the stitched heart set. I added another butterfly. For the butterflies, I started with plain white cardstock (actually one was Kraft cardstock) and then colored them with my markers to give them that gradient colored look. I adhered the butterfly to the center of the heart. I die cut the happy birthday in white cardstock and then used my markers to color them as well. For the happy, I just angled it around the heart as I adhered it. For the dot of the "I", I used some stickles.

Here is one last look at the finished card. This is a real easy and quick way to add a little extra something to your cards with minimal extra effort. Plus the sky is the limit on the sizing and style options for this. It is a real easy go to!


Don't forget to head over to the CottageCutz YouTube channel and check out all of the amazing projects on there. Our video team is doing a wonderful job of filling the channel with all sorts of creative content! You don't want to miss it!

Nested Stitched Eyelet Square Set

Stitched Heart Set

Happy Birthday W Shadow


Don't forget about the great Labor Day Sale Happening now!
Sale ends Thursday, September 8, 2022 at 9:00 PM Pacific Time.
Shop Now For Best Selection!!!!


Well that about covers it for today! Until the next time, have a wonderfully craft-die day!
Melinda Beltran


Thursday, April 28, 2016

Happy Mother's Day

Hello everyone,

It's Donna here sharing another beautiful card using the CottageCutz dies!  How many of you have made your mother a card and mailed it? Not me, but we still have about two weeks to get it out. Now onto my card.
  • Card base  is an A2 (4 1/4 x 5 1/2)
  • Top layer is 4 1/4 x 5 1/2
  • Center pieces are 4 1/4 x 1 1/2 
I die cut the two butterflies and pieced them together. I cut out two circles from the cross-stitched circle dies.  I used the 5th and 6th circles.  The larger circle is with the blue butterfly and the smaller is with the pink butterfly. I adhered them to my card with a glue dot and added my butterflies. I die cut the Happy and Mother's Day out with black cardstock, added some clear wink of stella then used liquid glue to adhered them to my card. I finished my card off by adding some sequins.


Don't forget to join the CottageCutz challenge...click here for all the details. Please come back and see us again soon!

List of dies used for this project:


Monday, February 08, 2016

Spring Butterflies

Hi, Vladka here!
The card I did today was inspired by spring colors! I used Distressed Inks to get the look I wanted. Let’s go step by step so you too can create this card. I used white cardstock for the background with some stamped leaves for more interest. For the stamping, I used yellow and green Distress Inks. I also spritzed some water on it to get more of a watercolor look.
  

I cut out the circle with the new die from the  Stitched Circle Set and added some splashes of yellow Distress ink mixed with water. When everything was dry, I cut out two Butterflies. One out of yellow cardstock and one green. I attached them over the circle with the splashes. I added the  Happy Birthday Cupcake expression out of white cardstock (after I cut off the cupcake) to the middle of the two butterflies.
 
This is a clean and simple card for someone’s birthday. The colors just scream happy!! Also check out our other dies from the Happy Birthday release. They are all so beautiful and fun to play with!!

Have a great day!
____________________________________
Card Supplies I used:

CottageCutz dies: they are listed below
Card stock: white, yellow and green cardstock
Distress Ink: Fossilized Amber, Peeled Paint
Other:  scissors, paper trimmer, scor-buddy, brush, water
______________________________________________