Showing posts with label Botanical Garden 2. Show all posts

Monday, August 19, 2024

Hello Fall

Hello Friends,

So glad you stopped by today!  I am so excited about starting my fall cards.  Autumn colors are my favorite and so is the season! Today I am sharing a Fall card using a number of different dies: Mushroom Fairy Garden (Mushrooms),  Fall Centerpiece (leaves), Spring GreeneryGreenery and Botanical Garden 2.  

 Background Photo by FreePiks

Design Steps:
1.  Use a Kraft card stock base measuring 5 1/4 x 5 1/4, DP 5 1/8 x 5 1/8 and cut 3 kraft frames using the Large Stitched Wide Square Frame die
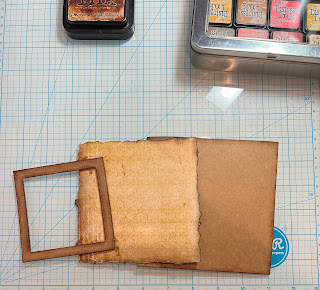
2.  Glue the frames together and ink edges, tear around the DP and ink the edges, and finally ink the edges of the square card base

3.  Glue the DP to the front of the card and then add frames
4. Cut out the greenery, mushrooms and leaves using the following dies: Mushroom Fairy Garden (Mushrooms),  Fall Centerpiece (leaves), Spring Greenery, Greenery and Botanical Garden 2.  Ink the edges.  For the extra texture I dyed a piece of cheesecloth brown.  Lay out your cheesecloth and then to tack down put a little exta glue on the backs of your greenery
5.  Place your leaves, mushrooms and acorns as shown above
6.  Cut out the hello fall 3 times using the Fall Phrases in dark brown card stock.  Glue together add the phrase to the upper right hand corner and your card is complete


We have more inspiration on our YouTube Channel check it out HERE

Thanks so much for stopping by! 

Blessings and Take Care


Head over to Cottage Cutz and do a little shopping today!

Get Social With Cottage Cutz

Thursday, August 02, 2018

Sea Turtles!

Good Morning Friends!

It is Pam sharing with you on this wonderful Thursday morning!

We are getting very close to our new release for Christmas!  And it will soon be time for us to share the new dies but until then we are showing you some new ideas for those favorite dies from the past!  I live near Hilton Head Island and the area is famous for sea turtles!  So with that in mind I used our turtle die combined with a few other dies to create my card for you today!


Design Steps:
1.  Cut out 2 Sea Turtles one in green and one in brown.  Place the shell panels from the green turtle into the brown and the brown into the green.  I just taped them into place
 2.  Add a little shading to the turtles using TH inks.  Use a fine black marker to make the eye standout
 3.  Use an A2 kraft card base, cut a slightly smaller piece of white 4 x 5 1/4.  Cut a 4 x 5 1/4 piece of wood grain DP and cut an oval in the center using the largest of the Wacky Stitched Oval dies.
 3.  Next cut a piece of 3 3/4 x 5 kraft card stock and cut out the second to the largest Pierced Oval die in the center.  Glue it directly behind the wood grain DP as shown
 4.  On the white card stock create an inked background for the water.  Use TH inks and then splatter with shimmer water (water mixed with Perfect Pearls Powder)
 5.  Glue to the back of the wood grain DP. (Make sure not to glue to close to the oval opening so you can stick the sea grass behind the oval
 6.  Using the Botanical Garden 2 die cut out the foliage in 2 shades of green card stock
 7.  Tuck the foliage into the oval and glue down
 8.  Add the sea turtle to the card front
 9.  Take a piece of white cheese cloth and spray with a walnut stain and let dry
10.  Add the cheese cloth to the card front and then add the pearls
CottageCutz Products


I hope you are having a good time looking a new ideas for all of those older favorite dies!  I am sure having fun using them again!  Stay tuned for those new Christmas dies coming very soon!

Blessing

Pam


Monday, May 21, 2018

Blue Vase/Pink Flowers

Hi, Lois here for my Monday post.  Before I start, I wanted to remind you that CottageCutz has many of their dies currently on sale for up to 70% off.  Be sure to check them out in The Scrapping Cottage store

It seems that it has been raining the entire month of May.  Of course, that helps the garden flourish -- rain is so good for the flowers.  I'm not much of a gardener, so most of my flowers are on my cards.  Today's card is no exception.  Once again, I started with a layout from one of the Splitcoaststampers sketch challenges.


This layout lent itself to some coordinating patterned paper, as you can see on my card.  It was a pad of two-sided Stamps of Life designer paper I recently bought at a local stamp show.


To start my card, I cut the pieces for the vase and flowers, using two CottageCutz dies -- Vase Collection and Botanical Garden 2.


Using several Copic markers I colored the die-cut pieces . . .


. . . and constructed my vase of flowers.


I then cut my cardstock and patterned paper as follows:

Gray  - 8 1/2" x 5 1/2", scored at 4 1/4"
Black - 3 3/4" x 5", 2 1/4" x 4 1/4", and 3" x 2 1/2"
Patterned paper - 3 1/2" x 4 3/4" and 2" x 4"
White - 2 3/4" x 2 1/4"

Using the sketch challenge layout, I constructed my card.


I then added my vase and flowers.


At this point I decided I wanted some kind of a sentiment on my card, so I stamped a small sentiment on a scrap of white cardstock, using navy blue ink.  I punched it out with a 1 1/4" circle punch and then punched a black 1 3/8" circle on which to mount it.


I added the sentiment using some foam pop dots and my card was complete.


CottageCutz dies used on this card are:

http://www.scrappingcottage.com/cottagecutzvasecollection.aspx

http://www.scrappingcottage.com/cottagecutzbotanicalgarden2.aspx