Showing posts with label Be My Valentine Puppies. Show all posts

Monday, February 01, 2021

No Horsin' Around

Hello Scrapping Cottage friends! Thanks for taking the time to stop and visit with us today. It's Mary Marsh here bringing you the Monday edition of the Blog.

We have a brand new release of dies in the online store. It's our Circus release with 16 new designs. They are currently on sale at 25% off individual dies. The Safari release dies are also on sale at 25% off individual dies. This was our Black Friday release. 

The Circus dies are so cute for Birthday, Valentine, Thinking of You or even Father's Day cards. Just let your creativity soar. The DT has been showing some great ideas & techniques for ways to use these dies. So if you missed any check back on the Blog. 

Today for your viewing pleasure, I am featuring the new Prancing Pony die and I created a Valentine card in some non-traditional colors. The color challenge #828 on Splitcoaststampers gave us smoky slate, basic gray and daffodil delight for a color trio. Optional was to use something that represents movement. The Prancing Pony definitely fits that option. Also for this color challenge you have other colors that are considered neutrals and navy blue is one of them. 
For the card layout I used the Splitcoaststampers sketch #837. Instead of the 3 squares in the layout, I used hearts. 
I stenciled my stripes for the background using a stripes stencil and daffodil ink. For elements e & 4 of the sketch, I cut daffodil cardstock 1/2" x 7 1/2" and embossed it with a hearts folder. The "no horsin around" sentiment is computer generated.

The "be my valentine" phrase is from the 2019 "Be My Valentine Puppies" die. The large scalloped heart is from the same die. The smaller hearts are from the Hearts set.

Well, that's it for me for this post. I hope I have given you another idea for a way to use this new die. And, there is still time to get it to create a Valentine's card. See you again on Saturday!

dies I used to create card:


Saturday, January 23, 2021

Stop Monkeyin' Around

Hello Scrapping Cottage friends! Thanks for taking the time to stop and visit with us today. It's Mary Marsh here bringing you the Saturday edition of the Blog. 

We have a brand new release of dies in the online store. It's our Circus release with 16 new designs. They are currently on sale at 25% off individual dies. The Safari release dies are also on sale at 25% off individual dies. This was our Black Friday release. 

The Circus dies are so cute for Birthday, Valentine, Thinking of You or even Father's Day cards. Just let your creativity soar. The DT has been showing some great ideas & techniques for ways to use these dies. So if you missed any check back on the Blog. 

Today for your viewing pleasure, I am featuring the new Juggling Monkey die and I created a Valentine card. My niece's little 3 year old boy loves monkeys and when I saw this die I knew I would make him a card for Valentine's Day. 

So let's get started with some details on how I created this card. 

Design Steps: 

I started my card this week with the layout. I saw this sketch #837 on Splitcoaststampers and decided to use it for my layout. 
Next, I cut my images in the colors on the packaging front. I thought they were good ones for a Valentine card. After I cut the monkey image, I realized that using the squares on the sketch wasn't going to work. So I switched them up to hearts. And instead of 3 hearts the same size, I used a large heart for the juggling monkey and 2 smaller ones for the sentiments. 
The large heart is from the 2019 Be My Valentine Puppies die. The smaller hearts are from the Hearts set
I also had designer paper picked out to use but when I laid the card out I had to make it longer to accommodate this image. And my paper was only 6 x 6. My cards are always works in progress anyway so I had to come up with Plan B. 

I decided to keep the layout a bit more on the simple side. I cut my card base in red at 7 1/2" x 3 1/2". Then for elements 3 & 4 of this sketch, I used some borders that  I had in a Christmas paper collection. I think they worked out great for this sketch.  
Next, I stamped my sentiment in red ink on the first smaller heart. I like using punny sentiments when I create whimsical Valentine cards.  For the 2nd smaller heart I used the "be my valentine" phrase and cut it in red cardstock. It's from the same die as the large heart. I referenced it above. 
Now I am ready to start card assembly. 

I attached the 3 hearts using dimensional adhesive to lift them slightly off the card base. It gives a nice visual to the card and  creates added interest. I decided to cut some additional white hearts and scatter them around the card base. The hearts are from the same die I  referenced above. 
Well, that's it for me for this card. I hope I have given you another idea for a way to use these new Circus dies. See you next Saturday!

dies I used to create card:


Saturday, February 01, 2020

Bee My Valentine (new die)

Hello Scrapping Cottage friends! Thanks for taking the time to stop and visit with us today. It's Mary Marsh here bringing you the Saturday day edition of the Blog. 

We have a new release of Spring dies, and they are in the online store and 25% off for a limited time. There are 27 new dies in the release and each one is cuter than the next. They will be perfect for your Easter and Spring card making. The DT will be showing more samples in the weeks to come.  Today, I am featuring the new Busy Bee die. I made a Valentine card with it.

So let's get started with some details on how I created this card.

Design Steps:

I started off by choosing my designer paper. I decided to stick with traditional Valentine colors for this card and I wanted some heart paper. I found this one in my collection that I thought would work. The hearts are small enough and once I added my die cut hearts it wouldn't overpower the image.

Red Card Base: 4 1/4" x 5 1/2"
Designer Paper Layer: 4 1/8" x 5 3/8"

Next, I cut the bee image in normal bee colors- black and yellow. I used vellum for the wings and sponged them with tumbled glass distress inks.
The large red heart is from the Be My Valentine Puppies and the white heart from the Stitched Heart set.

I wanted a "punny" sentiment for my card. I had this "bee happy" stamp. So I masked off the happy word and with the help of my stamp-a-ma-jig I stamped just the "bee" word in the corner of my heart with black ink. To make it stand out I stamped in black onyx ink and then embossed with a black embossing powder.
To finish off my sentiment, I used just the "my valentine" phrase from the Be My Valentine Puppies die and cut in black cardstock. When I started card assembly I decided to recut this phrase in a shiny black foil to make it stand out like the stamped sentiment.
I also cut a 1 1/2" wide strip of black cardstock and embossed it with a heart folder. Just wanted to get some other color on the card besides the red and white.

I am now ready to start card assembly.  I attached the black embossed strip to the designer paper with double sided tape. For the red heart I used dimensional adhesive and the white heart is attached with double sided tape. This photo shows the strip cut at 1" but it wasn't wide enough when I started card assembly.
Next, I added the bee using dimensional adhesive. The "my valentine" phrase is attached with Ranger multi medium matte. My camera wasn't cooperating on this photo. The "bee" word is embossed but it looks light and faded in this photo. IRL it's a solid black. 
To finish off my card. I added the image panel to the red card base and then scattered a few red hearts for added interest.

Well, that's it for me for this post. See you next Saturday.

dies I used to create card:


Saturday, January 25, 2020

Be My Valentine


Hello Scrapping Cottage friends! Thanks for taking the time to stop and visit with us today. It's Mary Marsh here bringing you the Saturday day edition of the Blog. 

Today, I am featuring the Moose Pulling Gnome Sled. It's from the Christmas Part 2 collection, but I am repurposing it for a Valentine card. It's just a way to get some more mileage out of your dies. Let's get started on some details of how I created my card.

Design Steps:
This week I started with my designer paper. I had this great winter scene paper and thought it would work well for a Valentine card. You can see another card I created using a scene from the paper pack here.
The paper is in a 6" x 6" pack and I didn't want to cut too much of the background scenery away. So I decided to make a square card.

Designer Paper: 5 1/4" x 5 1/4"
Rose Cardstock Layer: 5 3/8" x 5 3/8"
Espresso Brown Card Base: 5 1/2" x 5 1/2"

Next, I cut the Moose & Gnome using the cardstock colors from the designer paper. Since I am making a Valentine card, I only put one of the gnomes on the sled.
This part of the card is ready for assembly. I attached the designer paper to the rose panel with double sided tape. The moose & gnome are attached with dimensional adhesive. Lifting the images off the background gives added depth to your card.
I was going to stamp a sentiment directly on the designer paper above the trees. But I thought this "be my valentine" phrase would look like the gnome added it to the snow. My hubby did that for me one year when we had a snowstorm on Valentine's Day. He spray painted a heart and the same words I used on my card in red paint on top of the snow. It was so cute and the neighbors loved it as well.
I decided to add a few hearts above the tree tops on the designer paper. Just for a little added interest. After all it's a card for the big love day and I thought I should have them somewhere on the card (LOL).
To finish off my card I added the image panel to the espresso brown card base. I went with a brown base because I thought it accented the rose layering panel nicely.
Well, that's it for me for this week. I hope I have given you a new idea for using this die. See you next Saturday!!!

dies I used to create card:


Friday, January 10, 2020

Husky Love Mail

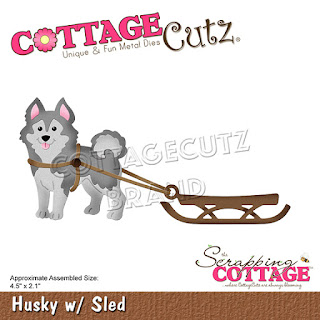
Happy Friday!  It's Jeanne sharing with you today and I have a Valentine's card for any dog lover in your life.  This card uses the Husky w/Sled die from the new Arctic Animals release along with some older Valentine's Day dies.
I started off by cutting all the pieces from cardstock in white, gray, brown and two shades of red.
I used some gray ink to shade the white areas of the husky, then I glued him together along with the letters and banner.  Final assembly of the pieces will be on the card itself.
My card is going to be a top folding A2 size card so I cut a panel 5.5 x 4.25 inches to glue on top of the base.  I used two shades of red/pink to create a soft background with more of the color towards the bottom and going diagonally from the middle to the upper right.
For my snow, I  cut a free form snow bank and used light blue ink to just shade the top.
I adhered the snow to my background panel and then glued down my dog and sled.  I left the top part of the sled unglued so I could slip the envelopes underneath.
I tucked the envelopes on the sled and used the various size hearts to create a trail.
Finally, I popped up the sentiment using foam dots and added a few rhinestone hearts in clear and red.  A fun and easy to make Valentine's Day card!

Dies used:
http://www.scrappingcottage.com/cottagecutzhuskywsled.aspx

http://www.scrappingcottage.com/cottagecutzbemyvalentinepuppies.aspx
http://www.scrappingcottage.com/cottagecutzpuppyloveletter.aspx
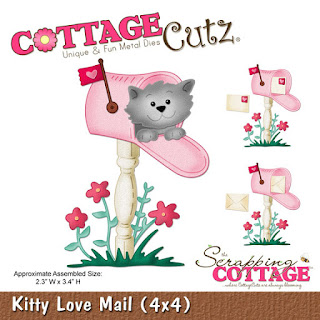
http://www.scrappingcottage.com/cottagecutzkittylovemail4x4.aspx

Thanks for joining me today and I hope you enjoyed my card.  Have a fun and creative weekend!