Showing posts with label Flower Pot House. Show all posts

Tuesday, May 05, 2020

Birthday hamsters

Hi Janja here. Welcome to the blog.
For today's post, I wanted to create something vibrant. I used some dies from past releases and here is my birthday card.


- CottageCutz dies: Happy Hamster, Flower Pot House, Clouds & Sun
- blank card: 4 ¼ x 5 ½” (10,8 x 14 cm), folded
- white cardstock: 3 15/16 x 5 3/16” (10 x 13,2 cm)
- different colors of cardstock
- different colors of ink pads
- glue, double-sided adhesive tape, self-adhesive foam pads

First, cut out two hamsters, a large flower pot, grass and some individual flowers from different colors of cardstock. Shade all cutouts with ink pads.


Then cut the sun and white cloud out of the cardstock. Stamp a sentiment.


Trim white cardstock. Use a large brush and ink to shade the background.


Paste the background on the front of the card. Gradually paste all the cutouts as shown and we're done.


Thank you for stopping by.
Janja


Wednesday, August 21, 2019

May Your Day Bloom with Happiness

Hello!  This is Sukie and today I have a card to share featuring the Magical Garden dies.  This whimsical scene was created with the Flower Pot House die set.
This die set has so many detailed pieces that come together to create the adorable Flower Pot House.  I also cut out the Picket Fence Border to coordinate with my other die cuts.  Everything was shaded with some Distress Inks.
The picket fence was trimmed on the edges so it would fit along the base of my card.  I created a sign by stamping a sentiment from the Scrappy Moms (retired) Flower Power stamp set on some card stock.  After punching a couple of holes on the top corners, I tied some Totally Natural Trendy Twine to finish off my sign.
I created the soft background by inking my card base in a couple of different colors.  The picket fence was added to the bottom portion of the card base.  A couple of flowers were tucked into the fence posts.
The Flower Pot House was anchored perfectly between the picket fence pieces to create a whimsical scene.
The sign was adhered at an angle above the pot.  A flower shaped brad was perfect for holding up the sign.
Here are the dies used on my card, available in shop:

Friday, July 05, 2019

More Than Flowers!

Happy Friday Cottage Cutz fans!  It's Jeanne today.  I hope you had a Fourth of July and that you have a long weekend to relax.  I have a clean and simple card for you today using the Flower Pot House from the Magical Garden release.
I die cut everything twice in white card stock and used Distress Oxide ink to color them.

To get the shading on the pots I used a Post-it note and placed it in the slit that creates the pot rim.  This creates a mask and allowed me to easily shade just part of the pot.
I assembled my flowers.
For the card front, I took an A2 panel and stenciled dots on it.  I knew I was going to use striped washi tape and felt the dots were a nice complement.
After stamping the sentiment I arranged the pots and flowers on the card and took a photo with my phone.  Since I usually need to remove most of what I've arranged in order to start gluing everything, and this makes a wonderful reference.
In the final you can see that I did rearrange things a little.  One tip to add depth to your die cuts - make sure to layer some over and under other pieces!

Dies:


Thanks for stopping by today.   Make sure to stop by the online store where there is a BIG July 4th sale going on right now!!!


Monday, June 24, 2019

DT Samples w/Magic Garden Dies (Day 6)

Hello Scrapping Cottage friends! Thanks for taking the time to stop and visit today. We are sampling DT cards for the next week from our brand new Magic Garden release.

There are 14 new dies in the Magic Garden release. And for a limited time the individual dies are on sale at 25% off.  If you love fairies, fairy gardens, gnomes and flowers, you will love these dies.
We want to give you some creative ideas for using the dies. Today we have a framed wall art and a card. So let's get started with the samples for today. 


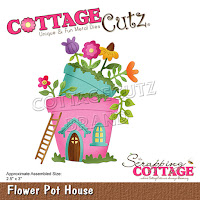
Sample 1:  Our first project today is from Anja Zurga. She used the Flower Pot House and Fairy Garden Flower dies to create another beautiful framed art piece, Check out another of her projects here. She used a stencil for her "welcome" phrase. This would be perfect as wall décor in your family room or guest bedroom. How about as a gift for a new homeowner and don't forget Christmas gifts.  So many possibilities. 


Sample 2: The next and last sample for today is one that I  (Mary Marsh)created, also using the Flower Pot House die.  When I saw this die it made me think of my hubby. He is an avid gardener and has flower beds all over our yard. Friends call our house the "flower house".  I love to cut them and give bouquets to our friends. So getting a Thanksgiving card from us that depicts a flower pot house would not be out of the ordinary (LOL)! I used only sunflowers since that represents the fall season. I also used fall colors for the card.


Well, that's our samples for today. I hope we have given you some ideas for this new die. We still have 2 more days of group samples so stop by again tomorrow. You can also check us out on FaceBook and Instagram .

dies used to create projects:
http://www.scrappingcottage.com/cottagecutzfairygardenflowers.aspx

http://www.scrappingcottage.com/cottagecutzflowerpothouse.aspx


Friday, March 02, 2012

Flower Pot House Card with Pocket/& Video

Hello everyone today I'm sharing my card made using CottageCutz flower Pot House & Love Tags. I also have a Video showing how I made this Pocket using the CottageCutz dies.
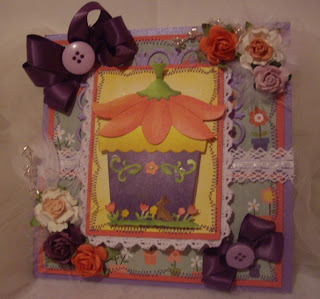
Ok I just LOVE this CottageCutz Flower Pot House, its super SWEET and when I saw this, I knew what I wanted to do with it from the get go. There are other options as well. You can just cut one, and use scor-tape on the sides and bottom to create a pocket, or cut it out like i did and tape just the sides for a pocket. Perfect for scrapbooking and Mini albums.

I thought having this CottageCutz flower pot house pocket/fold down area would be perfect for writing, or sentiments, and you have the tag to write or stamp on as well!!

My card has a couple of different fold down and up area's I think they are fun to make, and will have some different folds coming soon too! Love doing different types of cards, and havent really focused on this since my accident, but now I will be doing more :) woohooo!!!! hehehehe

Dp is from My Little Shoebox, and I just love this stuff, its DARLING!!!
There is also room for writing under the flap where the flower pot is on. the picture below shows that area.

As you can see the CottageCutz Flower Pot House below there are options on what you can add to the House, or leave off. I Left off the door andwindow and focused on the flowers and grass and bunny. Super CUTE!!!!


CottageCutz Used:
Also my video shows how I colored with copics and Dusted the flower pot, and all colors are given in my tutorial. Hope you enjoy :)


Hugs to all,
Cheryl