Monday, August 15, 2022

Baseball Jersey with Pop Up

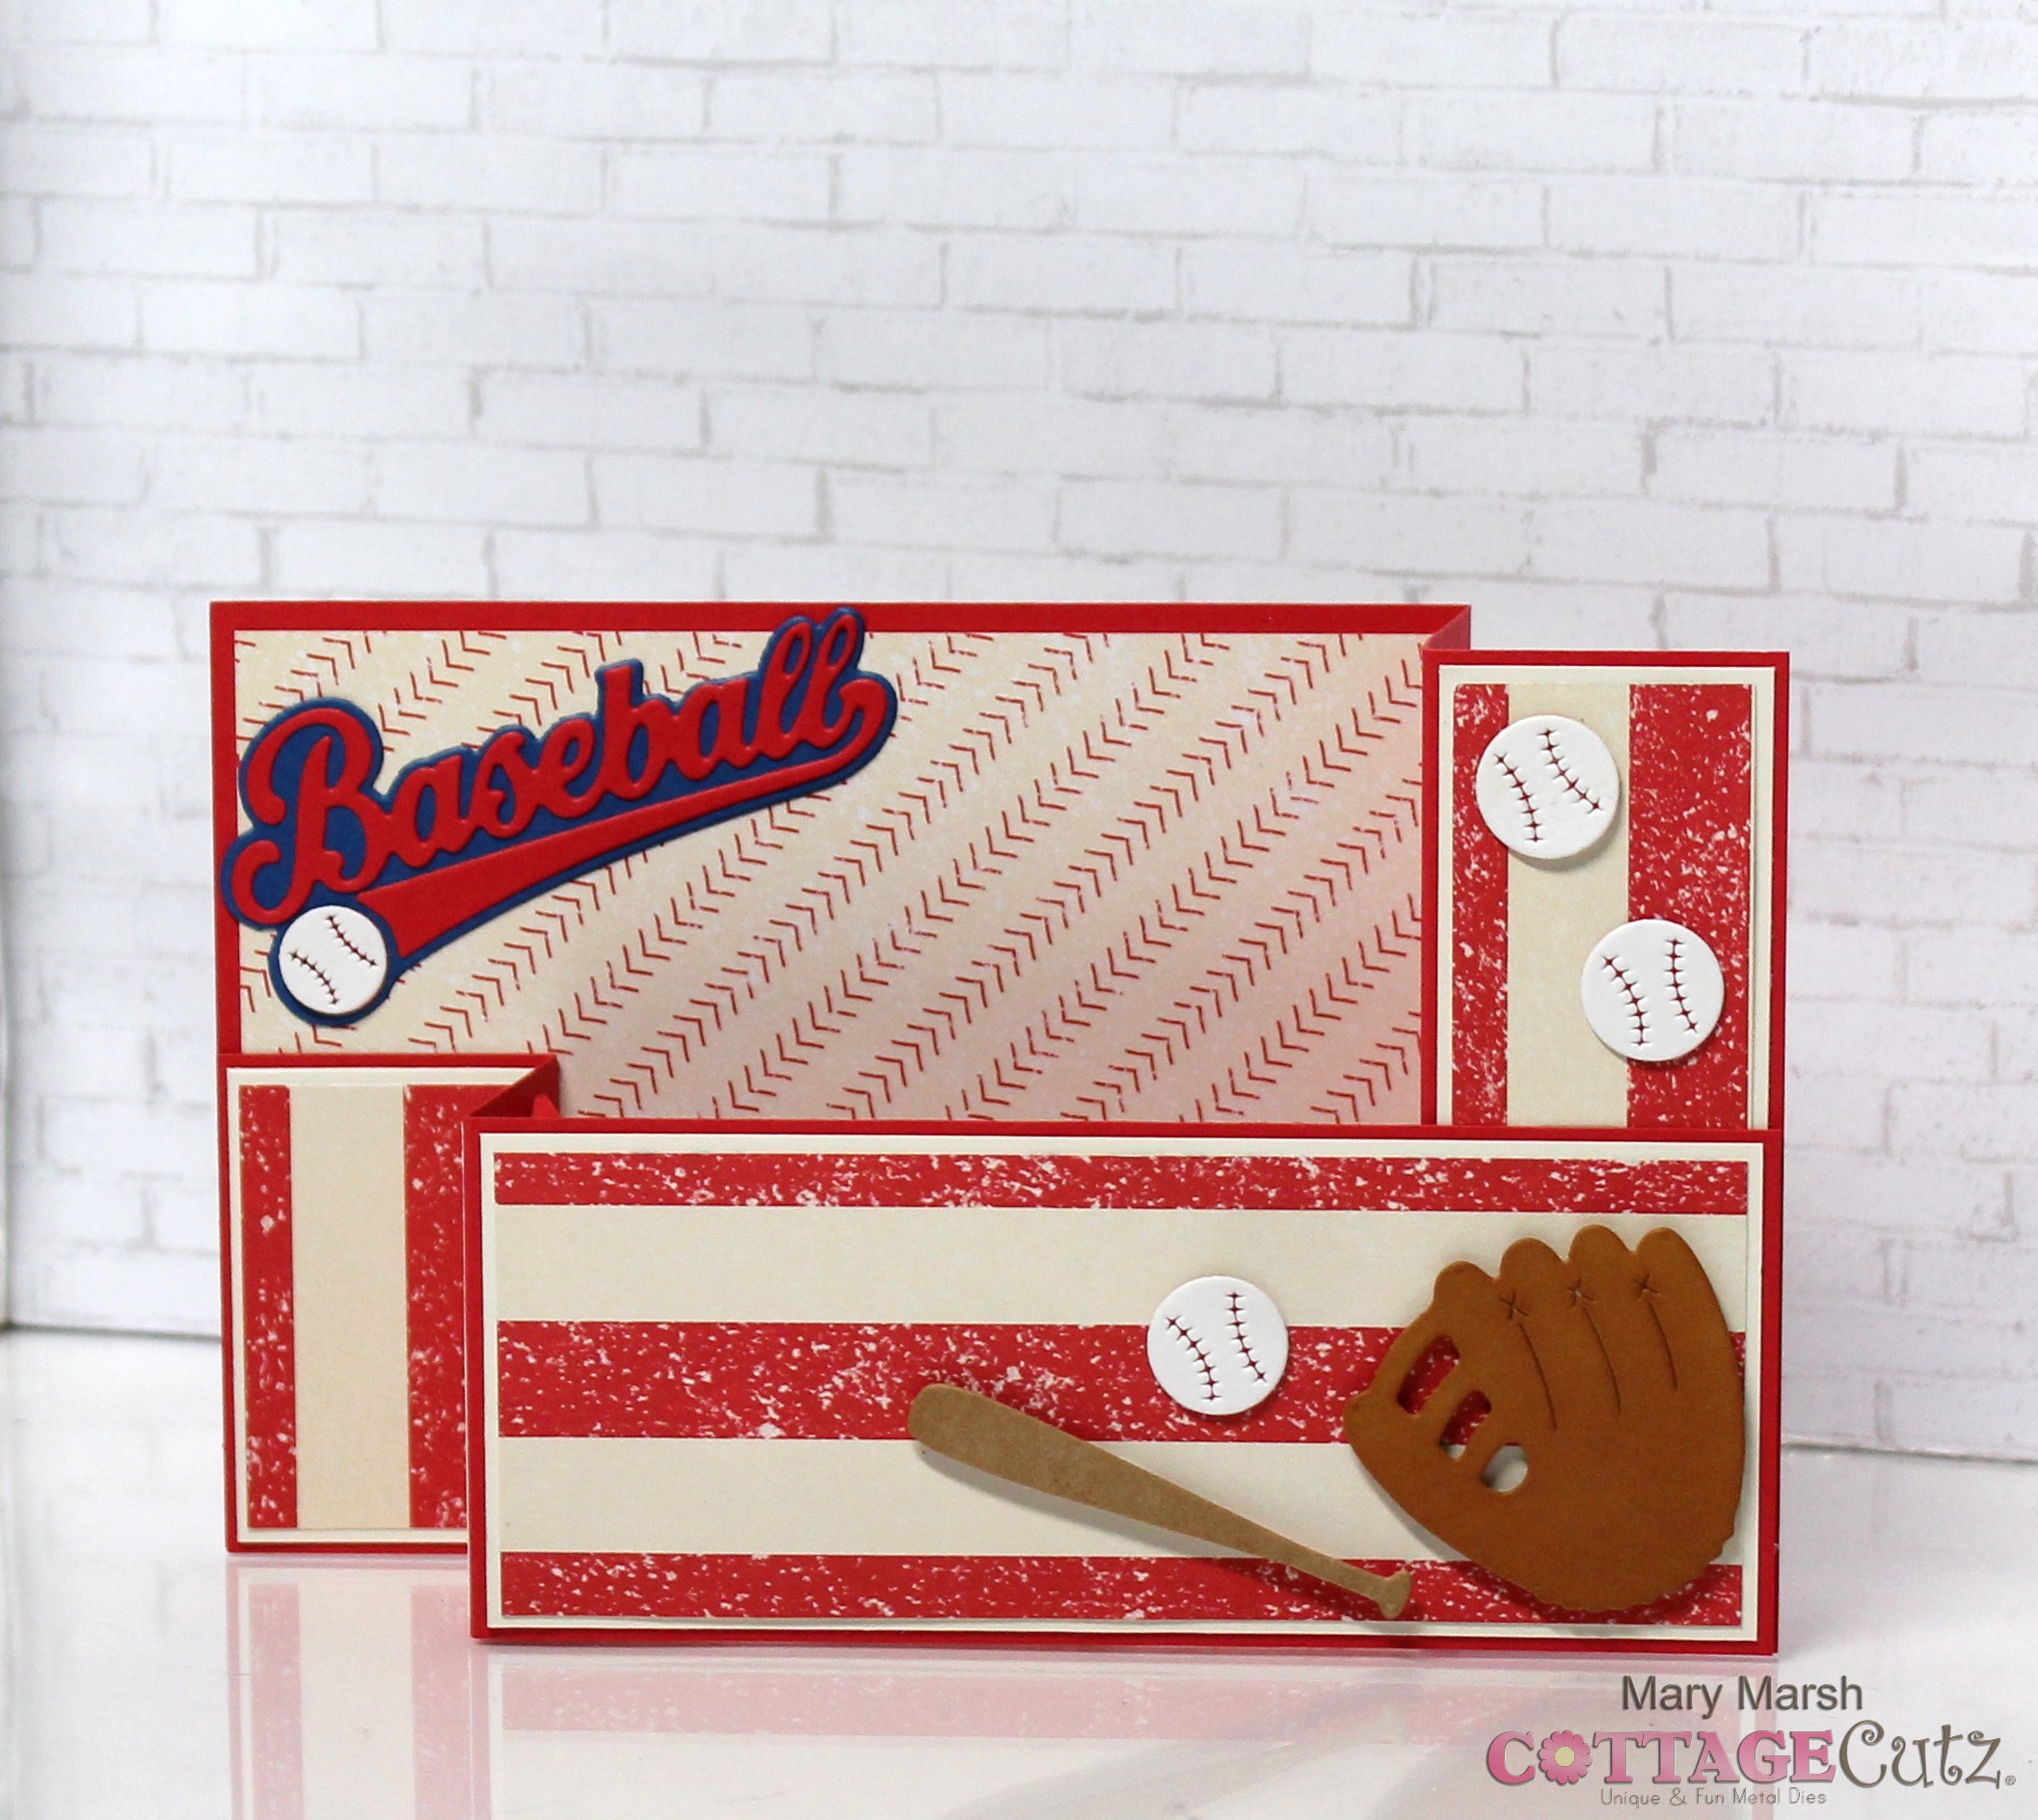
Happy Monday ~ Guest Designer Kris here with a Baseball card, featuring a POP UP inside!  The new  BASEBALL & GOLF RELEASE  is so perfect for those masculine cards, and the individual dies from this release are 30% off! 

I wanted to make the front look like a baseball jersey, then when you open the card ~ SURPRISE!  A pop up feature completes the sentiment


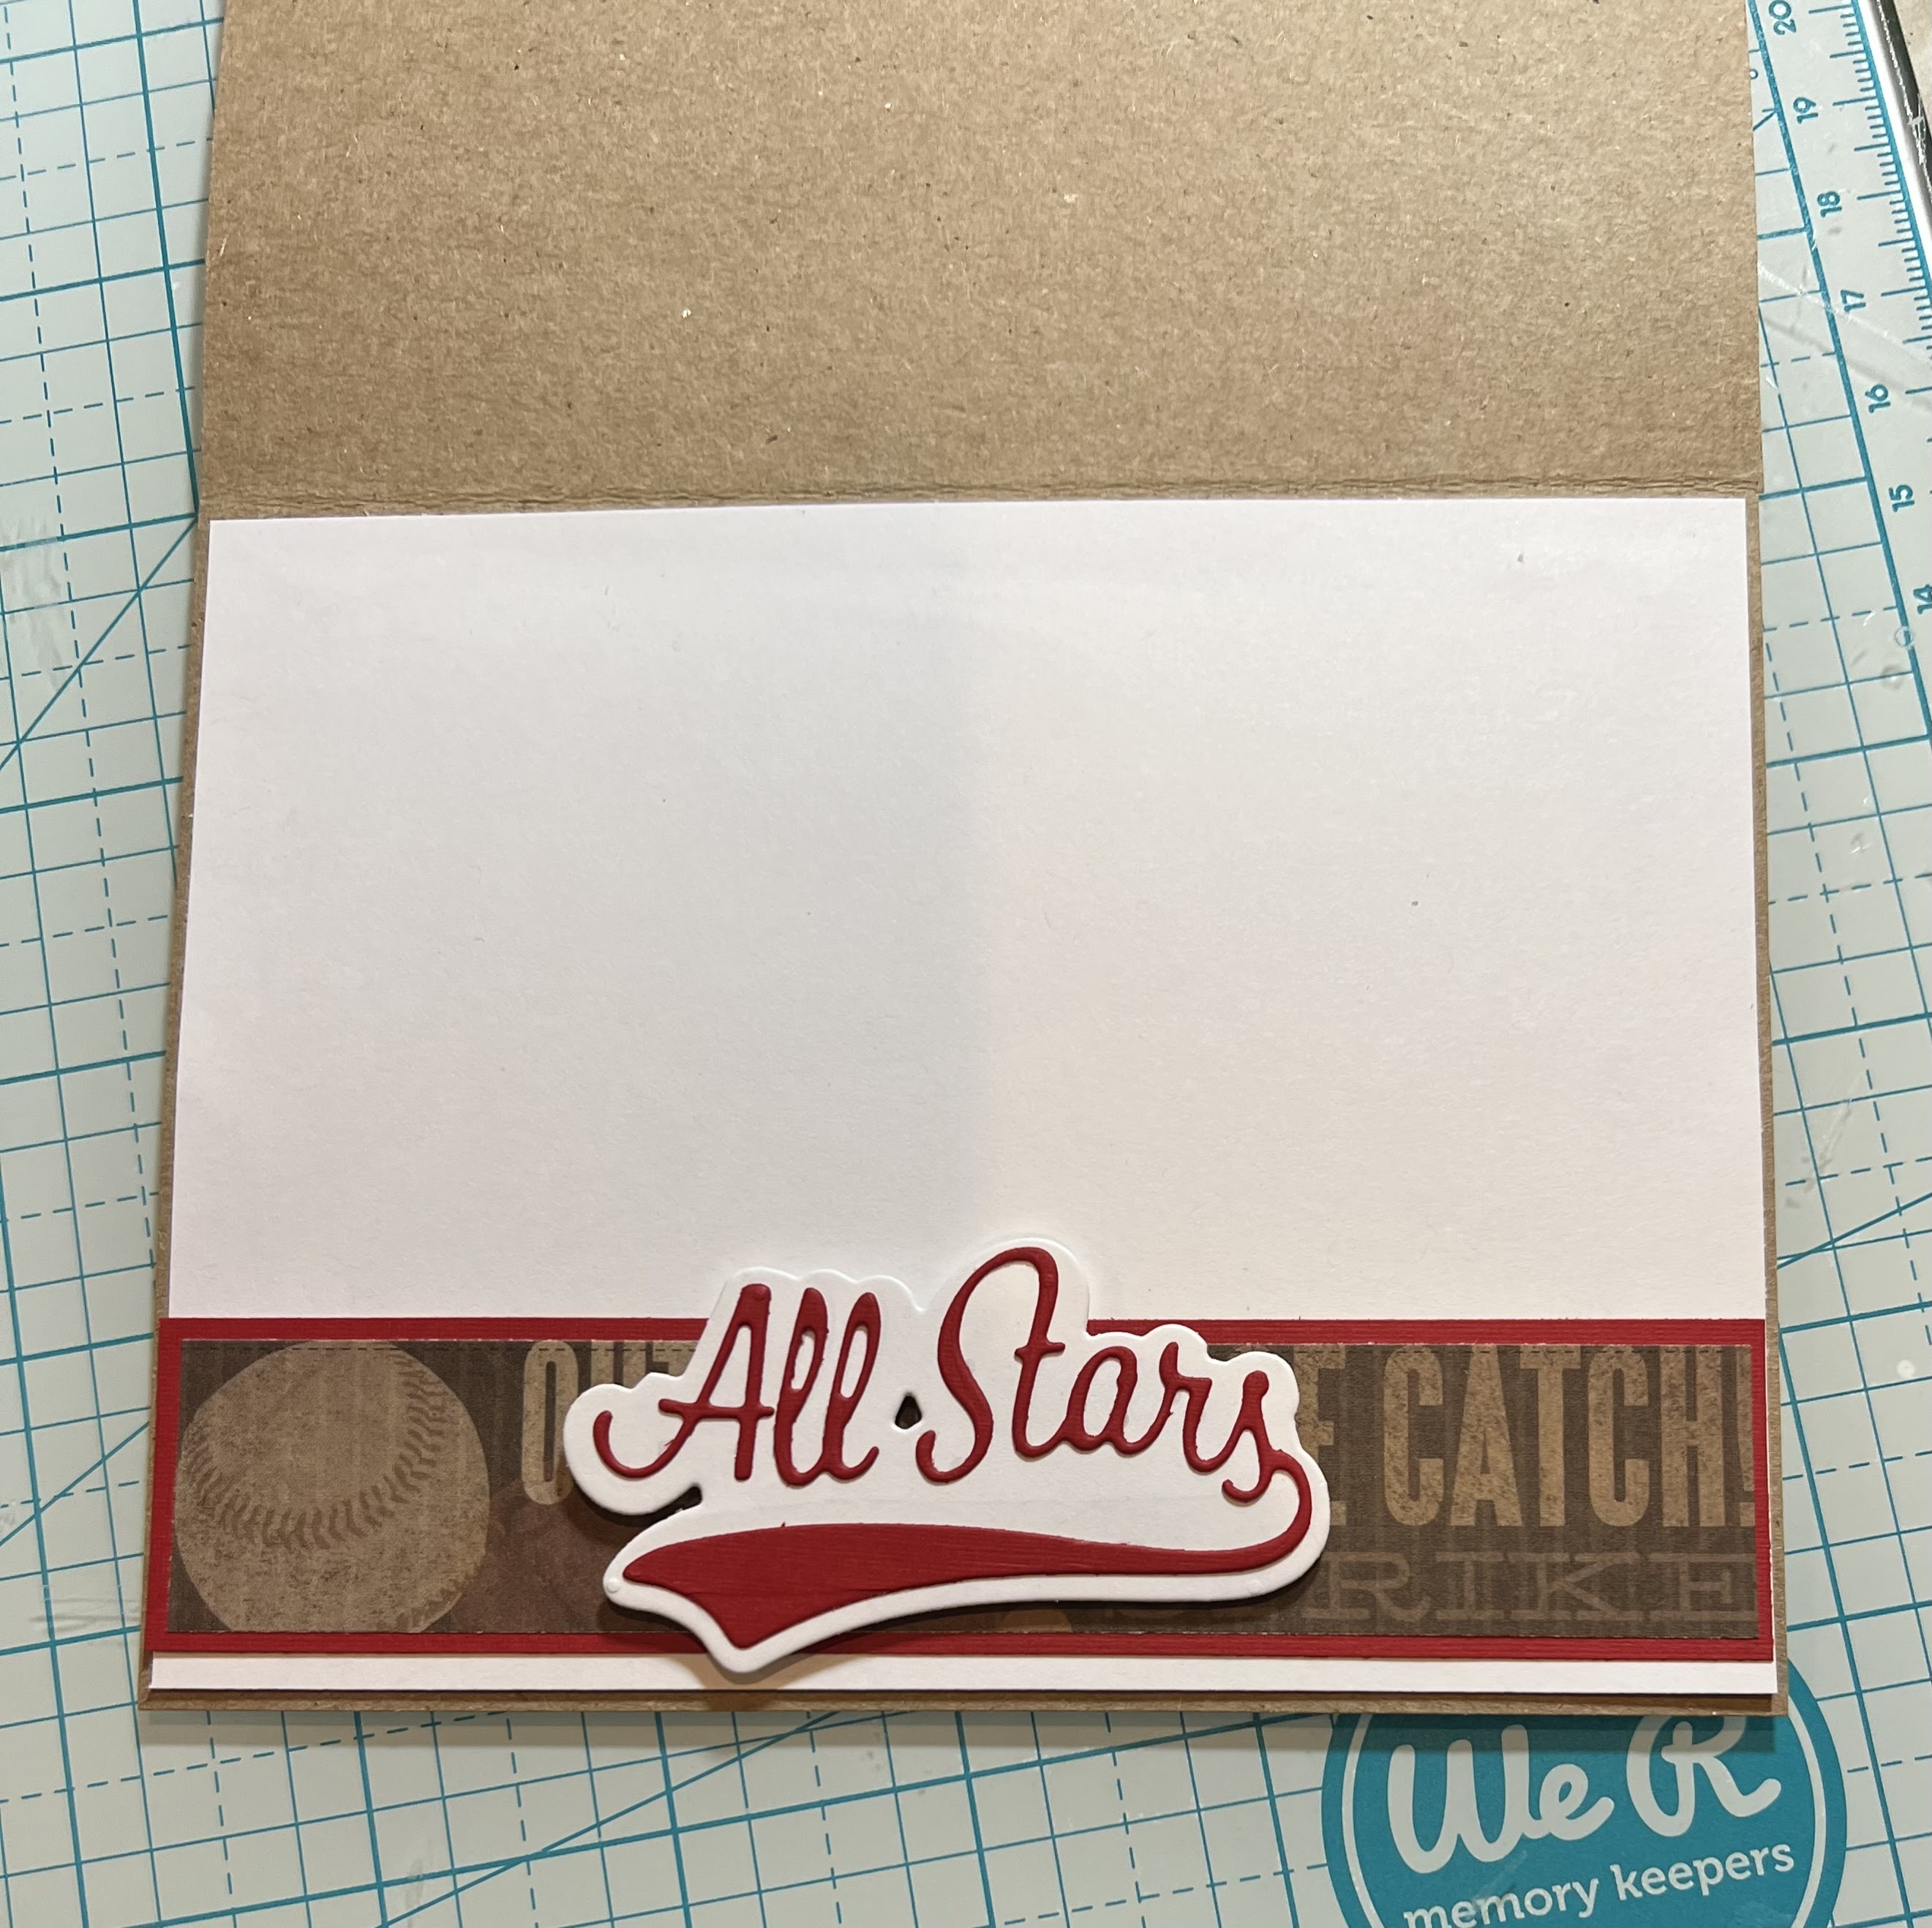
...and here's the inside:


HOW I MADE IT:

1.  I cut a piece of thick white cardstock at 4-1/4" x 11" - then scored at 5-1/2" for an A2 card base.

2.  I cut a royal blue cardstock at 5-3/8" x 4" 

3.  I cut a blue/white/grey pinstriped card (from an old Paper Pumpkin kit) at 5-1/4" x 3-3/4"

4. I then measured to find the center of that pinstriped card and placed a mark along the top.  I then placed the corner of the largest die from the Nested Rectangles Slimline dies (but you could easily use the squares, rounded rectangles etc.)  onto the top of the card as shown below.  I counted the stripes so I had equal stripes on each side of the die to cut a "V".  


5.  On my blue cardstock, I measured in 2" and placed a pencil mark along the top.  Then I placed it behind the pinstriped layer to get an idea of what size circle die to use.  

6.  I cut a half circle using the 3rd smallest (from smallest to largest) Pierced Circles Set to cut an almost half circle from the top of the blue cardstock, using that pencil mark as a center guide.


7.  I later decided I didn't like how large the shirt opening was, so I used the 2nd smallest circle die to cut an even amount from the blue piece that was cut out from the 1st cut.  Then I inserted that smaller piece so it nested just above the rounded blue cardstock and Voila!!  It totally looks like a t-shirt hem with those pierced marks from the die!  ♥ it!!  


8. I attached the blue rectangle layer to the very top edge of my card base (centered) and glued in the shirt hem.  Then attached the pinstripe layer on top, aligning at the very top edge of card as well.

9.  Next, I cut a strip of my pinstriped card (with stripes going horizontal this time) AND a strip of the solid blue cardstock to 1/4" x 4".  I then layered them so the blue is offset to the left a bit and attached them to the center of my card.

10.  I die cut 5 (can do just 4) "buttons" which are parts of the wheels of the Ice Cream Truck die and glued them to the placket.


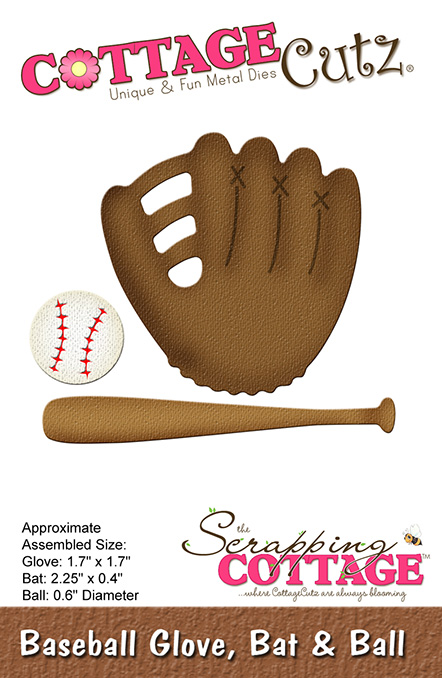
11.  Next, I die cut my pieces for the front & inside using the Baseball, Baseball Glove, Bat & Ball, and Baseball Phrases and attached the following to the front of my card...


12.  For the inside mechanism, I cut a piece of white cardstock that was 3/4" x 4" and scored at 1", 2", and 3" - fold and burnish.  

13.  I folded the 2 ends in so they meet in the middle.  Added glued to the 2 end sections and attached to inside of card so that the spot where the ends meet in the middle goes right over the score line of card base.  


14.  And last but not least, I added glue JUST to the section of the mechanism closest to the base of card and attached my die cut elements!  ☺


I hope you enjoyed my card today!
 HAPPY CRAFTING!

~Kristine 

PRODUCTS I USED:


Saturday, August 13, 2022

Baseball Wiper Card

Hello CottageCutz friends! Thanks for taking the time to stop and visit with us today. It's Mary Marsh here bringing you the Saturday edition of the Blog.

It's new release time!!! We have new dies in the online store. It's our Baseball and Golf release with 16 new designs and currently on a 30% off sale. These new dies are so perfect for a masculine themed card. 
Or for the kiddos (boys and girls) who are baseball or softball players.  Don't forget about the golfers either. If you are a scrapbooker and are putting together the summer season of your child's baseball season, we have you covered. 

My card today is featuring the new Baseball Glove, Bat & Ball die, Baseball Phrases die and the Baseball Phrase w/Shadow die.  I created a fun fold wiper card for my friend's little boy (9 years old) who loves baseball. His birthday is September 4 and when I saw these new dies, I thought of him immediately. He loves baseball and was the MVP for many games this season. So, let's get started with some details of how I created my card.

Design Steps:

I saw this wiper fold technique demonstrated on YouTube so if you like visuals, here is a link
I started my card by cutting all the cardstock and designer paper needed for this fun fold technique.

Red cardstock base:  4 1/4" x 8 1/2", score at 5 1/2" & 7”
Red Z-Fold:  2 1/4" x 8 1/2", score at 1 1/2" & 3”
Baseball themed Designer Paper:  4” x 5 1/4 - attached with double sided tape. 
Far Right Panel vanilla cardstock: 1 3/8” x 4 1/8” 
Striped designer paper: 1 1/4" x 4 -attached with double sided tape.  
Z-Fold Panel vanilla cardstock: 2 1/8” x 5 3/8”
Striped designer paper: 2” x 5 1/4" - attached with double sided tape. 
Now I am going to attach the z-fold panel to the card base. I only want adhesive on 1 1/4" of the long panel. I used a pencil to tick mark the 1 1/4" point and added double sided tape.  
Lined up with right side of panel and secure to card base. 
Now I am ready to cut my baseball images. I used a toffee shade of cardstock for glove and sponged with dye and rusty hinge distress inks to get more of a deeper shade. For the bat I used a kraft card cardstock and sponged lightly with antique linen distress ink for a deeper wood shade. 
Attached the images to the card base with dimensional adhesive and glue dots. 
Next, I cut the MVP and Baseball phrases word from red, white and blue cardstock. 
For the wiper mechanism I cut a piece of 1" x 2" red cardstock. Folded the right corner upwards. This is what allows the MVP phrase to move up and down. 
When attached it should be just inside the score line and make sure it doesn't extend beyond the front panel.  I used a glue dot to secure in place.  
You also need a piece of acetate (1/2" x 2") to anchor the MVP phrase. I also secured this with a glue dot. 
Now to close the z-fold bridge I used double side tape on the left panel only. You line it up with the bottom of the card base just like on the other side. I added the baseball phrase with liquid glue and a couple more baseballs to finish off my card. 
Here is photo of wiper card when it pops up. 

Here is a short video showing the card wiper card open. 
Well, that's my sample for today. I hope I have given you an idea for a baseball themed card. See you next Saturday!

dies I used to create card:


Friday, August 12, 2022

Gnome for Christmas


Hi everyone! My name is Linh and I'm honored and excited to be here as a guest designer. I have a new video up on the CottageCutz YouTube Channel. I've combined several dies from the Strawberry & Bees Collection along with Snowy Gnome Home to create this filmstrip slimline card.

Watch this video to see how I created this card.


Thursday, August 11, 2022

New Release - Play Ball!

 Hello Scrapping Cottage Friends,

We have a NEW RELEASE which is perfect for all those sports fans in the family! It is called Baseball & Golf! It has 16 fantastic dies which will make your card making and scrapbooking pages look great! The release has special pricing right now so go and check it out HERE!

I live in Arizona home of the Diamond Backs!  We have tons of baseball.  We host a number of times for spring training so the state has a lot of opportunities to see some fantastic games.

The easel card for today is using 3 of the new dies. They are All Stars with a ShadowBaseball, and Baseball Batter Silhouettes.


Design Steps:

1.  Use the Baseball die, the Baseball Batter Silhouettes, and the All Star with Shadow and cut out of black, white, and red.  
2.  Cut the following: Kraft 5 1/2 x 4 1/4, red card stock 5 3/8 x 4 1/8, Baseball DP 4 x 5 1/4,  a strip of red 1 x 4 1/8 and a piece of corrugated Kraft 7/8 x 4
3.  Glue the red to the kraft base, glue the Baseball DP to the red and next glue the red strip just slightly below center and then add the corrugated kraft strip to the red strip
3.  Put pop dots on the upper and lower part of the baseball and adhere to the card as shown.  Then put pop dots on the player and ball and add him just on top of the baseball

4.  Put glue on the lower half of the front flap and attach the front panel with the baseball

5.  For the inside Cut a piece of white card stock 4 x 5 1/4, red 5 1/4 x 1, and Baseball DP 5 x 3/4 and Assemble the All Star with Shadow
6.  Glue the white card stock to the inside, glue the red strip 1/8 of an inch from the bottom, glue down the Baseball DP to the red strip and then pop up the All Star (This will become the stopper for the easel pop up as seen below.  I added a couple of tickets that I stamped and cut out for additional interest.  The card is complete

CottageCutz Products


Here is the new release so please check it out in our store today!!


We have more inspiration on our YouTube Channel check it out HERE
Thanks so much for stopping by!  And I will see you next Thursday.

Blessings and Take Care