Tuesday, March 15, 2022

Hello Spring Chicken Pop Up Slider Treat Box

Happy Terrific TuesDIE Scrapping Cottage friends!
Melinda here with you for another fun Tuesday. My project features a couple of dies from the marvelous new SPRING RELEASE along with some others!  Here's what I created.


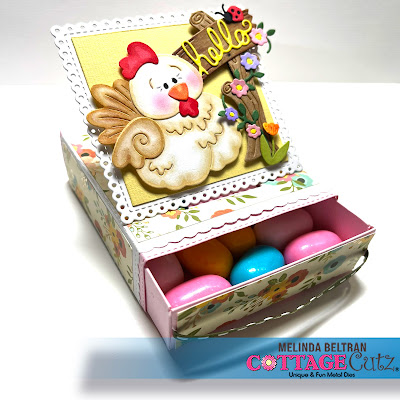
I decided to make a little Pop Up treat box! Check out this fun interactive box.
Here it is closed and standing on an angle.

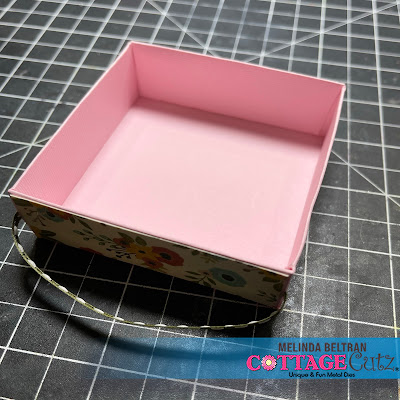
Here's a look at it with the little "drawer" slightly opened.

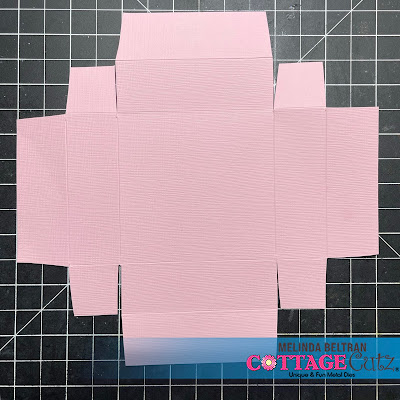
I started by creating the box base. It comes from a 7x7 piece of cardstock. I simply scored it on all four sides at 1" and 2" . I cut the squares and trimmed in the "flaps" just slightly.

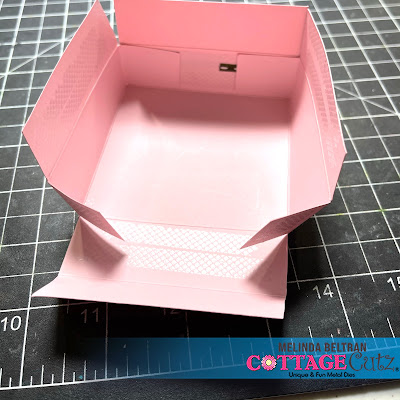
I added adhesive and began to fold the sides up.

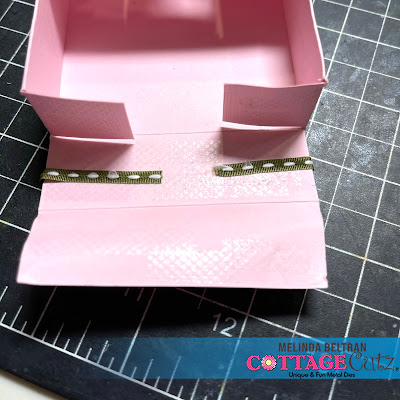
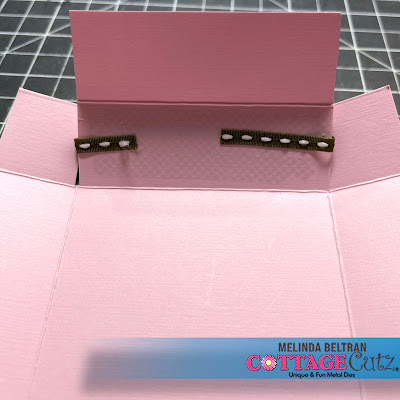
I made sure to add some ribbon around one of the two sides that has the flaps. This way the ribbon wouldn't pull out as I used it as a "pull" See photo above and below.

I turned in all four sides and that gave the interior of the box some sturdiness and gave it a finished off look.

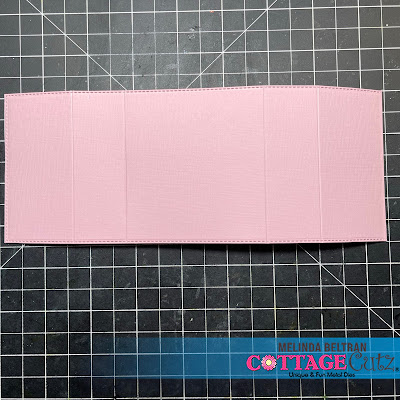
Next, I turned to making the box "top" or belly band if you will. I used the largest die from the Slimline Stitched Rectangle set. I then scored it to match the top and sides.


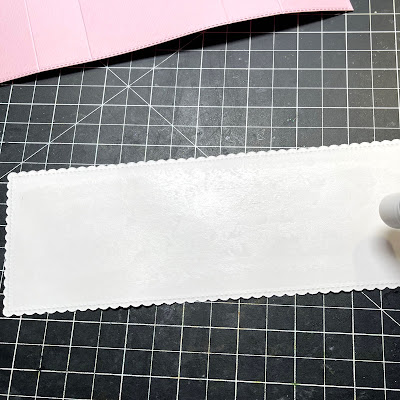
I then added glue to the back side of the largest slimline scallop stitched die. I glued this to the pink "top" we just made. See photos above and below.


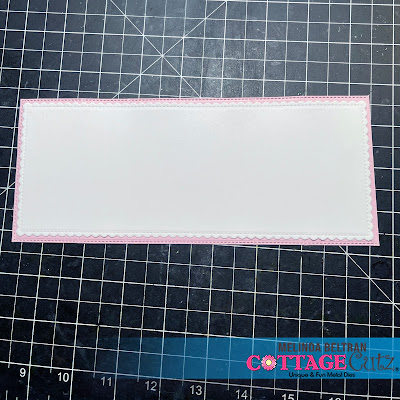
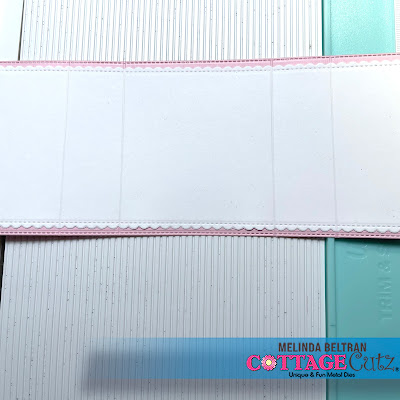
I scored the mats again once the white was adhered to the pink.


I then used the second smallest die from the double stitched rectangle set.

I ran it through my die cut machine a couple of times and it cut out fine. 


Next, I burnished the score lines and then ran a bead of glue along one of the seams and adhered the two ends together. 


I cut a strip of pink paper 1x4". Scored it and that is the base for the easel part.
Once I attached it to the under side 

Here's what it looks like with nothing in the box and once it was adhered to the inner top of the top and the center of the inside of the box. Here are some additional photos at varying stages of it opening.


Here is a pic of it closed.


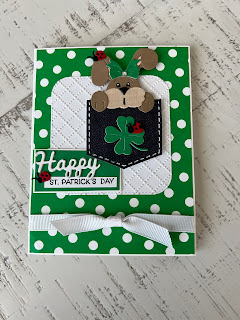
I proceeded to decorate one of the square scallop eyelet stitched dies with the cute Spring Chicken Die. I added the word Hello from the Hello Spring Bunny Cottage Die.

Here is another photo of the sweet little box open. Inside is a bunch of sweet "chewy" little (bubblegum) eggs.


The Dies I used to create this project:


In case you didn't hear, The CottageCutz YouTube channel is up and running.  Head over and check out the latest video! There is a giveaway for subscribing too!

Well that about covers it for today! Until the next time, have a wonderfully crafty day!
Melinda Beltran

Monday, March 14, 2022

Safari


Hi everyone. Welcome today I am sharing a fun idea actually from my friends son.  He was having some friends over and wanted me to make something to cheer his friends up.  So i showed him some of my dies and he picked the Safari Peekers.  

The look is simple because he didn’t want it to look to girly as he said.  So I made sure to make it very badic and added a nice clean sentiment of Happy.

He actually helped piece everything together and we made enough for 5 of his friends.  Goes to show how something so simple can go  a long way. 


Saturday, March 12, 2022

Spring Bunny and Carrot

Hello CottageCutz friends! Thanks for taking the time to stop and visit with us today. It's Mary Marsh here bringing you the Saturday edition of the Blog.

IT'S NEW RELEASE TIME! The Spring Release with 20 new designs is in the online store.  There is a nice combination of both religious and whimsical designs. So perfect for all card makers out there.

And the dies don't have to be used strictly for Spring or Easter. The team has done Valentine, Birthday and Thinking of You cards with these new dies. Take a look back on the Blog for lots of ideas.

Today for your viewing pleasure, I have a whimsical card for Easter. I used the new Spring Bunny w/Giant Carrot die. I have a 5 year old great niece that would love this card. So, it will find it's way to her mailbox. 

Let's get started on some details of how I created my card. 

Design Steps: 

I thought this cute little bunny would look great on an Easel card. I created a vertical Easel card. For those of you that like videos here is a link to one on Splitcoaststampers

Start out with a 4 1/4" x 11" piece of cardstock and score at 5 1/2" and 8 1/4". Your card front piece will measure 4 1/4" x 5 1/2. I used white cardstock for my base color.
I wanted some designer paper as a base for the bunny image. I found this piece of blue designer paper that has a marble effect and a piece of matching blue cardstock for my card front. 

designer paper layer: 4 1/8" x 5 3/8"
blue cardstock layer: 4 1/4" x 5 1/2"

I attached this panel to the bottom flap of the card base using double sided tape. You just secure the bottom panel only. 

Next, I cut my bunny image with various colored cardstock. 
I stamped my bunny sentiment on white cardstock and then mounted it on the blue that coordinates with the upper part of the card. I am also using this as my ledge for the easel to rest on. I added an additional piece of blue cardstock to make it a bit more secure. 

I attached the bunny image to the designer paper panel with dimensional adhesive. The sentiment panel is attached 1 1/2" from the card bottom with double sided tape. 
I decided to add the Easter phrase to the top of the card. I cut it 2x in magenta cardstock and secured to panel with Art Glitter glue.  Added a few magenta enamel dots to finish off my card. This card does fold flat so it will fit in a standard A2 envelope. 
That's it for me for this week. I hope I have given you an idea for a way to use this super cute die. See you next Saturday!
Reminder: Our YouTube channel is active again. Check out the latest video from Marla for card inspirations. Click here. There is a giveaway and for a chance to win you just have to subscribe, like and comment on the video. 

Dies I used to create card:


Thursday, March 10, 2022

St. Patrick's Day Peeker

 Hello Friends,

I have one more St. Patrick's Day card to share with you today!  I am using two dies the Peeker Bunny w/Pocket and the St. Patrick's Day Phrase and More.  

The Spring Release has so many adorable dies so don't forget to check it out!


Design Steps:

1.  Use the Peeker Bunny w/Pocket and cut out the pieces in brown, tan, green, black, pink, red and Denim DP.  For the clover use the St. Patrick's Day Phrases die and green card stock.  Assemble the pieces and enhance the stitching with a white gel pen.  I used a black and white gel pen for the eyes and a black gel pen for the mouth
2.  Use an A2 white card base, cut a green dotted DP 4 1/8 x 5 3/8.  Use the Stitched Rounded Square die second from the largest cut on white and run through an embossing folder
3.  Before you attach the green dotted DP to the front of the card add a square knotted ribbon
4.  Glue down the rounded embossed white square to the center of the card just above the ribbon
5.  Use the Happy Expressions die and cut out 3 of the happy pieces.  Glue the pieces together and then glue flat to a piece of green card stock 2 1/8 x 1 1/8.  Stamp the St. Patrick's Day in black and glue it as shown above.  Mount the green rectangle onto a pieces of white 2 1/4 x 1/4
6.  Pop the bunny onto the front of the card.  Glue the sentiment to the left of the bunny as shown below. (I decided to move the bunny up just a little) I made 2 more of the ladybugs and glued one to the ear and one to the sentiment as shown below.  Add a rhinestone to the bow and some glossy accents to the nose and your card is complete

CottageCutz Products


We have more inspiration on our YouTube Channel check it out HERE
Thanks so much for stopping by!  And I will see you next Thursday.

Blessings and Take Care


Wednesday, March 09, 2022

Beautiful Faith-Based Easter Card


Hi there, Marla here with another CottageCutz YouTube video over on the CottageCutz Channel.  Today, I am sharing a faith-based Easter using the "Easter Cross with Flowers Die" from the Spring Release.  

You can find all of my Easter card details in my video and also enter for a chance to win this die.  

If you entered the giveaway from the "Spring Sentiments" giveaway head over to see if you are the winner.