Saturday, March 12, 2022

Spring Bunny and Carrot

Hello CottageCutz friends! Thanks for taking the time to stop and visit with us today. It's Mary Marsh here bringing you the Saturday edition of the Blog.

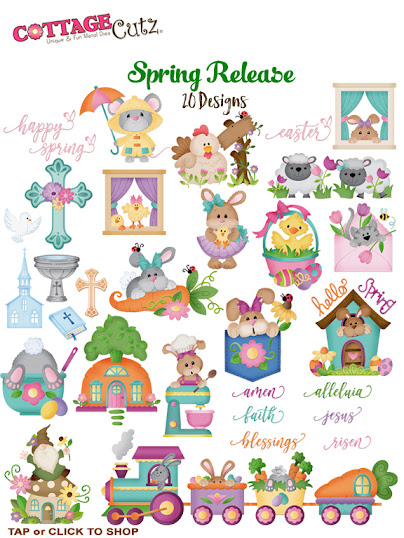
IT'S NEW RELEASE TIME! The Spring Release with 20 new designs is in the online store.  There is a nice combination of both religious and whimsical designs. So perfect for all card makers out there.

And the dies don't have to be used strictly for Spring or Easter. The team has done Valentine, Birthday and Thinking of You cards with these new dies. Take a look back on the Blog for lots of ideas.

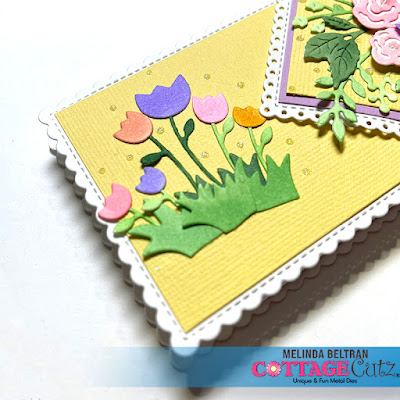
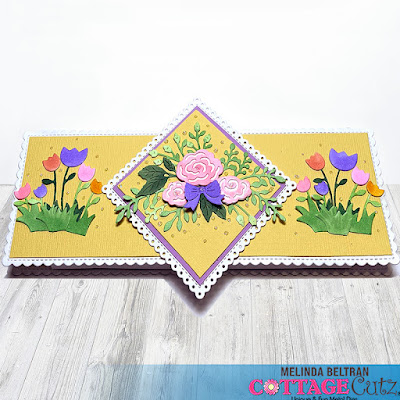
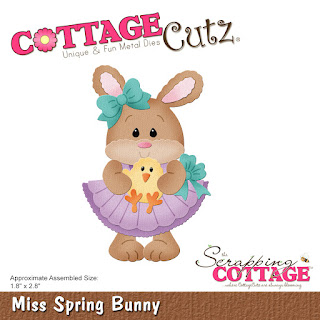
Today for your viewing pleasure, I have a whimsical card for Easter. I used the new Spring Bunny w/Giant Carrot die. I have a 5 year old great niece that would love this card. So, it will find it's way to her mailbox. 

Let's get started on some details of how I created my card. 

Design Steps: 

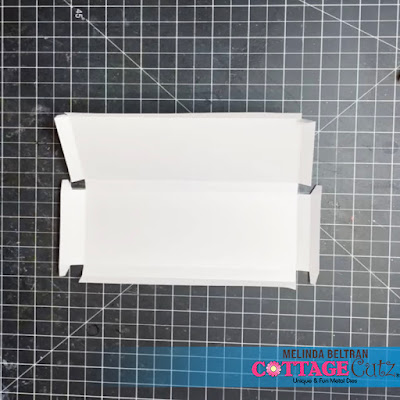
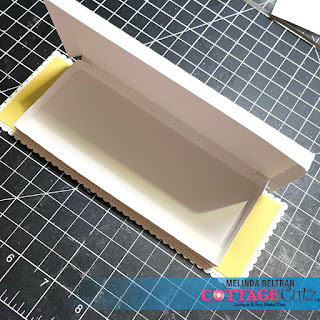
I thought this cute little bunny would look great on an Easel card. I created a vertical Easel card. For those of you that like videos here is a link to one on Splitcoaststampers

Start out with a 4 1/4" x 11" piece of cardstock and score at 5 1/2" and 8 1/4". Your card front piece will measure 4 1/4" x 5 1/2. I used white cardstock for my base color.
I wanted some designer paper as a base for the bunny image. I found this piece of blue designer paper that has a marble effect and a piece of matching blue cardstock for my card front. 

designer paper layer: 4 1/8" x 5 3/8"
blue cardstock layer: 4 1/4" x 5 1/2"

I attached this panel to the bottom flap of the card base using double sided tape. You just secure the bottom panel only. 

Next, I cut my bunny image with various colored cardstock. 
I stamped my bunny sentiment on white cardstock and then mounted it on the blue that coordinates with the upper part of the card. I am also using this as my ledge for the easel to rest on. I added an additional piece of blue cardstock to make it a bit more secure. 

I attached the bunny image to the designer paper panel with dimensional adhesive. The sentiment panel is attached 1 1/2" from the card bottom with double sided tape. 
I decided to add the Easter phrase to the top of the card. I cut it 2x in magenta cardstock and secured to panel with Art Glitter glue.  Added a few magenta enamel dots to finish off my card. This card does fold flat so it will fit in a standard A2 envelope. 
That's it for me for this week. I hope I have given you an idea for a way to use this super cute die. See you next Saturday!
Reminder: Our YouTube channel is active again. Check out the latest video from Marla for card inspirations. Click here. There is a giveaway and for a chance to win you just have to subscribe, like and comment on the video. 

Dies I used to create card:


Thursday, March 10, 2022

St. Patrick's Day Peeker

 Hello Friends,

I have one more St. Patrick's Day card to share with you today!  I am using two dies the Peeker Bunny w/Pocket and the St. Patrick's Day Phrase and More.  

The Spring Release has so many adorable dies so don't forget to check it out!


Design Steps:

1.  Use the Peeker Bunny w/Pocket and cut out the pieces in brown, tan, green, black, pink, red and Denim DP.  For the clover use the St. Patrick's Day Phrases die and green card stock.  Assemble the pieces and enhance the stitching with a white gel pen.  I used a black and white gel pen for the eyes and a black gel pen for the mouth
2.  Use an A2 white card base, cut a green dotted DP 4 1/8 x 5 3/8.  Use the Stitched Rounded Square die second from the largest cut on white and run through an embossing folder
3.  Before you attach the green dotted DP to the front of the card add a square knotted ribbon
4.  Glue down the rounded embossed white square to the center of the card just above the ribbon
5.  Use the Happy Expressions die and cut out 3 of the happy pieces.  Glue the pieces together and then glue flat to a piece of green card stock 2 1/8 x 1 1/8.  Stamp the St. Patrick's Day in black and glue it as shown above.  Mount the green rectangle onto a pieces of white 2 1/4 x 1/4
6.  Pop the bunny onto the front of the card.  Glue the sentiment to the left of the bunny as shown below. (I decided to move the bunny up just a little) I made 2 more of the ladybugs and glued one to the ear and one to the sentiment as shown below.  Add a rhinestone to the bow and some glossy accents to the nose and your card is complete

CottageCutz Products


We have more inspiration on our YouTube Channel check it out HERE
Thanks so much for stopping by!  And I will see you next Thursday.

Blessings and Take Care


Wednesday, March 09, 2022

Beautiful Faith-Based Easter Card


Hi there, Marla here with another CottageCutz YouTube video over on the CottageCutz Channel.  Today, I am sharing a faith-based Easter using the "Easter Cross with Flowers Die" from the Spring Release.  

You can find all of my Easter card details in my video and also enter for a chance to win this die.  

If you entered the giveaway from the "Spring Sentiments" giveaway head over to see if you are the winner.  


Tuesday, March 08, 2022

Candy Bar Box

Happy Terrific TuesDIE Scrapping Cottage friends!
Melinda here with you for another fun Tuesday. My project features a couple of dies from the new SPRING RELEASE along with some others!  Here's what I created.

I decided to make a candy bar box! Yep... on top of being adorable, this little pretty holds a wonderful surprise!

I started by creating a template for the box base. I measured the size of the candy bar and worked from there. The box is approximately 6" wide and 2.5" high. The depth is just a bit under a half inch.

Once the box base was completed, I turned to my Cottage Cutz dies. I used the beautiful scallop stitched slimline die set to create the base and the cover of my box. I matted them with some yellow cardstock. Here you see I attached my box to the base scallop stitched die panel.


I then went to work coloring the pieces from both the rose die and the tulips and grass from the 


Here is a closeup of the roses and foliage from the Floral Spray die. I also used the bow from the sweet little Miss Bunny die. I mounted them onto a yellow cardstock mat. That mat along with the lavender cardstock mat was mounted onto the stitched eyelet square die. You can see I finished it off with some dots of stickles to give it all a bit of sparkle.


For the inside of the box, I kept it very simple. I added a mat of some lavender cardstock. I then mounted some yellow cardstock onto a double-stitched rectangle die from that set. For a little decorative touch, I added a couple more tulips from the spring sheep die.


Here is a closer look at some of the tulips and grass from the Spring Sheep die.


This is a closer look at the tulips on the other side. You can see I added some dots of stickles for a little extra sparkle!

Here is one last look at my creation. I think it turned out super cute and quite delish!!!!

Once I get it completely diagrammed out, I will share the template for the box. So stay tuned!


The Dies I used to create this project:
I used the Stitched Scallop version. That one is currently unavailable, but this is an excellent alternative.


In case you didn't hear, The CottageCutz YouTube channel is up and running.  Head over and check out the latest video! There is a giveaway for subscribing too!

Well that about covers it for today! Until the next time, have a wonderfully crafty day!
Melinda Beltran


Monday, March 07, 2022

Flock and Foa

Hi everyone today I am back sharing a similiar slimline using Whimsical Heart.  I just got this die and its so pretty.  So I made another but instead my hearts are 3d. 
I colored them with copics and used foam and cut the die and used some of the foam to create my 3d hearts.
I used some flock paper to make some of the critters


Thanks