Saturday, October 16, 2021

Gingerbread Teapot

Hello Scrapping Cottage friends! Thanks for taking the time to stop and visit with us today. It's Mary Marsh here bringing you the Saturday edition of the Blog.

IT'S NEW RELEASE TIME! The new Christmas dies are in the online store with 40 new designs and they are on a limited time sale at 30% off. It's not too soon to get started on your Christmas cards.

Today for your viewing pleasure I am featuring the new Gingerbread Teapot die. I created a Christmas card for my neighbor who has an exquisite holiday tea at her home every year. So let's get started with some details of how I created my card. 

Design Steps:
I started my card today with colors. I was the hostess on the Splitcoaststampers color challenge #865 this week. I chose the colors based on this Gingerbread Teapot die. I chose cinnamon cider, polished pink and coastal cabana for my color trio. Optional was anything goes and I added 2 additional colors. 
cinnamon cider, polished pink, coastal cabana

Next, I cut the teapot elements in the challenge colors. Love the way it's looking so far. 
Next, I looked for a designer paper as a background for the Teapot house. I found this one that I thought would work great. I liked the silver trees, the falling snow and the snowy ground at the bottom. 

Polished Pink card base: 4 3/8" x 6"
Designer Paper Layer: 4 1/4" x 5 7/8"

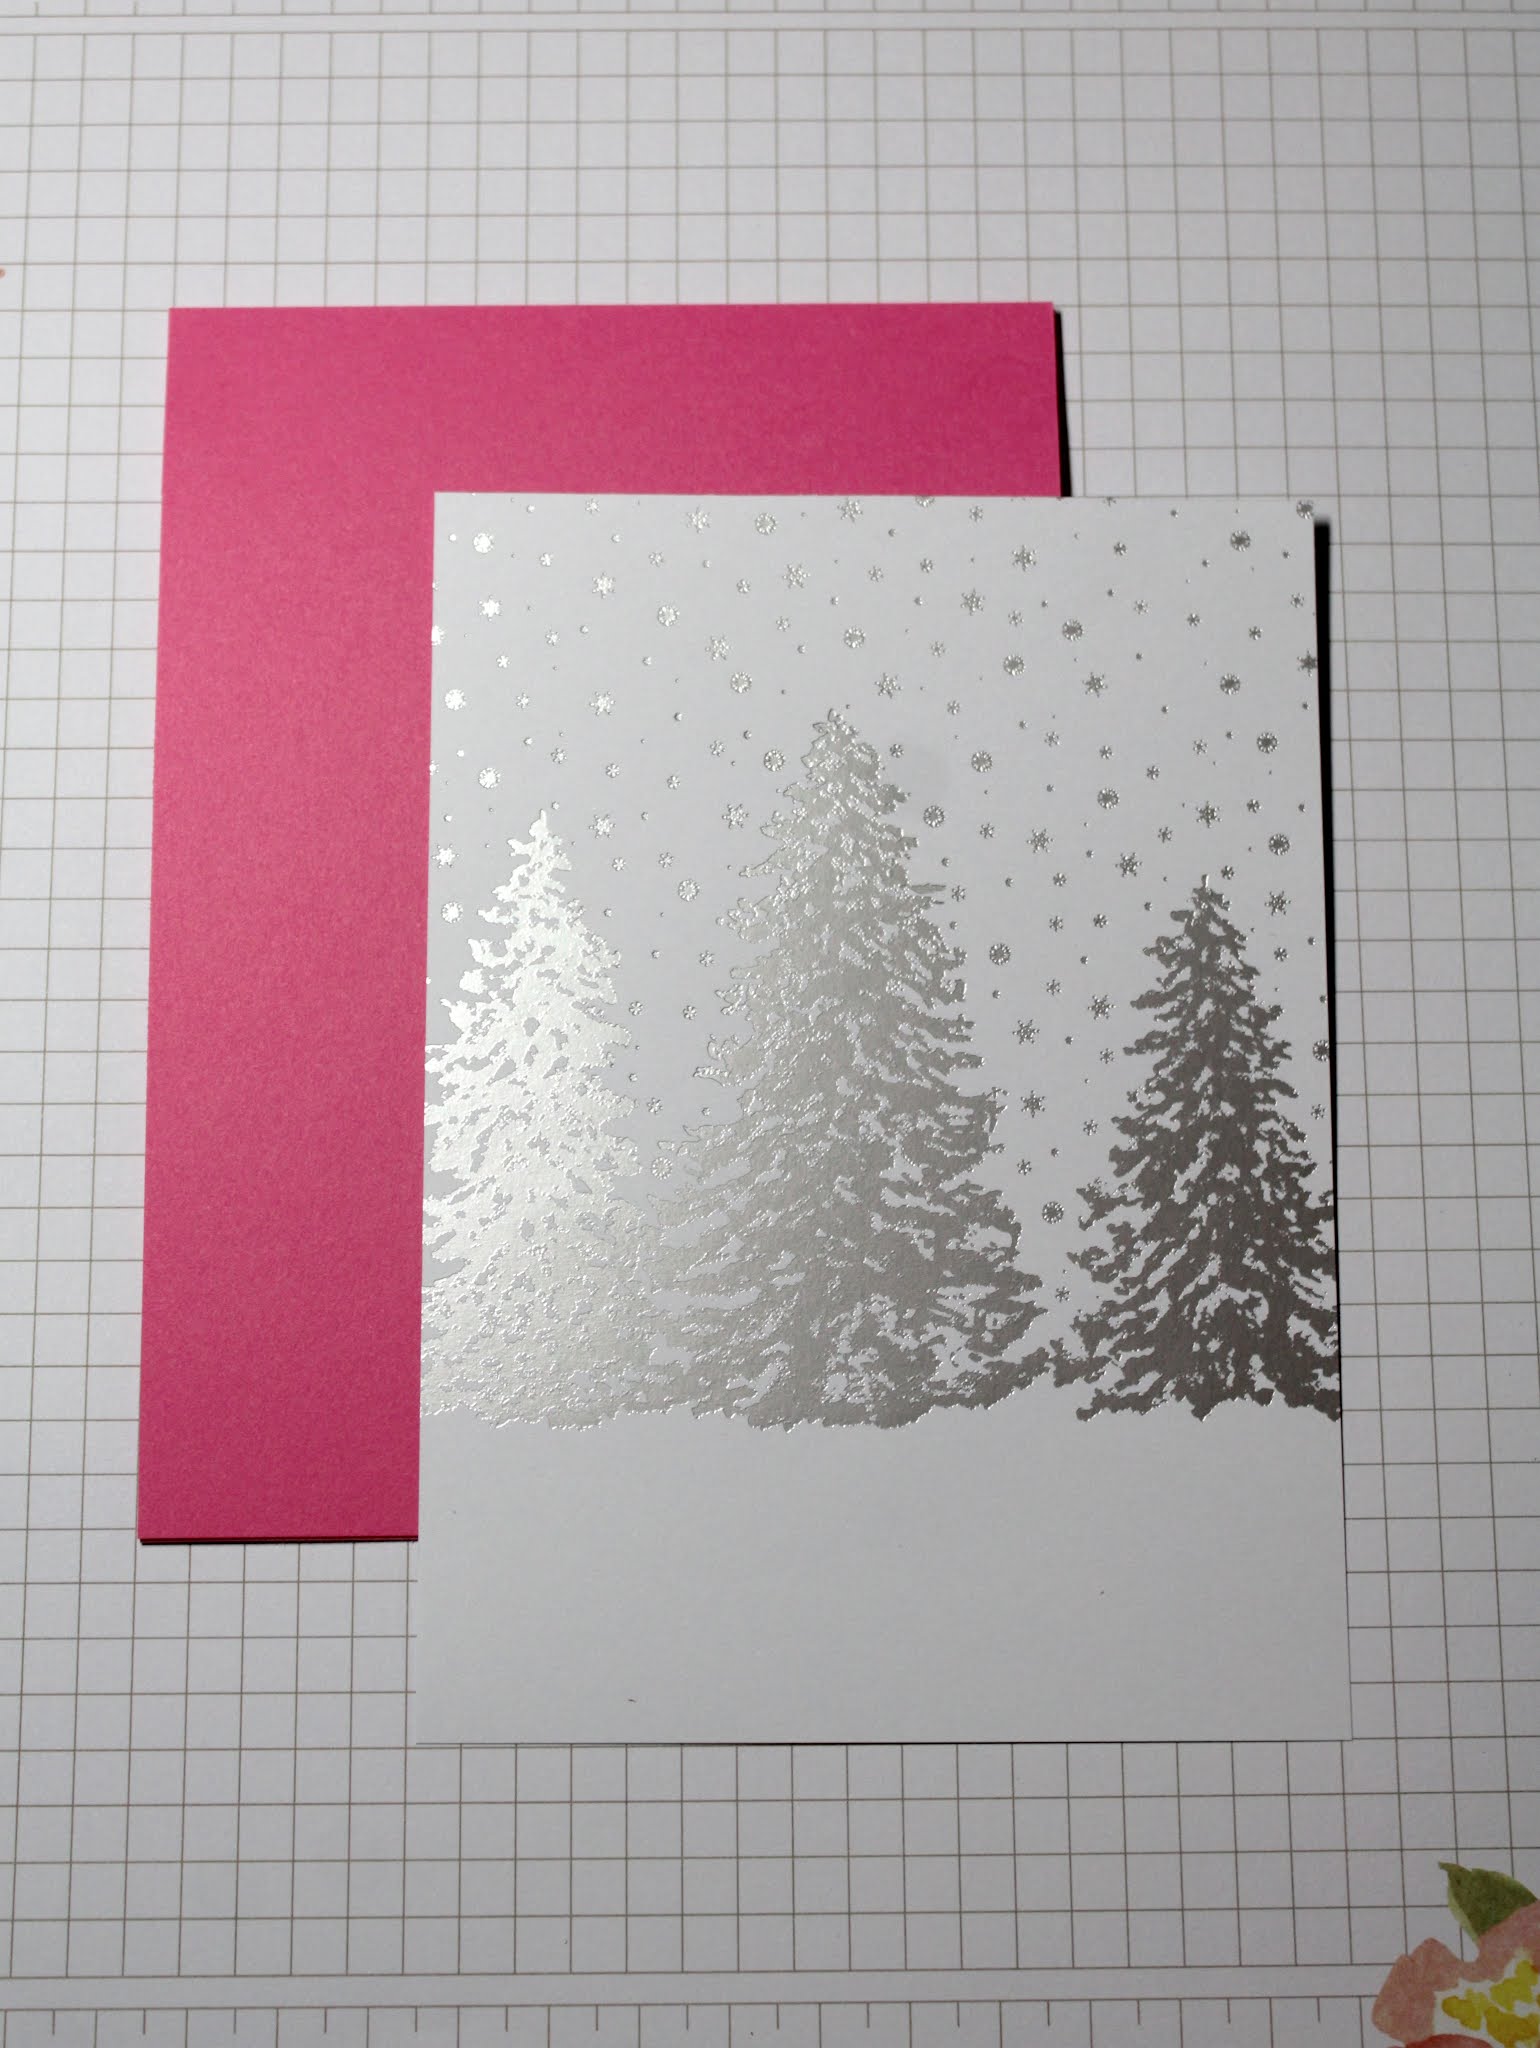
Now that the card elements are prepared, I am ready to start assembly. I attached the designer paper to the card base with double sided tape.
I attached the teapot using a dimensional adhesive. I wanted it lifted slightly off the designer paper for added depth.
I wanted a sentiment on this and after several attempts that I didn't like I settled on this one. Season's Greetings w/Snowflakes is from the 2017 Christmas release. I cut it 2x in polished pink cardstock and used Art Glitter glue to connect them together. 
I attached the phrase to the image panel using the same glue. I like this one because it dries clear. 
Well that completes my sample for this week. I hope I have given all you tea lovers out there a way to use this die for a special Christmas card for a friend or family member. See you next Saturday!

Announcement: Don't forget to visit our YouTube Channel for the latest video from Marla Harris. If you subscribe to our channel, leave a comment and like the video you have a chance to win the Santa's Delivery die she used to create her card.


Dies I used to create card:


Friday, October 15, 2021

Snowball Fight!


Good morning CottageCutz fans, its Wendy bringing the blog to you today. I hope you’ve had a wonderful week and are looking forward to a super weekend. Mine will be full of dog walks and Christmas crafting so I’m looking forward to that.

Today I’m bringing you a fun simple card. Santa and the joyful snowman are having a snowball fight and Santa really needs to get his reindeer ready for the night of present deliveries.

I have made a snowy scene using the slimline hills both on the top and the bottom of the card. I cut 2 hills out for the bottom of the card so that I could slot some items behind one of the layers.

One of the new designs I have used is the Reindeer stable. This is such a cute die and I thought one of them had to be Rudolph with his red nose. 

I really hope you enjoyed the card today. These dies are amazing and I hope that it has inspired your Christmas crafting. Remember to take time to craft!

Announcement: Don't forget to visit our YouTube Channel for the latest video from Marla Harris. If you subscribe to our channel, leave a comment and like the video you have a chance to win one of the dies she used to create her card. 

Take care and I’ll see you Tuesday
Wendy 

 
    Dies I have used


Thursday, October 14, 2021

Christmas Hound and Friend

Hello Scrapping Cottage Friends

It is Pam sharing with you on the blog today!

Our new release for Christmas is available for purchase today!!  It has 40 darling dies that would make gorgeous cards, gift tags, banner or toppers for a bag.  In this release there is everything from farm animals to beautiful Navitiy Scenes.   Today, I am using the Holiday Hound Dog.

My card was inspired by a fun and playful design by Meghan Kennihan.  I just loved the sketch she created so I had to give it a try.  Thanks for the wonderful idea Meghan.  


Design Steps:
1. Start out with a red slimline card base 8 3/4 x 3 3/4.  Next use the Random Circle Slimline die and cut it out of white card stock.  Cut a piece of blue card stock 8 1/2 x 3 1/2.  Cut a piece of red card stock 3 x 4 1/3 and a piece of striped DP 2 3/4 x 3 3/4.  Glue the blue to the red card front, next glue the white random  circle piece to the blue and last mount the striped DP to the red and glue to the card front at an angle as shown
2.  Cut out a white circle using the Crossed Stitched Circle die second from the largest and a red circle cut with the second from the largest Pierced Circle die.  Glue together and then to the card front
3.  Using the Holiday Hound Dog die cut him out of brown, blue, green, red, black, tan and white.  Shade the dog and assemble

4.  Using the Moose and Tree die cut out the tree in green and the trunk in dark brown.  Assemble and glue to the card front as shown.  The little owl is from the die Snowman w/Woodsy Friends

5.  Pop up the dog using dimensionals add the little bulbs on the tree and coat them with glossy accents.  Add the sentiment and your card is complete

CottageCutz Products


Thanks so much for stopping by and don't forget it is never to let to start on those Christmas cards or even start to shop for our crafty friends!  One more bit of info our YouTube channel is up and running with some wonderful video inspirations check it out HERE.

Blessings and Take Care
Pam


Wednesday, October 13, 2021

Special Delivery Santa


Hello, my crafty friends.  Marla here, with another card share over on the CottageCutz YouTube Channel.

Christmas card making is in full swing now and the new release over in the Scrapping Cottage store is filled with tons of adorable new dies to help you create the cutest cards this holiday season. 

Here's a look at the card I am creating today.  I love how the sweet snowman is delivering all the packages just in time for Christmas.  This scene reminds me of those old Frosty the Snowman or Santa Clause is Coming To Town Movies.  What do you think?  


I am a super fan of slimline cards, especially for scene building.  If you didn't know, CottageCutz has several amazing slimline dies. If you struggle with fitting everything you want onto an A2 card, I highly recommend diving into slimline cards.  It's a game changer for sure.  

Thank you so much for stopping by.  I'd love for you to head over to the YouTube Channel for more card details and please don't forget to hit subscribe and ring the bell so you are notified when a new video is uploaded.  

Announcement: The winner of the first YouTube giveaway is Karen Ladd. Contact Mary Marsh at mrmarsh917@gmail.com to make arrangements for your prize. There will be having another giveaway for this video as well. So drop by our channel. 

CottageCutz Supplies Used


Tuesday, October 12, 2021

One die three ways

Happy Tuesday Cottagecutz fans, It's Wendy bringing the blog to you today. It’s my birthday today so I am sharing 3 full tutorial projects with you. I have a shaker tag or it could be a bauble, some cupcake toppers and a Shaker Napkin Ring


So I’m going to start with the gift tag and then the napkin ring as they are very similar to make. Take 2 of the nested circles dies measuring 3” and 2” and cut a ring


Next take some acetate and choose a circle die that is just smaller than the ring, cut it our and glue to the reverse of the ring


Next use some 3D foam pads at lease 2-3mm and apply all around the ring and pop to one side


Now cut another 3” circle in the teal, a cut two 2” circles in the lighter blue and white. glue the lighter blue circle in the middle of larger circle. Then with the white circle create a snow hump using one of the slimline hills dies and stick to the light blue circle


Now cut out the snowman from the ‘Joyful Snowman’ die in coordinating colours and attach to the base you have created 


Now I’ve added chunky glitter onto my snowman scene but you could use little beads


Now you can peel off the foam pads from the acetate circle you made and carefully place over top to make your shaker element. I’ve cut a circle at the top to thread through some ribbon and added some holly for decoration. So this could be a bauble or a gift tag.


We’re going to make the napkin ring now and It’s exactly the same method as above, you just don’t need to cut the hole for the ribbon or add the holly. So here is how I made base ring for the napkin. Take a piece of card 7” x 1.5” and mark at 1” either end. At the same time cut one of the nested stitched circles measuring 3”


Take a stapler and staple one end to the middle of the circle


Take the other end of the card and staple to the middle of the napkin ring. Make sure the more pointy part of the staples are facing out as we’ll cover that up


Next add 1mm 3D foam pads to cover all of the circle


Attach to the shaker design we made earlier


Here is your fun and final shaker napkin ring


Finally we come to the cupcake toppers. These are so quick and simple to make. So using the ‘Joyful Snowman’ again, cut the main body 12 times if you are making 6 cupcake toppers.Then cut our the remainder of the design 6 times as we are only going to decorate the front of the toppers 


Now to create the basic cupcake topper. I would use 2-3mm foam pad and add this to one side of the snowman but leave enough room for a cocktail stick. In that void use a strong blue such as cosmic shimmer and then app,y another snowman over the top before inserting the cocktail Stick.


Finish by adding the remaining elements onto the snowman and you are done. There are so many other dies that Cottagecutz has that lends themselves to make cupcake toppers


I hope you’ve enjoyed the projects today. Have a lovely week and I’ll look forward to seeing you on Friday
Wendy    

Announcement: 
The winner of the YouTube giveaway is Karen Ladd. Contact Mary Marsh at mrmarsh917@gmail.com to make arrangements for your prize. We will be having another giveaway on YouTube starting Wednesday when the newest goes live. 

Dies I have used