Saturday, January 11, 2020

I Love Us

Hello Scrapping Cottage friends! Thanks for taking the time to stop and visit with us today. It's Mary Marsh here bringing you the Saturday day edition of the Blog. Happy New Year wishes to all our Blogger friends!

Today, I am featuring the Seal & Walrus Pals die. It's from our latest Artic Animals release. There are 13 new designs in this release and each one is so versatile for a variety of card making and giving occasions.

I needed to start making some Valentine's Day cards and the idea for this one has been brewing in my head ever since I saw the die. This would also work as an anniversary card. It will go to my hubby for the big love day celebration. So let's get started on some details of how I created my card.

Design Steps:

My card took several detours on the actual layout, but I wasn't getting anywhere with trying to use the designer paper and all the layers I had in mind.  I even tried using heart paper for the ice floats but that didn't work either. So I switched gears and decided to sponge my background with distress inks. 

I started with Tumbled Glass distress ink and a stencil for the clouds. Then for the horizon line I used Broken China distress and the water is done with Salty Ocean distress. To get some white caps in the water I used a Tombow sand eraser, I was happy with the results. 
Image Panel: 5 1/2" x 4 1/4"
Next, I cut the seal and walrus images in various colored cardstock. I am showing the ice floats with the designer paper I was going to use. I thought they didn't look like ice floats with this designer paper,  so I went back to white cardstock. I just forgot to take a photo of my change. (LOL)!!!
I decided to stamp the Valentine sentiment on a cloud. I used the cloud die from the Clouds & Sun die. The largest die was the perfect size for my sentiment. I used my MISTI for placement and also just in case I needed to stamp the sentiment 2x. Which I did. 
Now that all my card elements are done, I am ready to start card assembly. I attached both the ice floats and the sentiment cloud with dimensional adhesive. I wanted them lifted off the background.
To finish off my card, I attached the image panel to the blue card base. I like using non-traditional colors for Valentine cards and after all the beginning issues I was pleased with how the card turned out.  
Blue card Base: 5 3/4" x 4 1/2"
Well,that's it for me for this post. I hope I have given you an idea for a way to use these Artic Animals. See you next Saturday!

dies I used to create card:


Friday, January 10, 2020

Husky Love Mail

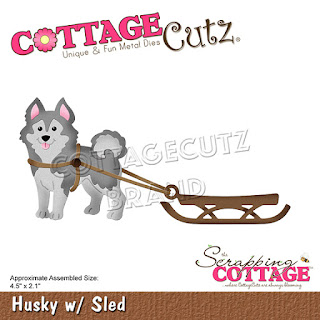
Happy Friday!  It's Jeanne sharing with you today and I have a Valentine's card for any dog lover in your life.  This card uses the Husky w/Sled die from the new Arctic Animals release along with some older Valentine's Day dies.
I started off by cutting all the pieces from cardstock in white, gray, brown and two shades of red.
I used some gray ink to shade the white areas of the husky, then I glued him together along with the letters and banner.  Final assembly of the pieces will be on the card itself.
My card is going to be a top folding A2 size card so I cut a panel 5.5 x 4.25 inches to glue on top of the base.  I used two shades of red/pink to create a soft background with more of the color towards the bottom and going diagonally from the middle to the upper right.
For my snow, I  cut a free form snow bank and used light blue ink to just shade the top.
I adhered the snow to my background panel and then glued down my dog and sled.  I left the top part of the sled unglued so I could slip the envelopes underneath.
I tucked the envelopes on the sled and used the various size hearts to create a trail.
Finally, I popped up the sentiment using foam dots and added a few rhinestone hearts in clear and red.  A fun and easy to make Valentine's Day card!

Dies used:
http://www.scrappingcottage.com/cottagecutzhuskywsled.aspx

http://www.scrappingcottage.com/cottagecutzbemyvalentinepuppies.aspx
http://www.scrappingcottage.com/cottagecutzpuppyloveletter.aspx
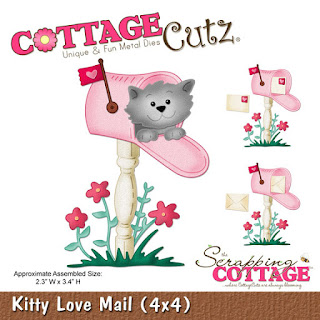
http://www.scrappingcottage.com/cottagecutzkittylovemail4x4.aspx

Thanks for joining me today and I hope you enjoyed my card.  Have a fun and creative weekend!


Thursday, January 09, 2020

Happy Brrr-thday!


Hello Scrapping Cottage friends! Thanks for taking the time to stop and visit with us today. It's Mary Marsh here bringing you the Thursday edition of the Blog. Happy New Year wishes to all our Blogger friends!

Today, I am featuring the Polar Bear Fishing die. It's from our latest Artic Animals release. There are 13 new designs in this release and each one is so versatile for a variety of card making and giving occasions.

I needed a masculine birthday card and I thought this die image would be perfect. So let's get started on some card details.

Design Steps:

I started off by cutting the polar bear image. I used a variety of white and colored cardstock. Sponged blue ink on the edge of the ice float for depth.
I used a snowfall stencil and embossing paste for the top half of my card. I stenciled an A2 size piece of white cardstock but I cut it at 2 1/8".  I stencil on a craft mat because the clean up is a breeze.
Stamped the sentiment in an espresso brown ink. I decided to stamp it before it was attached to the card base. This bottom half of the card front is blue designer paper. I thought it had a water like pattern to it. 
Now that all the card elements are prepared, I am ready to start assembly. I attached the stenciled panel and the designer paper to the white card base. The panels are joined together with blue cardstock cut at 1/4" x 5 1/2". I was trying to get the look of the horizon line.

White card base: 5 1/2" x 4 1/4"
Stenciled panel: 5 1/2" x 2 1/8"
Designer Paper Panel: 5 1/2" x 2 1/8"

The polar bear image was attached using dimensional adhesive. For the ice float, I used double sided tape.
To finish up my card I attached the "brrr" letters. These were cut in blue glitter paper and I used the Retro Alphabet die. I stamped the remaining letters of the birthday sentiment on light yellow cardstock and sponged it with dried marigold ink to make it a bit more vibrant. Sorry I forgot to take pictures of this step in the process. But here is the finished photo.
Well that's my card for this post. I hope I have given you a bit of inspiration for a masculine birthday card. See you on Saturday for my regular posting day.

dies I used to create card:


Wednesday, January 08, 2020

Holiday Wishes & Gingerbread Kisses

Hello!  This is Sukie and today I'm sharing this sweet card. I have one last card to share from the Christmas holiday created with the adorable gingerbread couple from the Gingerbread Baking Set.
The couple was die cut in card stock along with 4 frames: Stitched Wide Rectangle, Nested Stitched Scallop Rectangle, Stitched Rectangle and the Rectangle set.
The sentiment is from the Scrappy Moms (retired) Winter Wishes stamp set.  I punched holes on each side of the sentiment tag and tied it some Candy Cane Trendy Twine.
The frames were layered together and adhered to the card base. The different sized frames nested inside one another perfectly.
The first gingerbread was angled a bit and placed in the left hand corner of my card directly under the sentiment.
The second gingerbread was adhered directly opposite of the first which completed this festive card.
Here are the die sets used on my card available in the store:


Tuesday, January 07, 2020

Birthday card for boys

Hi, Janja is here with you.
One of my three grandchildren is celebrating his birthday in January. So for the first posting of the new year, I prepared a birthday card.


- CottageCutz dies: Dump Truck, BulldozerFireplace w/ Accessories (gifts)
- craft card base: 5.3 x 5.3" (13,5 x 13,5 cm), folded
- white cardstock
- colored cardstock
- clear embossing ink pad
- white embossing powder
- heat tool for embossing powder
- cloud stencil
- light blue ink pad
- glue, double-sided adhesive tape, self-adhesive foam pads

First, I cut the truck and bulldozer out of yellow and gray cardstock.


Then I prepared some gifts from colored cardstock.

Alternatively, you can add hearts instead of gifts, and get a Valentine's Day card.


For the background I used a cloud stencil and a light blue ink pad. I ripped off a craft cardstock and glued it to the bottom.


I took a blank craft card and a white cardstock. I cut the frame out with two square dies. The outside dimensions are: 5 x 5 inches (12,7 x 12,7 cm). The frame width is 1/2 inch.
For the sentiment I used a white embossing powder.


When I cut all the pieces, I started assembling the card. Finally, I added a yellow enamel dot to the sentiment strip.


Have a nice day.
Janja