Monday, November 04, 2019

Christmas Part 2 Samples

Hello Scrapping Cottage friends! Thanks for taking the time to stop and visit today. We are sampling DT cards for the next 6 Mondays using dies from the Christmas Part 2 release.

There are 34 new designs in this release. This release has something for everyone. So if you prefer a more religious tone to your cards- we have you covered. If you like a more whimsical design featuring Santa, reindeer, gnomes, moose or even a hot chocolate theme you will find some really cute dies.
  
We thought you might like to have some new and creative ideas for your Christmas cards using the Part 2 dies. So let's get started with the cards for today.

Card 1:  Our first sample is from Janja AlbrehtShe used the Farm Truck w/Tree die and combined it with the Happy Holidays Polar Bear die to create a snowy forest scene.
She created the background forest using tree stamps and stamped on blue designer paper. She used a brushed and flicked white ink on the background for a snowy look. 
The bears are right at home with all the snow and seem to be enjoying being a part of this scene. 
Card 2:  Our next sample is from Jeanne Knobbe. She used the new Moose in Forest and Pinecone Charm dies to create her whimsical card. The trees and moose are wonderfully colored with distress oxide inks. The pinecone charm is a great rustic accent for her card and it highlights her sentiment nicely.  She chose the perfect sentiment with a little pun to complete this ever so cute card. 
Well that's our samples for today. I hope the team has given you some fresh ideas for a way to use these new dies. 

dies used to create cards:


Sunday, November 03, 2019

Moose In The Snow

Hi!

It's Anja here. Today I used one of my favorite dies from the latest release. This moose is so adorable. I set it in a snowy forest.


For this card I used:
- Cottage Cutz dies (Moose In Forest),
- Distress Inks,
- craft card base (15x15 cm),
- white card stock for die cuts,
- brown card stock (12x12 cm),
- white watercolor paper (11,5x11,5 cm)
- black pen,
- heat gun,
- scissors,
- tooth brush/brush,
- white acrylic paint,
- paper glue.

First I cut the moose and the trees. I cut more sets of each. I colored one set of cuts for the moose in more details.


Then I glued the moose together to get more dimension.


Next I did the background. First I colored the watercolor paper using the smooching technique. I dried the paper with the heat gun.


Then I trimmed brown card stock and a piece of white paper for the snowy ground.


Then I glued all the background pieces together and made the snow using white acrylic paint and brushes. I let it dry.


When the background was dried I adhered it on the craft card base and added the moose. And my card was done.


That's all from me for today. Hope you have a lovely Sunday. See you again next week.

Anja Z.


Cottage Cutz die I used for this card:


Saturday, November 02, 2019

Christmas Car & Trailer

Hello Scrapping Cottage friends! Thanks for taking the time to stop and visit with us today. It's Mary Marsh here bringing you the Saturday edition of the Blog. 

We have the new release of Christmas Part 2 in the online store and they are all in stock and available for delivery. There are 34 new designs in this release. 

This release has something for everyone. So if you prefer a more religious tone to your cards- we have you covered. If you like a more whimsical design featuring Santa, reindeer, gnomes, moose or even a hot chocolate theme you will find some really cute dies.

I actually do a combo of religious and whimsical for my Christmas cards. Today, for your viewing pleasure, I am going whimsical with the new Christmas Car & Trailer. It's part of the Part 1 release

I have a friend that has a trailer and camping is a big part of her life now that she and hubby are retired. So I made this card for her. So let's get started with some details on how I created this card.  

Step 1: I started with cutting out the card and trailer. I used the die packaging for colors. Our dies always have such beautiful coloring that it makes it easy for you to use cardstock or any coloring medium. My preference is cardstock.
Next I decided on my background designer paper. This paper reminded me of a blue sky with even a bit of snow.

blue card base: 5 3/4" x 4 1/2"
white layering panel: 5 1/2" x 4 1/4"
designer paper layer: 5 3/8" x 4 1/8"
I decided to emboss the designer paper with a birch tree embossing folder. Just thought it would add interest to the card and give the appearance of a wooded campsite.
Step 2: I am ready to start card assembly. Attached the designer paper layer to white layer panel with double sided tape.
To attach the die-cut images I used dimensional adhesive. This adds depth to your design.
I attached the image panel to the blue card base with double sided adhesive.
I felt like the card wasn't complete so I decided to add a Merry Christmas sentiment and several snowflakes. The snowflakes are from the Holiday Hedgehog die. The sentiment is from last year's Christmas collection - Merry Christmas w/Deer Family
Well that's it for me for this week. I hope I have given you an idea for using this new die. It makes a perfect card for your camping friends and family. See you next Saturday!

dies I used to create card:


Friday, November 01, 2019

Ho Ho Ombre

Happy Friday!  It's Jeanne with a clean and simple card today.  My favorite style of card is CAS.  When I saw the Ho Ho Friends die I loved its bold, graphic style and knew it would be perfect for this style of card.
To start I chose three reds that were a progression in color and intensity to create an ombre effect. 
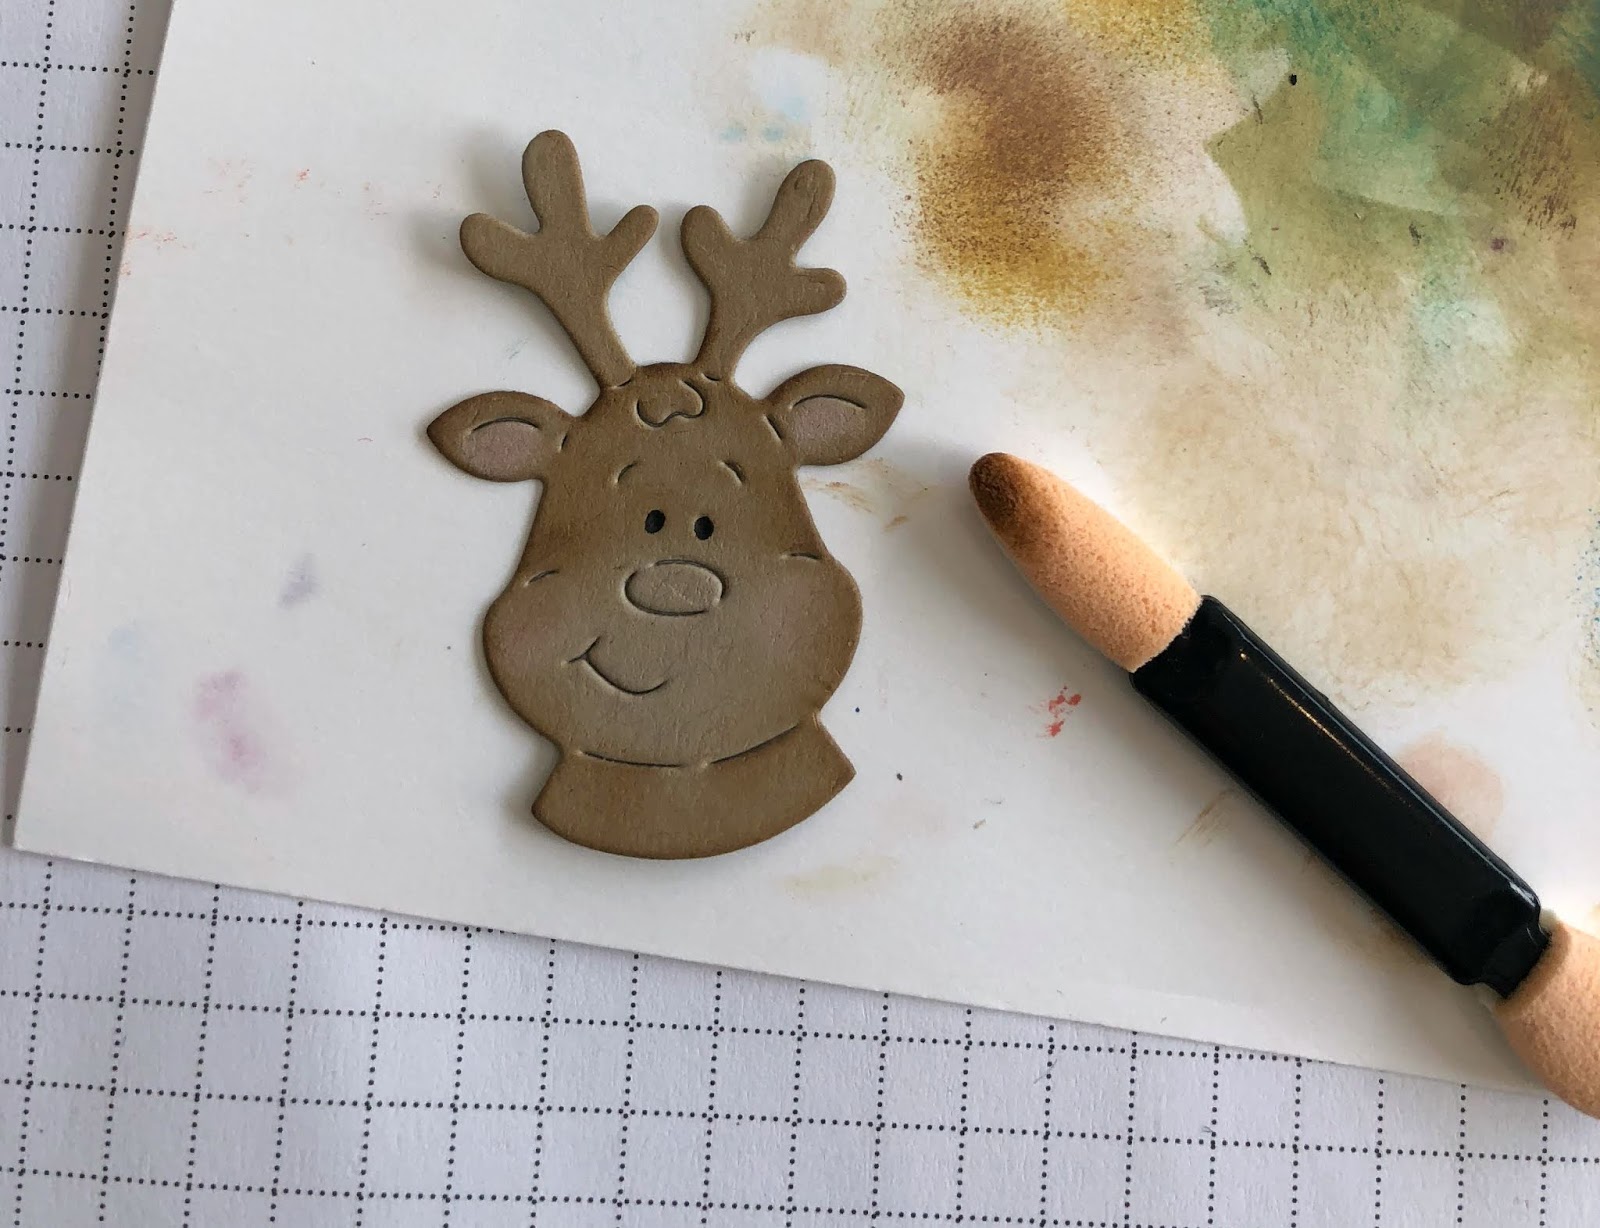
I die cut one set of letters from each red, along with the green holly leaves and the reindeer out of Crumb Cake and black.
Next I added shading to the deer using Distress Oxide inks in Vintage Photo and Tattered Rose.  I purchased inexpensive cosmetic sponges in bulk and these work great for coloring small spaces.
I assembled my reindeer.
For the card base I used an A2 base of white and cut one white panel and three green panels using the largest of the Nested Wacky Stitched Rectangle dies.  I'll use the green ones under the white panel to give dimension and color.
Next is the part that took a bit of concentration.  Clean and simple cards need to be pretty  precise, but a bit of planning is all that is needed.
The key to a card like this is to work from the middle out.  I made very light pencil marks at the halfway point on each long side of the white panel and also at the halfway point on the long sides of the middle red "H".  I erased these later.
I applied snail adhesive to the back side of my "H".  Using a saved backing from a piece of an adhesive sheet, I placed it from tick mark to tick mark.  The backing to these adhesive sheets are handy to have around as they are non-stick.  I was able to position the top of my "H", line up the mid points, then slip the backing out and burnish down the letter, being assured the position was correct.
Then I glued down the middle "O" leaving the top unglued so I could slip in the lightest "O".  The rest went very quickly.  I simply aligned the other letters.
To finish the card I stacked the three green panels underneath and added  my reindeer and holly with berries.
I chose the reindeer to peek out of my card, but this set also comes with Santa, a snowman and penguin.  All wonderful choices for an adorable CAS card!

Dies:
http://www.scrappingcottage.com/cottagecutzhohofriends.aspx
http://www.scrappingcottage.com/cottagecutznestedwackystitchedrectangleset.aspx

Be sure to stop by the online store to see all of the new Christmas dies!

Thanks for stopping by today.  I hope you have a fun and creative weekend!


Thursday, October 31, 2019

O Come Let Us Adore Him

Hello Scrapping Cottage Friends

It is Pam creating with you on the blog today!

Our Part 2 of the the Christmas release has 34 new designs everything from Moose to Mangers!  So please take a moment and check out the collections.  I am using the manger scene for today's card.  The name of the die is Nativity w/Donkey.

Design Steps:

 1.  Start by using the Nativity w/Donkey die and cut out the pieces using light yellow, tan, brown, flesh, and grey card stock
 2.  Shade the pieces with your favorite markers.  I used Copics
 3. Using the largest of the Stitched Wide Rectangle Frame set cut out a frame from tan card stock. Set aside and next cut out a piece of white card stock that will tuck just behind the frame.  Using your Distress inks sponge the bottom of the white card stock with yellow and the top with a navy blue
 4.  Use an A2 tan card base and take a distress edging tool to rough up the sides and bottom.  Next use a brown distress ink to ink all the edges of the card.  Also use the brown distress ink to ink the sides of the frame
5.  Glue the yellow and blue white piece to the center of the tan card base.  Then use dimension tape to attach the frame.  Add the nativity scene, your sentiment and star button to the card and it is finished

CottageCutz Products


Thanks so much for stopping by!  I hope you have time to create today!  We would love to see you in the store.   Shopping for dies to use for all those wonderful Christmas cards you create and everyone treasures!

Blessings
Pam