Friday, October 18, 2019

Warm Hearted Friends

Happy Friday!  It's Jeanne with you today.  Today's card uses the adorable polar bears from the Christmas Release Part 1.  I think these are just about everyone's favorite, they are so darn cute!  I chose to use them today as a friendship card rather than a holiday card.
I cut all pieces from white card stock and used Distress Oxide ink to color them.
 I assembled all the pieces.  Although I assembled the hat, I ultimately decided not to use it.
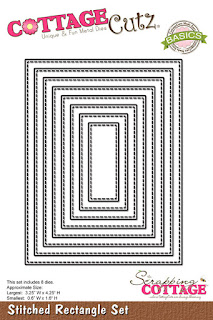
For the background I used the same pink inks and a stencil made from the second smallest circle of the Double Stitched Rectangle set.  I blended an area larger than I needed so I could adjust where to cut the rectangle.  I splattered the blend with water to give the feel of falling snow.
I cut four panels, two using the third largest Stitched Rectangle die and two using the second largest die so that the panels stacked would be a bit thicker than regular card stock.
The message is stamped centered on the bottom of an A2 card base in grey ink.  After adhering the panels I glued down the snow and birch trees. 
I wanted the birch trees to go to the top of the rectangle and the snow to be at the bottom.  You can see that there is a gap here.  But that will get covered up by the bears.
The bears are popped up using foam dots.  This was a simple card to make that is wonderful for a good friend.  These little bears are perfect for almost every occasion!

Dies:
http://www.scrappingcottage.com/cottagecutzpolarbearswbirchtrees.aspx


http://www.scrappingcottage.com/cottagecutzstitchedrectanglesetbasics.aspx

http://www.scrappingcottage.com/cottagecutzdouble-stitchedcirclesetbasics.aspx

Thanks for stopping by today.  Be sure to check out all the new Christmas dies from both releases in the online store!

I hope you have a fun and creative weekend!

Thursday, October 17, 2019

Santa with the Naughty and Nice List!

Hi Friends!

It is Pam on the blog creating with you today.

Part 2 of the new Christmas release is OUT and ready for you to take a peek.  Just go to our online store to check it out.  It is fantastic and I can't wait to start to play with all the new dies.  Be looking for the Design Team inspiration coming soon.

For today,  I am using one of the dies from the Part 1 new Christmas release.  It features Santa and his reindeer with the naughty and nice Christmas list.  Hope you are on the nice list!! Hee Hee


Design Steps:
1.  Cut your pieces out using the Santa w/List and Reindeer.  I used tan, red and white card stock.  And with some of the pieces I just colored them with my copics markers such as the green and black pieces
 2.  Shade your pieces using inks and copic markers then assemble
 3.  Using the Winter Window die cut out the window in tan card stock and the curtains in a checked DP
 4.  Darken the window the ink, cut a piece of pale yellow to back the window and glue it to the back.  Glue on your curtains
 5.  Use a white A2 card base cut a piece of brick DP 4 x 5 1/4 and a snow bank for the bottom
 6.  Glue the snow to the bottom of the brick DP and then glue down the window
7.  Use dimension tape to attach Santa and the reindeer.  Stamp your sentiment in the snow and add the snowflakes.  Your card is finished

CottageCutz Products


We are super excited about all of the new Christmas dies!  I hope you get the chance to own a few of them.  They are adorable and make Christmas cards that will be treasured by those on the receiving end!!  Thanks for stopping by today!
Blessings
Pam


Wednesday, October 16, 2019

Greeting from the North Pole

Hello!  This is Sukie and I have a snowman themed card to share today.  The die set used on my card is from the Christmas Part 1 dies. There is also a brand new release of Christmas Part 2 dies.  Between the two new Christmas die releases, there is something for everyone!
I created a snowy background for my card with some Oxide Ink, a sprinkling of water and some white paint splatters.  The die cut pieces are from the Snowmen w/Fence die set.
Once I dressed up my snowmen in their hats and scarves, I located my long forgotten Peachy Keen Stamps (Frosty Friends Face Assortment) and used them for the snowmen faces.  A bit of inking and chalk added some dimension to the snowmen.
I created a pole for my sentiment to add a bit of character to the snowy scene.  The sentiment is from the Scrappy Moms (retired) Merry & Bright stamp set.  I used my paper trimmer and a punch to cut out the pieces.
The pole with the sentiment was adhered to my card base and layered with a bit of solid card stock at the bottom of my card.
Next,  I placed the first snowman on the right side of my card and then added the taller snowman at the center of my card.
The third snowman fit perfectly between the taller snowman and the pole with the sentiment directly above.
To finish off the snowy scene, I adhered the picket fence directly above the solid card stock.
Here is the die set used on my card, available in the store:

Tuesday, October 15, 2019

Snowman with Snowballs

Hi! Janja is here with you. I prepared another Christmas card for today. This card was easy to make.


- CottageCutz dies: Snowman w/ Snowballs, Cross-Stitched Square Set
- card blank: 5.3" x 5.3" (13,5 x 13,5 cm), folded
- patterned paper: 5" x 5" (12,7 x 12,7 cm) and 2.5" x 5" (6,3 x 12,7 cm)
- colored cardstock
- colored ink pads
- glue, double-sided adhesive tape, self-adhesive pads

First, cut out all the pieces from colored cardstock. For more depth, color the edges with colored pads.
Assemble the snowman with snowballs.


Cut out two white squares for the background. On the first square, apply a white texture paste over a snowfall stencil. For a snowy hill, cut off the second square with scissors.


Once the texture of the paste has dried, attach the white hill with self-adhesive pads.
Now take the snowman and mount it on the background with self-adhesive pads.


Trim the selected patterned paper.


Complete the card as shown.


Have a nice day.
Janja


Monday, October 14, 2019

Peeking Reindeer Shaker Card

Hello Cottage Cutz fans!  It's Jeanne today with an extra post for me this week.  I have a fun shaker card using the Silly Holiday Reindeer die and Winter Window along with a new die from The Christmas Release Part 2.
I colored all the pieces using Distress Oxide inks. 
For the blue sky behind the reindeer I used the negative piece created by cutting the window as a stencil.
I lightly traced the outline of the window in pencil and glued the reindeer and snowflakes within that area.
I did have to cut off the bottom of his scarf so it wouldn't be seen under the window.
To create the shaker window I cut seven windows - one from white and colored with the DO inks and the others from a brown card stock.  I layered these brown pieces and cut out the panes.  Then I placed a piece of acetate between the top window and the stacked layers.
 The rest of the card went quickly.  I used the Happy Ho Ho Ho die for the sentiment and some matching green striped paper down each side.  I think it just goes perfectly for this crazy little deer peeking in the window!

Dies:
http://www.scrappingcottage.com/cottagecutzsillyholidayreindeer.aspx
http://www.scrappingcottage.com/cottagecutzwinterwindow.aspx
http://www.scrappingcottage.com/cottagecutzhappyhohoho.aspx


Thanks for stopping by.  Have a great week and I'll see you Friday!