Sunday, March 10, 2019

Easter Cross


Hi!

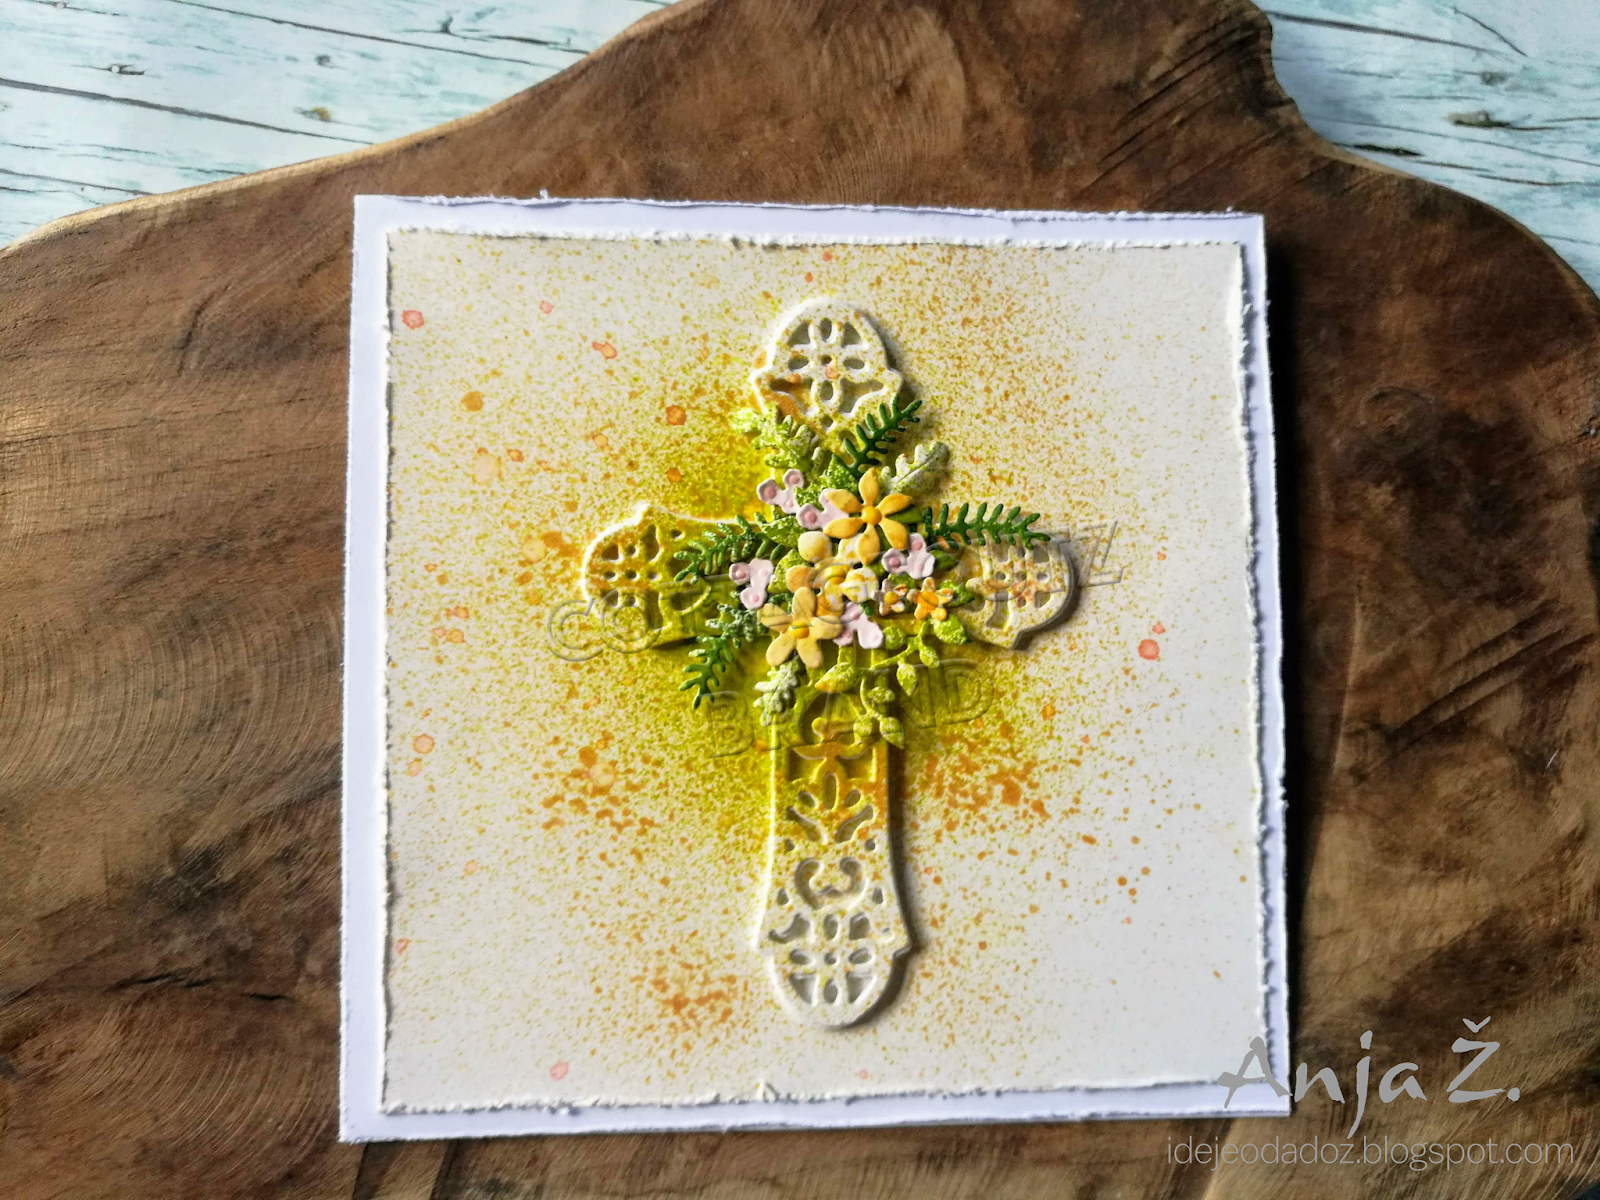
It's Anja here. Today I made a card that can be used as an Easter card. I have this cross die for quite some time and I've been waiting to use it. So today I decorated it with spray colors and some spring flowers.


For this card I used:
- Cottage Cutz dies (Ornate Cross, Hedgehogs in Love, Iron Stand w/ Plants, Fresh Spring Floral),
- color sprays (green, pink, gold, orange),
- white card base (15x15 cm),
- watercolor paper for background (14x14 cm),
- white card stock for die cuts,
-  white foam sheet,
- paper embossing tools and surface,
- Nuvo Crystal Drops (pink, yellow),
- paper distresser,
- heat gun,
- paper glue.

First I cut the paper for background and the cross. I colored it all t once by spraying both with gold color.


Next I added green and a few drops of pink. I used heat gun to dry it.


Then I sprayed paper with green and orange. Dried the paper and then cut the flowers and the greenery.
 

I did colored another piece of paper using pink.


I used embossing tools to add some dimension to the flowers and leaves.


Next I cut another cross, this time using foam.


I used paper distresser for the edges of the background and card base.


When I had everything clued on the base I added Crystal Drops to the flowers. And my card was finished.


That's all from me for today. I wish you all a nice Sunday.

Anja Z.


Cottage Cutz dies I used:


Saturday, March 09, 2019

Rainy Day Duck (new die)

Hello Scrapping Cottage friends! Thanks for taking the time to stop and visit with us today. It's Mary Marsh here bringing you the Saturday edition of the Blog.

We have a new release of 36 Spring dies in the online store. There are a variety of designs so perfect for Easter or Spring cardmaking. Take a look in the store you definitely won't be disappointed.

For my card today I am using the new Rainy Day Duck die. This little ducky has such detail right down to the water puddle and splashes of water coming off the puddle. It would be so perfect for a get well card, a thinking of you, a thank you and even a birthday card. So let's get started with some details on how I created my card. 

Step 1: Having a layout in mind at the card start is always a big boost for me. That way I can just choose the card colors and designer paper and I am good to go. I liked this week's sketch #739 on Splitcoaststampers because there are lots of layers and the image panel is big enough to show off the sweet little ducky. 
I looked through my designer papers to get one that would coordinate with the whimsical die cut image I was using. Well that took much longer than I anticipated (lol)!! I selected 4 papers before I settled on the one I am using on this card. Dotted paper always works for me. 
Teal card base: 4 1/4" x 5 1/2"
Teal dotted designer paper: 4 1/8" x 5 3/8"
Teal diamond paper (Layer 3 on the sketch): I used the largest die of the Rectangle set
White image Layer: Again I used the largest die of the Rectangle set
Next I cut the duck image. I used a daffodil cardstock for the body and a tangerine cardstock for the beak and legs. I selected another patterned paper for her umbrella and a coordinating cardstock for the handle. I cut the umbrella twice to give a little contrasting edge.


I love how the water puddle has splashes of water coming out to give the appearance of movement. CottageCutz dies are so detailed. I used the puddle of water as element 6 of the sketch. 

For the rain cloud and raindrops I used the Stitched Sun, Clouds and Umbrella die. I used dimensional adhesive on the rain cloud. The umbrella I used on my card is part of the Rainy Day Duck die. 

After I attached the cloud, I thought of adding a sentiment on the cloud. So I carefully removed it and stamped my sentiment. I decided to make this a thinking of you card. My cards are always a work in progress so sometimes I have to backtrack in the creating process (lol)!!! 
Step 2: Now that all the card elements are cut, I am ready to start assembly. Attached the background designer paper and the designer paper that is element 3 of the sketch with double sided tape. This is my favorite adhesive. 
For Element 4 of this sketch I decided to use purple cardstock. I cut it 1/2" x 4 1/8". 
 To complete my card I added the image panel and it was done. I hope I have given you some inspiration on a way to use this die. I made another card with these same dies and sketch but the card colors and paper are different. You can see that one here
That's it for me for this week see you next Saturday. 
dies I used to create card:


Friday, March 08, 2019

Springtime Bouquet

Happy Friday!  It's Jeanne today with a pretty card today that could be used for a number of occasions.  I stamped a generic "for you" on it but think birthday, Mother's Day, thank you, etc.
What made this card fun to make is that it was just like arranging real flowers!
I ran the Spring Teacup Bouquet die through the Big Shot twice using white card stock.  This gave me two of every flower.
Next I colored them using Distress Oxide inks.
Think of all the color combinations you could get with this bouquet!
To get my scalloped strip, I used the third largest Nested Scalloped Square die and trimmed off the top and side, then cut the strip 1 1/2 inches wide.  I saved the other piece to use on another card.  I glued my strip to a white panel 4 x 5 1/4 inches.
I loaded this into my Misti and laid the teacup where I wanted it so I could position my sentiment.  I did not glue it to the card but now I knew where it would go on the card and I stamped the sentiment.
I glued one flower and leaf overhanging the teacup....
and used foam dots around the lower part of the back of the cup.  This gave me an easy way to insert the flowers "into" the cup.
By popping up the cup and leaving the top open I could arrange the flowers!  I used foam tape on the back of the panel to adhere it to a side fold A2 card base.
I love this die.  There are so many flowers that the variations are endless.  The dimension on this bouquet makes it truly special!

Dies:
http://www.scrappingcottage.com/cottagecutzspringteacupbouquet.aspx
http://www.scrappingcottage.com/cottagecutznestedscallopsquareset.aspx

Thanks for stopping by.  Be sure to visit the online store where the new Spring release is 25% off for a limited time.

Have a fun and creative weekend!

Thursday, March 07, 2019

Buster

Good Morning Scrapping Cottage Friends!

It is Pam sharing with you on the blog today!

The south is just blooming with Daffodils and Azalea!  I know some parts of the country are still experiencing cold weather so I am sending you warm thoughts!  The die I am using today is from the new Spring Release.  I hope you take a moment and check it out.  You will not be disappointed.  Plus the sale is still going for 25% off the new Spring Release dies!


Design Steps
 1.  Cut out the dog and daffodil using the Buster w/ Spring Daffodil die.  I used tan, dark brown, light green, dark green and yellow card stock
 2.  Shade Buster with sponge and inks.  Assemble the dog and flower
 3.  Use the largest Pierced Wide Rectangle Frame and cut out the white frame
 4.  Cut out a piece of cloud DP just slightly smaller then the frame add dimension tape to the back of the frame
 5.  Use the Spring Grass die and cut out grass using green card stock
 6.  Glue the cloud DP to a A2 white card base, add the grass and then pop on the frame.  Glue down Buster and the daffodil.  Last use the Stitched Alphabet die and cut out the word spring in yellow then add to the top of the frame as shown.  Your cute card is complete
CottageCutz Products

Thanks so much for stopping by we are so happy you did!
Blessings
Pam