Friday, December 28, 2018

Love My Pets!

Happy Friday!  It's Jeanne posting today.  I hope everyone had a wonderful holiday!  Rather than a card today, I decided to do two framed pieces that would be perfect for the pet lover in your life.
My initial thought was do make a card, but I had the 4 x 6 frames from a package of frames I had previously purchased and this design just worked so well with them.  However, this design could easily be made into a card.

I first cut all the pieces from various colors of card stock.
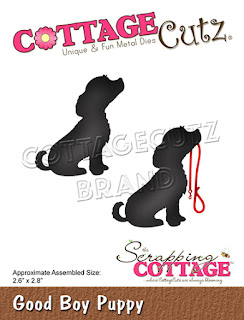
For the dog, I used Crumb Cake, Soft Suede and Real Read.
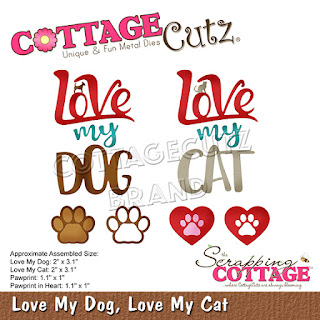
For the cat, I used Basic Black, Basic Grey and Real Red.  (Can you tell I have a brown dog and a grey cat at home?  LOL.)  My white panels are cut 4 x 6 inches to fit the frame.
Next, I embossed each panel with a falling hearts embossing folder.
I placed the pieces on each panel.  Before gluing them down I put the frame on top (minus the glass which I threw out) to see how the layout would look, and how much border I had around the layout.
When I was satisfied with each layout I glued the pieces to the embossed panel.  For the cat panel I went with a vertical layout since the kitty is rather small.  Because the dog is a bit larger, I used a horizontal layout for her.

These make fun, quick gifts for the pet lover in your life - even if that is YOU!

Dies:
http://www.scrappingcottage.com/cottagecutzgoodboypuppy.aspx

http://www.scrappingcottage.com/cottagecutzlovemydoglovemycat.aspx

http://www.scrappingcottage.com/cottagecutzloyalpets.aspx
Thanks for visiting today!  And don't forget to stop by the online store where there is a terrific after Christmas sale going on for a limited time!


Thursday, December 27, 2018

Hampster Hugs!

Good Morning Friends

I hope you all had a wonderful Christmas!  I certainly did!  It was so much fun spending time with my family.  Today,  I am starting to make my Valentine cards if you can believe it!  I am using one of our adorable new release pet dies!

Designer Steps:
 1.  Using the Happy Hampster die cut out the wheel using a metalic silver, cut out the hampsters using light brown and brown card stock.  Cut the little teeth on white and the little tuffs of fur in dark brown card stock
2.  Use TH inks to shade the hampsters and assemble them
3.  Start by using a 4 1/4 x 11 piece of white card stock scored at 2 3/4 inches and 5 1/2 inches
4.   Cut an 11 x 1 1/2 inch piece of white card stock and score at 5 1/2 and 8 1/4
5. Cut Pink card stock 1 piece 4 x 5 1/4 and 2 pieces 4 x 2 1/2 set aside
6.  Cut Pink Heart DP  1 piece 3 3/4 x 5 and 2 pieces 3 3/4 x 2 1/4.  Glue the Pink DP to the pink card stock  and then attach to the card
7.  Cut pink card stock 1 piece 1 1/4 x 5 1/4 and 2 pieces 2 1/2 x 1 1/4.  Emboss each piece and then glue the pink card stock to the white strip

8.  Attach the strip to the card making sure you only place glue on the first 4th of the strip and the last 4th of the strip.  The middle fold will pop out toward you as you fold the card
9.  Cut out the Hugs using the Stitched Alphabet die on white card stock
10.  Glue the Hampster onto the wheel and then glue to the front flap.  Glue the Hugs to the front strip as shown
11.  Glue the other little Hampster to the inside on top of the strip as shown
12.  Cut out 2 red hearts using the Stitched Cupcake die pop them inside the hampsters mouths

13.  Stamp your sentiment and glue inside the card


CottageCutz Products


Thanks so much for stopping by and I would like to wish you a very happy and healthy New Year!
Blessings
Pam


Wednesday, December 26, 2018

There's Snow One Like You

Hello! I hope everyone had a wonderful Christmas holiday!  This is Sukie, sharing a card for my guest designer post.  The sweet snowman scene was perfect for this winter card!
Today's card was created with the Snowman Lane and the Nested Stitched Scallop Rectangle die sets.  I cut out all of my pieces in card stock, although there are lots of tiny pieces in this set, it all came together very easily.
I selected my card base pieces from a K and Company 6x6 paper pad in my stash.  Everything was inked on the edges with some Vintage Photo Distress Ink which is one my go to colors.  I splattered the kraft card stock with some white paint for a snowy background.  A fun sentiment from the Scrappy Moms (retired) "Winter Wishes" stamp set was stamped on a hand cut flag.
I added a sparkly finish to some of my pieces with the Red and Clear Art-C Glitter Water Brush.  The glitter also changes the red die cut pieces to a deeper shade which coordinates better with the card base.
I layered the snowmen creating a cohesive look on my card.  The snowy background worked perfectly with the snowmen scene.
All of the pieces were adhered to the base of my card. The 2 top layers were placed at an angle for a bit of interest.
 Here are the dies used on my card available in the shop:

Monday, December 24, 2018

All Is Calm

Hi, Lois here to wish you a Happy Christmas Eve!  I hope you have all your Christmas shopping, wrapping, baking, and card-making finished.  If not, I have one last, rather quick and simple Christmas card to share with you today.   I love the way silhouettes look on a card.  This one was made with a not-so-new silhouette die from CottageCutz called Away in a Manger.


To start my card I cut the silhouette from black cardstock.


And then I cut my cardstock as follows:

White - 8 1/8" x 5 1/2", 4 1/4" x 5 1/2"
Black - 4 x 5 1/4"


I cut the smaller white piece larger than I will eventually need; but, because I am going to sponge the background, I made it slightly larger to allow for trimming after I've finished my sponging.   Then, using four different distress inks, I sponged my background.


I then trimmed the piece down on all four sides to 3 3/4" x 5".  What this does is eliminate the darker color around the edges where the sponge initially hit the cardstock.  And then I constructed my card base.


After gluing down the silhouette at the bottom, I stamped the sentiment in the upper left-hand corner, and my card was finished.


As promised at the beginning of this post, this card went together quite quickly.  The CottageCutz die I used on it is:


Sunday, December 23, 2018

Nativity Scene

Hi!

It's Anja here. We are a few days away from Christmas. I look forward to some work free days ahead of me. And more time to do some crafting and making a few small handmade gifts for my friends.

Today I made a Nativity themed card. A simple one, where I tried out new spray colors.


For this card I used:
- Cottge Cutz dies (Nativity),
- Spray colors (three shades of blue),
- craft card base (13x13 cm) and paper for die cuts,
- watercolor paper for background (11x11 cm),
- black card stock for background (11,5x11,5 cm),
- Distress Inks (Black Soot, Chipped Sapphire),
- Gansai Tambi watercolors (silver),
- heat gun,
- brush,
- paper glue.

First I made the background. I used the lightest color. I spritzed it on my glass surface and then tapped the paper on the color. I used the heat gun to dried it. 


 I did the same with the darker color.


And again with the darkest colors.


Next I spritzed the colors over it to get more effect.


I dried the paper and then spritzed it with silver color.


When colors were dried I used Distress Ink around the edges.


I cut another piece of paper for the background.


And then I just needed the Nativity scene. I used craft paper and some black color around the edges.


In the end I just glued everything together and my card was done.


I wish you all a merry Christmas. I hope you spend it with people you love. 

See you again next Sunday.

Anja Z.


Cottage Cutz dies I used: