Thursday, September 27, 2018

Forest Christmas

Good Morning Scrapping Cottage Friends!

It is Pam sharing with you today!

We are so happy that you stopped by to visit with us today!! I am showing you a die from the Part 2 Christmas release today.  In this release there are 29 different designs and everyone of them is unique and very detailed.

Very soon you will be seeing examples from our Christmas Part 3 and Halloween dies.  These dies are already in the store with a 25% discount!  There is also an exclusive die that can only be purchased through the online store.  So make sure you stop by the store to see our sweet Dakota the Huskey!!

Here is my card for today hope you like it!


Design Steps:
1.  Use an A2 white card base and a slightly smaller piece of red card stock.  Glue the red card stock 
to the base and set aside


2.  Cut a piece of white card stock 4 x 5 1/4 and stamp the background using a forest stamp with Versa Mark.  
 3.  Emboss with white diamond embossing powder set with a heat gun

 4.  Use blue inks and sponge over the embossing.  After completing the inking wipe it off with a paper towel

5.  Use the Merry Christmas w/ Deer Family die and cut out the deer in brown, the banner in red and the fawn and trees in white 
 6.  Ink shadows onto the large deer and color the fawn with a marker and add small white dots to fawn.  Color all of the hoofs black with marker
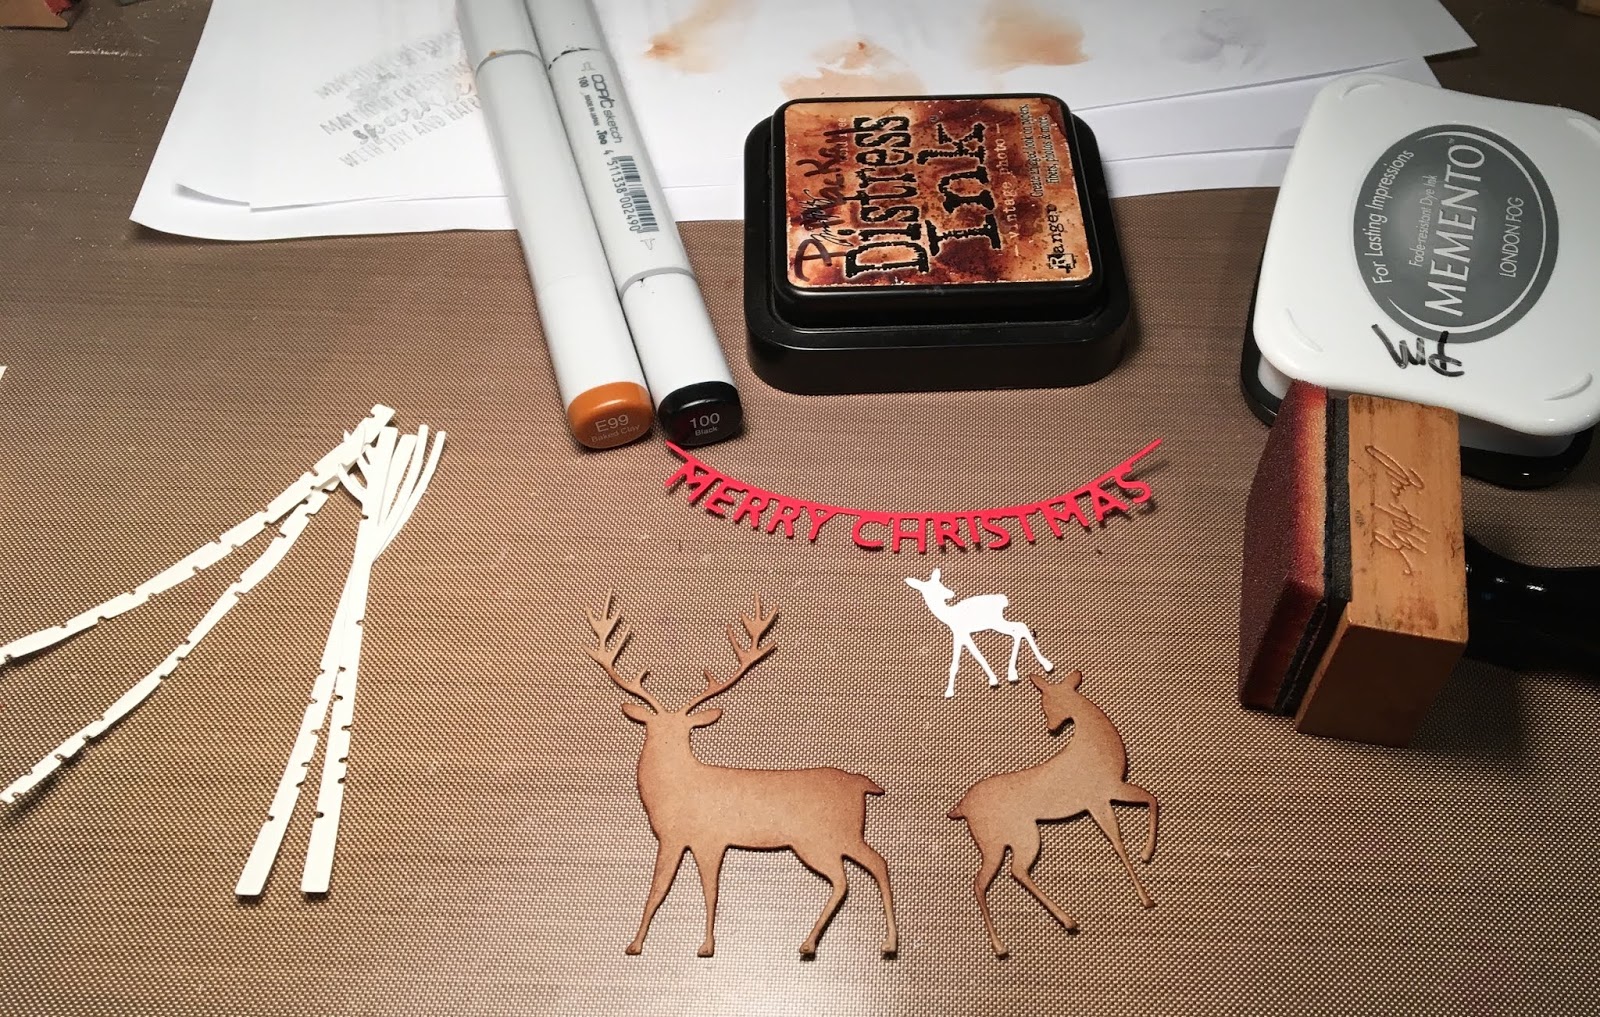
7.  Add shadow to the birch trees with grey ink
8.  Add the die cut pieces to the background


CottageCutz Products
Thanks so much for stopping by!  And make sure to take some time to be creative!!
Blessings

Pam


Wednesday, September 26, 2018

Group Post w/Christmas Designs

Hello Scrapping Cottage friends! Thanks for taking the time to stop and visit today. We are sampling DT cards from Part 2 of the 2018 Christmas release. There are 29 new designs in this release. 

And, speaking of new releases Christmas Part 3 has just been released along with some new Halloween dies. You will find these in the online store at a 25% off sale. There is also an exclusive die that can only be purchased through the online store. Check out the sweet Dakota the Husky die.

The DT will be showing samples soon with these new dies. Today, we have a group post showing samples from the recently released Christmas Part 2 dies. All the card samples today are ones that could easily be mass produced for Christmas card giving.

Card 1: This first sample is from Jeanne Knobbe. She used the Grapevine Wreath w/ Bird and the Love, Peace & Joy dies to create this soft and serene card. The wreath was colored with Copic markers except for the bird which was left in white. The bird and peace word are covered in two coats of wink of stella for a bit of shine. Notice that she continued the sparkle by layering the image panel with silver metallic cardstock.
Card 2:  Our next sample is from Anja Zurga. She used the Christmas Village 1 & Christmas Village 2 dies to create her beautiful night time scene. The background is sponged with distress oxide inks and then she splashed with a bit of water. She also sponged a little yellow ink to give the effect of a soft glow coming from the buildings.
Card 3: Our next sample is from Janja Albreht. She used the Winter Deer Oval + The Merry Christmas w/Deer Family dies to create her woodland scene. She used patterned paper with a subtle design that gives a beautiful whimsical look to this card. It reminds you of a misty moor. Her oval cut in the medium shade of brown draws your eye right to the deer image.
 Card 4:  Our last sample for today is from Anja Zurga. She used the Peeker Snowmen die to create a beautiful Christmas tag. By using black cardstock as a background it created a dramatic look for her sweet snowmen. The sentiment in white ink gives a chalkboard look to her tag. Wouldn't a tag like this look great on that special Christmas present. It's a gift in itself.
That's our samples for today. Hope the team has given you some new ideas for using these fabulous Christmas dies. 
 
Dies used to create samples:
http://www.scrappingcottage.com/cottagecutzgrapevinewreathwbirdelites.aspx
 
http://www.scrappingcottage.com/cottagecutzchristmasvillage1elites.aspx

http://www.scrappingcottage.com/cottagecutzchristmasvillage2elites.aspx
 
http://www.scrappingcottage.com/search.aspx?find=winter+deer+oval

http://www.scrappingcottage.com/search.aspx?find=Merry+Christmas+Deer
 
http://www.scrappingcottage.com/search.aspx?find=peeker+snowmen


Tuesday, September 25, 2018

Christmas Mice

Hi, Janja here!

You've already started to think about your Christmas cards. Today I have another Christmas card for you. Let's see how it's made.


Supplies:
- CottageCutz dies: Christmas Mice, Little Angel (stars)
- white cardstock for a center step card
- white and colored cardstock
- patterned paper
- colored ink pads
- glue, double-sided adhesive tape, self-adhesive foam pads

For the cutouts we will use colored cardstock. So first prepare colored cardstock and ink pads.
Then cut out the individual cutouts, ink the edges, and fix them to each other.


Now cut and fold the card base. Center step card tutorial.
This is my card base.


Cut the patterned paper and attach it to the card base. The paper is colored on the edges.


Stamp a sentiment and complete the card as shown. Last, add some small stars. 
I borrowed them from a little angel.


I would like to remind you that the new Christmas dies (Part 3) and the new Halloween dies are already in the store. They are currently on sale for 25% off.

I hope you enjoyed it. Have a nice day.


Monday, September 24, 2018

Gnomes Bake Shop

Hi, Lois here with my Monday card.  Before showing the card, however, I wanted to let you know that the Christmas Release (Part 3) and new Halloween dies are on sale at 25% off on the CottageCutz website.  I hope you check them out.  There is also a cute new die, Dakota the Husky, which is available only in the CottageCutz store.

Now, on to my card!   I'm a big fan of fun-fold cards, and today's card is a Center Step Card.  If you're unfamiliar with this technique, you can find a tutorial on Splitcoaststampers.  This is my card for today.


Cardstock used for this card are as follows:

Brown - 5 1/2" x 11"
Red - 3 1/8" x 4 1/8"
White - slightly larger than 3" x 4"
Patterned paper - 3/4" x 5 1/4" (3 pieces)


I die cut the pieces for the bake shop from brown and white cardstock.


Using Copic markers and some distress ink, I colored the pieces and constructed my bake shop.


I then cut the gnomes from white cardstock . . .


. . . then colored and constructed the figures.


Following the directions from the Center Step Card tutorial, I cut, scored, and folded my card base from the brown cardstock.


After die-cutting the white piece of cardstock with the second largest Wacky Stitched Rectangle die, I layered the red and white pieces onto the center of the card; then glued the three strips of patterned paper -- trimming down the vertical strips to size.


I then added the bake shop and gnomes to finish the card.


CottageCutz dies used on this card are:

http://www.scrappingcottage.com/cottagecutzbakeshop.aspx


http://www.scrappingcottage.com/cottagecutznordicgnomes.aspx


http://www.scrappingcottage.com/cottagecutznestedwackystitchedrectangleset.aspx

Sunday, September 23, 2018

Gnomes Card

Hi!

This is Anja. I just love all the new gnomes dies. It is so adorable. I had to try another one for today's card.


For this project I used:
- Cottage Cutz dies (Nordic Gnomes, Love, Peace & Joy),
- Distress Inks (Stormy Sky, Chipped Sapphire, Peeled Paint, Forest Moss, Fired Brick, Aged Mahogany, Black Soot, Old Paper, Tattered Rose, Mustard Seed, Walnut Stain),
- white card base (1015 cm),
- water color paper for die cuts and background (9,6x20,6 cm),
- snowflake stencil,
- white glitter paste,
- spatula,
- heat gun,
- black pen,
- water spritzer,
- paper glue.

First I colored the gnomes. I used Distress Inks.


Then I colored the sentiment.


Next I made the background. I used smooching technique. I dried the paper with heat gun.


When it was dry, I used then stencil and spatula to apply the paste. I let it dry.


Then I just glued the background to the base and adhered the sentiment and the gnomes. And my card was done.


This is all from me for today. I'm also inviting you to check the online store for all the new goodies.

Have a nice Sunday.

Anja Z.


The Cottage Cutz products I used: