Wednesday, March 28, 2018

CAS - Rise & Shine Hello!


Hello crafty friends! It’s Janet here to share with you a CAS (Clean & Simple) card featuring dies from the new Rise & Shine Collection and the Spring Collection. Before I forget, did you know that the Rise & Shine Collection is on sale for 25% off? Here’s the link to check out all the great breakfast and food related dies in this release: Rise & Shine Collection

So back to my card. When I first saw the Rise & Shine Collection, I was immediately attracted to the strong and colorful graphic in the Rise & Shine Phrase die. It’s big, it’s bold and it’s such a beautiful classic graphic image. I have used it today to make a hello card that will tell someone special I’m thinking about them. Since it has a farm theme, I kept the colors simple: green, craft, white, blue, red, with highlights of yellow and orange. I found that the Oval Doily and Frame die was a perfect backdrop to the die. Inside, I used the craft doily portion as the mat for the wonderful one cut Butterfly Hello die.


Today’s video is a short tutorial to show you how this card is made. I hope you’ll visit and let me know what you think. Just click on the thumbnail below or on this direct link to watch: Video Link 


Thanks for checking out today’s project. It’s always fun to be here with you.

Dies used in this project:


Tuesday, March 27, 2018

Rise & Shine Card Samples - Part 3

Hello Scrapping Cottage friends! Thanks for taking the time to stop and visit today. The new Rise & Shine dies are available in the online store and the dies are currently on sale for a limited time at 25% off the retail price.

So many cute breakfast and made with love themed dies. The design team has put together some great samples to give you some ideas on how to use these dies. We showed some samples previously- click here and here to see those.

So let's get started with the samples for today.

Card 1: This first sample is a card from Anja Zurga and she used the coffee pot & toaster dies. She created a cute card that would be a perfect way to thank someone for their hospitality or a random act of kindness. My neighbor has sent over some delicious breakfast foods on the weekends. This would make a wonderful way to say thanks.
Card 2: This is another card from Anja. On this sample she used the Homemade Bread dies. How cute would this be tucked in with a homemade treat that you are giving to someone. A handmade card is always appreciated by the recipient.
Card 3: This next sample is a card from Janja Albrecht. She used the Bowl of Cereal die to create this lovely card. I think this would make a great card to let someone know you are thinking of them or even a get well card. I like to have cards on hand to send out for no particular reason and this would be such a nice one.
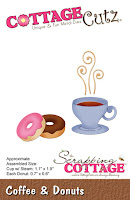
Card 4: This next sample is from Janet Axtman. She used the uber cute Breakfast Plate and Coffee & Donuts dies. Her card is such a wonderful way to let someone know you want to get together with them.
Card 5: This next sample is from me -Mary Marsh. I used the Coffee & Donuts dies to create a card to let that special someone know you love them. It could be used for an anniversary or birthday or even at Valentines day by changing up the patterned paper.
Card 6:  This next sample is also from me -Mary Marsh. I used the Breakfast Plate die to create another card to let that special someone know you love them. This one could also be used for an anniversary, birthday or Valentine's Day.

That's our card samples for today.  Hope these samples have sparked some ideas in ways you could use these dies. They are so versatile and could be used for a variety of occasions. And, remember they are currently 25% off for a limited time in the online store.

Dies used to create cards:
http://www.scrappingcottage.com/cottagecutzbreakfastplate.aspx
http://www.scrappingcottage.com/cottagecutzcoffeepotandtoaster.aspx
 
http://www.scrappingcottage.com/cottagecutzcoffeeanddonuts.aspx

http://www.scrappingcottage.com/cottagecutzbowlofcereal.aspx

http://www.scrappingcottage.com/cottagecutzhomemadebread.aspx
 

Monday, March 26, 2018

Spring Basket with Bunnies

Hi, Lois here with my last Easter card of the season.  I used one of the dies from the Spring/Easter release (Spring Basket), as well as a basic shape die I recently acquired -- the Nested Wacky Stitched Rectangles.


To start my card I cut the Spring Basket images from a piece of white cardstock and placed them on my sticky board.  For some reason they look blue on this photo; but, please believe me, they are white.


Using some Copic markers, I colored each one of the pieces.  The packaging shows the basket all in one color, but I wanted to make it look a bit more realistic.


I then cut the pieces for my card base:

White cardstock - 8 1/2" x 5 1/2"
Purple cardstock - 4" x 5 1/4" and 3" x 4"
Patterned paper - 3 7/8" x 5 1/8"
The pale purple cardstock was cut using the second largest Nested Wacky Stitched Rectangle die.


I layered the patterned paper on the larger purple rectangle and adhered them to the white card base.  Then I assembled the die-cut pieces onto the pale purple die-cut piece and adhered it to the smaller purple piece.


This was then attached to the card base using large foam pop dots, and a small Easter greeting was stamped in the corner.  You can see how these foam dots, as well as the ones behind the chick and tan bunny, give the card some dimension.


Here again is my finished card.


CottageCutz dies used on my card are:

http://www.scrappingcottage.com/cottagecutzspringbasket.aspx

http://www.scrappingcottage.com/cottagecutznestedwackystitchedrectangleset.aspx


Sunday, March 25, 2018

Easter Egg With Flowers

Hi!

This is Anja. It's just one week away from Easter and that's why Easter and Spring themed dies are on my table.


For this card I used:

- Cottage Cutz dies (Floral Eggs & Butterflies, Spring Watering Can, Spring Greenery),
- Zig markers (numbers 043, 046, 052, 202, 260),
- Craft card base (15x10,5 cm),
- dark red card stock for background (10x14,5 cm),
- patterned paper - wood (9,6x14,1 cm),
- watercolor paper for die cuts,
- embossing ink,
- rose gold embossing powder,
- heat gun,
- Nuvo drops (Dandelion Yellow),
- paper glue,
- adhesive foam pads
- watercolor brush,
- scissors.

First I cut all the background paper.


Then I die cut the flowers and the greenery from watercolor paper and colored it with Zig markers. I used Nuvo drops for the middle of the flowers.


I die cut the beautiful egg from white paper and tapped it with embossing ink. I used rose gold powder and heat it with the heat gun.


I wanted the inside of the egg to be white, so I drew around the egg and cut it out from white paper. Then I glued the two pieces together.


I put adhesive foam pads on the backside of the egg and glued it on the "wooden" background. I glued the flowers around it. And card was finished.


I hope you have all your Easter cards ready to go. I have to make a few Easter treats and then I'm ready to go.

Btw Rise&Shine dies are still available for 25 % lower price.

Have a nice Sunday.
Anja Z.


Cottage Cutz dies I used:


Saturday, March 24, 2018

Easter Sunrise

Hello Scrapping Cottage friends! Thanks for taking the time to stop and visit with us today. It's Mary Marsh here bringing you the Saturday edition of the Blog. Before I start with today's card, I wanted to let you know we have a new release of dies. It's our Rise & Shine collection and they are currently on a 25% sale. To see some card samples from the team - click here and here

Today, I am showing a card from our Spring die collection. I still need a few more Easter cards and I wanted to create one using the Happy Easter Phrase die. So lets get started with the details on how I created my card.

Step 1: I had this idea brewing in my head for awhile about sponging a sunrise with hills, the cross and the Easter Phrase. I wasn't real sure of how I was going to accomplish all of this but I think it worked out well the way I created my card.

I started by sponging my white cardstock with distress inks. I used hello honey, abandoned coral oxide and wilted violet oxide. I just purchased a few of these oxide inks and they sponge on so smoothly. I really like them. Now I can see why the team loves them so.
Card Panel: 3 7/8" x 5 1/8"
Step 2: I was going to create a slope for my hill and then I decided to use the rock die from the "under the sea" collection. I cut two of them with some soft suede patterned paper. I re-sized them by cutting off of the bottom to create my hills. Just another way to get more mileage out of the dies that you already own.
Step 3: Now for the cross, I just used a stamp I had in my collection and stamped with the help of my MISTI in soft suede ink. I centered the cross in between the slops of the hills. Attached the hills to the sponged sunrise panel. Sponged a bit more of the coral and violet inks to get the color a bit more vibrant.
Step 4: The Happy Easter phrase was just a bit to big to fit this panel so I snipped off the Happy part. Just the word Easter seemed to fit the sunrise background I created.
Step 5: I wanted to layer this image panel on a violet background but I had no cardstock that color. So I took a piece of white cardstock and sponged the outer edges with the wilted violet oxide ink. Now I had the perfect color panel. Attached to the image panel and then attached to my coral card base.
Violet Layering Panel: 5 1/8" x 3 7/8"
Coral Card Base: 5 1/2" x 4 1/4"
Step 6: I decided to do a little finish work on the inside of this card. I added several eggs and some of the flowers that are part of the Happy Easter Phrase die.
Well, that's it for me for this week. I hope I have given you an idea on another way to use the Happy Easter Phrase die on a card. See you next Saturday!

Dies I used to create card:
http://www.scrappingcottage.com/cottagecutzhappyeasterphrase-2.aspx

http://www.scrappingcottage.com/cottagecutzunderthesea-2.aspx