Tuesday, April 10, 2018

Llamas & Botanicals Card Samples (Part 1)

 
Hello Scrapping Cottage friends! Thanks for taking the time to stop and visit today. We have a brand new release of Llamas & Botanicals dies available in the online store. And the dies are currently on sale for a limited time at 25% off the retail price.

The new dies have a couple of super cute Llama images as well as cactus and other succulents. And, let's not dismiss our sweet hummingbird and a great garden bird image. There are so many different ways to use these dies and the Design Team will be featuring them in our posts over the next couple of weeks.

We wanted to get a jump start on samples so today we are showing you 4 cards using different dies from this release. You can also see a couple of other samples here and here.

Card 1: This first sample is a card from Pam MacKay. She used the Garden Bird die to create such a pretty and soft feminine card. Her design could easily be used for a variety of occasions - a birthday-thinking of you-get well or even a sympathy card.
Card 2: The next sample is a card from Lois Bak. On this card, she used the Succulent Terrarium die to create a lovely thinking of you card. Perfect for anyone but especially someone who has succulents in their home. They are so popular right now and I see them all over the garden nurseries.
Card 3: This next sample is another card from Lois Bak. She has been a busy stamper creating all these beauties for your viewing pleasure. For her beautiful easel card she used the Iron Stand w/Plants dies and for the easel bumper she used one of the Garden Frames die. These easel cards always make for such a beautiful presentation and Lois didn't disappoint us with this one.
Card 4: Our last sample for today is this pretty hello card from Janet Axtman using the Dogwood Branch die. She watercolored her blossoms, framed them with bling and added her gold hello for a sparkling presentation.
 
That's our card samples for today.  Hope these samples have sparked some ideas for ways to use these dies. They are so versatile and could be used for a variety of occasions. And, remember they are currently 25% off for a limited time in the online store.

dies used to create cards:


http://www.scrappingcottage.com/cottagecutzgardenbird.aspx
 
http://www.scrappingcottage.com/cottagecutzsucculentterrarium.aspx
 
http://www.scrappingcottage.com/cottagecutzironstandwplants.aspx

http://www.scrappingcottage.com/cottagecutzgardenframes.aspx
 
http://www.scrappingcottage.com/cottagecutzdogwoodbranch.aspx


Monday, April 09, 2018

Llama Birthday (new die)

Hello Scrapping Cottage friends! Thanks for taking the time to stop and visit with us today. It's Mary Marsh here bringing you the Monday edition of the Blog. Before I start with today's card, I wanted to give you a heads up on a few sales going on over in the online store. You can save up to 70% on some overstocked designs and also some great savings on retired designs.

And, the BIG NEWS is that we have a new release of dies and they are 25% off for a limited time. The new dies are the Llamas & Botanicals. There are 13 new designs in this release. Lois featured a card on Saturday using one of the new dies. See that here.

For my card today, I am featuring the Llamas and Potted Cactus dies. So let's get started on how I created this card.

Step 1: I wanted some festive patterned paper for this card that would compliment the llama images. I found this paper in my stash and thought it would work for the look I was after. 

Turquoise Card base: 4 1/4" x 5 1/2"
Patterned Paper: 3 7/8" x 5 1/8"
White Circle Die: 2nd largest in set
Stitched Circle Die: 2nd largest in set
Step 2: I cut the llama images and also the cactus. I used colors that coordinated with the patterned paper. The llamas are just to cute. I like how you can add color to them with the flowers and the saddle.
Step 3: I stamped my sentiment before I started assembly of the llama scene. It's a one line sentiment but it was too long for my circle. So I used my MISTI and stamped it on 2 lines.


Once this was finished I started the assembly of the scene.
Step 3: I attached the turquoise circle to the image panel. And then assembled the card base and patterned paper layer.

I used mounting tape to lift the image panel off the background. I always like the bit of dimension it gives the card.
I thought I was finished with my card but I felt it needed something else. So I scattered a few black enamel dots on the patterned paper and I thought it completed the card quite nicely. 
 

Well that's it for me for this post. I hope I have given you some inspiration on a way to use these new dies. I will be back on Saturday with another card sample.
 
Dies I used to create card: 
http://www.scrappingcottage.com/cottagecutzllamas.aspx
 
http://www.scrappingcottage.com/cottagecutzpottedcactus.aspx
 
http://www.scrappingcottage.com/cottagecutzcirclesetbasics.aspx

http://www.scrappingcottage.com/cottagecutzstitchedcirclesetbasics.aspx


Sunday, April 08, 2018

Flowers for Mom

Hi!

It's Anja here. My mom is celebrating her birthday this week and I was looking for ideas for her birthday card. I tried out foam flowers and I love the effect. I think I will make some more in different colors.


For this card I used:
- Cottage Cutz dies (3D Flower #1, 
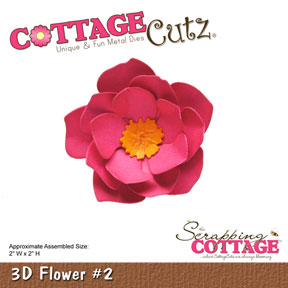
3D Flower #2, 3D Flower #7, Leafy Foliage, Oval Set, Nested Stitched Scallop Oval set, Sugar & Cream Alphabet),
- Distress Inks (Aged Mahogany, Forest Moss, Worn Lipstick, Fired Brick),
- foam in different colors,
- craft card base (15x15 cm),
- patterned paper (14,5x14,5 cm),
- white and craft card stock for die cuts,
- flower stamen,
- green tape for flowers,
- iron,
- silicone glue,
- paper glue,
- wire,
- embossing tools.

First I die cut the flowers and leaves, using foam. I colored the foam with Distress Inks.


Then I used the iron and heat all the pieces.


You don't have to heat it for a long time. The foam shrinks and it peels of the surface. Then I used embossing tools to add some more shape to the flowers and leaves.


I used flowers stamens for the middle of the flower. I used a bit of wire to pull it trough the flower.


Then I taped t with this green adhesive tape that's used for making paper flowers.


I made all the flowers in the same way. When I had the finished I cut patterned paper for the background.


Then I die cut oval shapes for the front and inside of the card. I also cut letters from craft card stock.


When I had everything cut I started with adhering. I used silicone glue for adhering flowers to the front of the card.

And this is the finished product.


Have a nice Sunday!
Anja Z. 


Cottage Cuts products I used: