Thursday, March 22, 2018

Easter Bunny

Hello Scrapping Cottage Buddies!

It is Pam from Stamper at Heart Blog Spot creating with you today! And before I get started I wanted to give you a heads up about the sales we are have at our store.  We have a Collection of new release dies called Rise and Shine that are currently 25% off and they are just so much fun!  To see some card samples from the design team click here and here!

Now on with today's card!  I am on my last Easter card for my friends and family in fact most of the cards are just about to go in the mail at the end of the week.  This is my last one and I just love how this little guy turned out in his overalls with the little buttons!


Designer Steps:
 1.  Start with an A2 white card base and cut a 4 x 5 1/4 piece of blue card stock.  Run the blue card stock through a cloud embossing folder
 2. Cut out the greeting using the Happy Easter Phrase die and white card stock.  Glue the phrase to the upper part of the blue embossed panel
 3. Cut out the white fence using the Victorian Fence die.  Then glue it just below the greeting
 4.  Next cut out a strip of green card stock 4 x 1 1/4 and 3 grass strips using the Spring Grass die
 5.  Layer the grass onto the bottom part of the card as shown
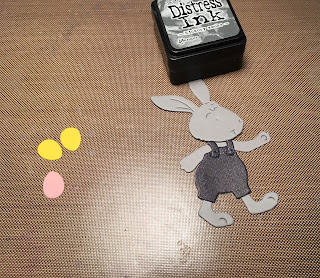
 6.  Using gray card stock and the Mr. Peter Rabbit die cut out the body.  Next use the same die and cut out the overalls in a denim DP.  Also using the same die and cut out the Easter eggs using yellow, orange, and pink card stock
7.  Shade the bunny with a gray ink then glue on the overalls add the black pearl eye and tiny buttons.  Glue the eggs into the grass and one in the bunny's hand and your card is complete.

Cottage Cutz Products


I hope that you are finishing your Easter cards too and that this little card has given you some inspiration!  As always thanks for stopping by!
Blessings
Pam


Wednesday, March 21, 2018

Quick and Easy Easter Treat Containers


Hey Everyone, Sherry here with CPR - Craft Pray Repeat and I'm here with another project using some of my new favorite dies. I have really enjoyed this Spring and Easter Release and hope that you have enjoyed the many projects that you've seen on the CottageCutz YouTube channel and blog. Click Photo below to watch the video showing how fun this project is to make and how it would be a great project for schools, church groups, scouts and of course, to share at your office with co-workers.


Remember that the Rise and Shine Collection is still on sale at the store.
Click HERE to go directly to that page 
to start looking at the amazing dies that were released.


Remember to practice your CPR - Craft Pray Repeat.
Thanks for visiting me today and happy crafting.
God Bless,
Sherry

Tuesday, March 20, 2018

Coloring Easter eggs

Hi, Janja here!

Coloring Easter eggs is a ritual in the spring. There are so many fun ways to decorate Easter eggs. Let's see how Bunny did it.


Supplies:
- CottageCutz dies: Egg Painting Bunny, Spring MeadowStitched Alphabet, Miss Petunia Bunny, Just Hatched Chick, Pillow Box Plus, Stitched Oval Set
- white card base: 5.3 x 5.3" (13,5 x 13,5 cm), folded
- white cardstock
- silver cardstock
- Distress inks: Spiced Marmalade, Festive Berries, Aged Mahogany, Broken China, Mowed Lawn, Tea Dye
- Distress Oxide ink Vintage Photo
- Memento inks: Tangelo, Lady Bug
- glue, double-sided adhesive tape, self-adhesive pads, fun foam

Cut out all the pieces we need. Mine are colored with Distress inks.


Cut the same large white frame as the card base. Stamp some stains on it.


Make two holes in the frame, and insert a string. Attach letters on the string.


Fix the frame to the card base with a self-adhesive foam tape or use a fun foam.


Complete the card.


And for the youngest, something sweet. Pillow boxes with chocolate eggs.


I would like to remind you that the new Rise & Shine release is still available for 25 % less. 

Thank you for coming over. Have a nice day. 


Monday, March 19, 2018

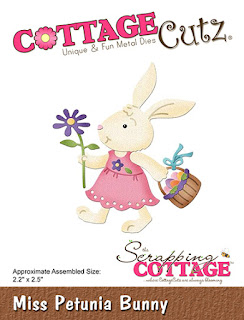
Miss Petunia Bunny

Hi, Lois here with a quick Easter card.  CottageCutz's Spring/Easter release has lots of cute dies.  I'm using three of them on my card today -- Happy Easter Phrase, Miss Petunia Bunny, and Spring Meadow.   Before I explain about my card, I first wanted to remind you that there is a 25% discount sale on the newest Rise and Shine release in the CottageCutz store, with lots of cute breakfast and cooking dies.  Be sure to check them out while the sale continues.

And now for my card:


Before cutting out the dies, I put a sheet of two-sided adhesive on the back of a piece of white cardstock to make adhering the smaller die-cuts easier.  To tell the truth, I waver back-and-forth between using the adhesive sheets and not.  Either process will work well if you have a fine-tip applicator on your glue for when you don't use the adhesive sheet.

After cutting out the pieces, I colored them and constructed each element.  I used a black mini brad for Miss Petunia's eye.


Then I gathered the supplies for my card base:

White cardstock - 8 1/2" x 5 1/2"
Sky patterned paper - 4" x 5 1/4"
Brick patterned paper - 4" x 1 1/2"
Green cardstock to cut the grass from the Spring Meadow die


I then constructed my card base, adding the "Happy Easter" phrase.  


After slipping Miss Petunia between the rows of grass, I placed the egg on the wall, and stuck the flowers (from the Happy Easter Phrase die) to the stems within the grass.  I tend to work "by the seat of my pants" and realized that the phrase didn't really stand out as much as I had envisioned, so I pulled out my Dark Green Wink of Stella brush and went over the lettering.  I was much happier with the result -- it now glitters!


CottageCutz dies used on this card are:

http://www.scrappingcottage.com/cottagecutzhappyeasterphrase-2.aspx

http://www.scrappingcottage.com/cottagecutzmisspetuniabunny.aspx

http://www.scrappingcottage.com/cottagecutzspringmeadow.aspx