Saturday, February 24, 2018

Miss Petunia Bunny (New Die)


Hello Scrapping Cottage friends! Thanks for taking the time to stop and visit today. It's Mary Marsh here bringing you the Saturday edition of the Blog. Have you noticed the days are getting longer? We are getting closer to Spring and Easter.

We have a new release of dies. There is a In-Stitches release with 12 new dies and a Spring release with 21 new designs. And, some other good news is that for a limited time, you can get the new dies at 25% off. Just in time to create your Easter or Springs cards.

Today, I am using the new Miss Petunia Bunny die to create an Easter card.  She is just the cutest little thing. So let's get started with some details on how I created my card.

Step 1: This week I started my card with a sketch I found online. I thought it would work perfectly to showcase Miss Petunia as well as layers to my card. Since I like to use patterned paper, the addition of layers to my cards always works for me.
Step 2: I looked through my patterned papers and found this Spring Mix. I liked the bright colors so I matched it up with some corresponding cardstock.
Berry Burst Card Base: 4 1/4" x 5 1/2"
Patterned Paper Layer: 4 1/8" x 5 3/8"
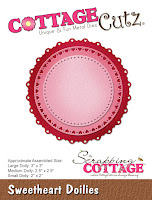
Berry Burst Doily Circle: I used the largest of these dies
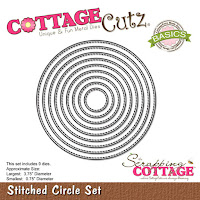
White Stitched Circle: I used the 4th largest of these dies
Berry Burst rectangle Layer: 1" x 5 3/8"

Step 3: I cut Miss Petunia Bunny using different colored cardstocks. The eggs in her basket I cut in white cardstock and then colored with distress inks - spun sugar, seedless preserves, tumbled glass, squeezed lemonade. Used a little pink chalk to add some color to her floppy ears. Attached the body pieces using Ranger Multi Matte Medium.
Step 4:  For the image panel I used a cloud template and sponged with tumbled glass distress ink. For the grass, I used mowed lawn distress ink and a dauber and sponged around the bottom of the circle.
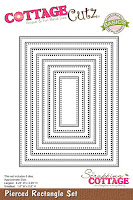
I realized I forgot to cut the larger rectangle panel. I used the 3rd largest pierced rectangle panel and cut in white cardstock. Decided to stamp a sentiment in the upper right corner with berry burst ink. I masked off the part of the sentiment I didn't want to use before i inked my stamp. For placement I used the Stamp-a-ma-jig.
Step 5: Now that the card elements are ready, I can start assembly. Added all the elements of the sketch to the patterned paper panel. I eliminated the scalloped trim on the long rectangle panel. I thought my diamond background paper was a bit to busy to add scallops.
I used dimensional adhesive to attach Miss Petunia Bunny to the image panel. I always like the look of the image lifted a bit from the background. It adds depth. 
 To finish off my card I scattered a few berry burst sequins. I hope I have given you an idea for using the Miss Petunia Bunny die. She is on sale for 25% off and there is plenty of time to get her for Easter cards.
 
See you next Saturday. Enjoy your weekend!
 
Dies I used to create card:
 
http://www.scrappingcottage.com/cottagecutzmisspetuniabunny.aspx

http://www.scrappingcottage.com/search.aspx?find=sweetheart+doilies

http://www.scrappingcottage.com/cottagecutzstitchedcirclesetbasics.aspx

http://www.scrappingcottage.com/cottagecutzpiercedrectanglesetbasics.aspx
 

Friday, February 23, 2018

Easter Wreath

Happy Friday Cottage Cutz fans!  Are you ready for the weekend?  I know I am.  It's Jeanne posting today and I have a card that I created from an inspiration challenge at Fusion Challenge blog.
For the challenge you can use the photo as inspiration or the sketch or both.  When I saw the wreath on the door I knew that the new Fresh Spring Floral die would be PERFECT. Here is the challenge:
Not only would the die be perfect, but I have a paper stack of "wood" papers!  I did not want my card to be dark so I picked a light color weathered wood paper and cut it to 5 1/2 x 4 1/4 inches (A2).
I love the color combination of yellow, lavender and purple.  It reminds me of Spring.  I cut the flowers from various shades of those colors and the foliage from two shades of green and Crumb Cake which matches the wood tone on the distressed wood panel.
I glued the two tone flowers together and used a marker to accent the centers of the tiny flowers.
Next I arranged all the wreath pieces on the upper portion of the panel leaving enough space for a sentiment strip.  I adhered all the pieces except for one of the larger purple flowers.  I set that aside. I cut a piece of Crumb Cake cardstock 4 1/4 x 11 and scored it at 5 1/2 inches to make a top fold card.
I cut two strips 5/8 x 5 1/2 inches and heat embossed "Happy Easter" in both white and a metallic purple.  I wasn't sure which one I would like better.
I decided on the purple and glued it down letting the edges hang over the sides of the card. Then I trimmed it with my paper snips.  For short cuts like this I find that easier than using a paper trimmer.
I added the last large purple flowers by popping it off the card using a foam dot.  I added iridescent sequins that change from yellow to purple.  It really adds some sparkle to the wreath - almost like little berries!
I hope you enjoyed today's card.  The new Fresh Spring Floral die is very versatile - this could easily be made a thank you, birthday or thinking of you card just by changing the sentiments.  And by changing the colors you can match it to the seasons or your recipient's personal tastes.

For a limited time this die and all the new Spring dies are on sale!  Be sure to visit the website!

http://www.scrappingcottage.com/cottagecutzfreshspringfloral.aspx

Thanks for stopping by today.  Have a creative weekend!


Thursday, February 22, 2018

Elegant Eggs

Good Morning Scrapping Cottage Friends!

It is Pam from Stamper at Heart Blog sharing with you today!
Easter is coming early this year so I have already gotten started making my cards for family and friends.  In the Cottage Cutz store you will find a wonderful selection of Easter and Spring dies.  And as of right now these new dies are all 25% off!  The card I am showing you today was a rather fast and easy one!  So I am making quit a few of them!


Designer Steps:

1.  Use an white A2 card base cut a piece of designer paper 4 x 5 1/4 and the use the largest Stitched Scallop Rectangle die and cut a white rectangle
2.  Using the Floral Eggs and Butterflies die cut out the eggs in yellow and blue and the butterfly in black card stock

3.  Using the Spring Meadow die cut out the grass in green

 3.  Glue the blue egg to some bright pink card stock and the yellow egg to some pale blue card stock.  Cut out the eggs
 4.  Use a shimmer pen all over the cut out eggs and butterfly
  5.  Stack the grass at the bottom of the scalloped rectangle
 6.  Tuck the eggs behind the grass and add the butterfly
7.  Stamp your sentiment and layer onto blue DP

Cottage Cutz Products


Thanks so much for stopping by today! Hope to see you again real soon!
Blessings
Pam


Tuesday, February 20, 2018

Get Well Cards

Hi, Janja here!

I have not managed to create with the new Spring dies, as they have not yet arrived at my address.
So, today I show you some cards I've created with Get Well dies.
With them, you will brighten the day to anyone who feels bad.


Chicken Noodle Soup from our kitchen.
Supplies:
- CottageCutz dies: Chicken Noodle Soup, Bear Patient, Ouch With Tooth, Nurse Puppy, Stitched Wide Square Frame Set, Build A House Set 2 (window)
- kraft card base: 5.3 x 5.3" (13,5 x 13,5 cm), folded
- patterned paper: 4.7 x 4.7" (12 x 12 cm)
- white and colored cardstock
- Distress inks: Tattered Rose, Spiced Marmalade, Aged Mahogany, Brushed Corduroy, Vintage Photo
- double-sided adhesive tape, glue and self-adhesive pads

Prepare a card base from kraft cardstock, and two frames. Cut a patterned paper to the desired size. Cut a square from a white cardstock.


Cut all the individual pieces from colored cardstock. Emphasize the edges with different Distress inks.


To finish the card, mount all the elements as shown.


I added the window later. 


Inside the card. 


I embellished the glass on the window, and sentiment with a clear Wink of Stella.


For the next three cards, I used a little smaler card base 4.7 x 4.7" (12 x 12 cm).


Thanks for stopping by. Have a lovely day!