Tuesday, March 06, 2018

Rise and Shine Dies


http://www.scrappingcottage.com/cottagecutzriseandshine.aspx
Hello Scrapping Cottage friends! Thanks for taking the time to stop and visit today. I have some exciting news to share. There is a brand new release of dies. It's our Rise & Shine release and the designs are currently on sale for a limited time at 25% off the retail price.

So many cute breakfast and made with love themed dies. The design team has put together some cute samples to give you some ideas on how to use these dies. For the next 3 Tuesdays, we will be showcasing these new dies.

So let's get started with the samples for today.

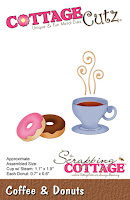
Card 1: This first sample is a card from Lois Bak. I love how the card looks the breakfast plate is sitting on a checked table cloth. Reminds me of going to a diner for breakfast - so cute. She used the Breakfast Plate, Coffee & Donuts  and Rise & Shine Phrase.

Card 2: This next sample is a card from Pam MacKay. She carried her theme through with the coffee themed designer paper. She used the Coffee & Donuts and the Sweet Phrase dies.
Card 3: This next sample is from Jeanne Knobbe. She used the Yogurt & Fruit dies to create a beautiful thank you card. She colored the images with her Copic Markers. Love how her sentiment ties back to the bowl of fruit.
 
Card 4:  This next sample is from Janet Axtman. She used the uber cute Pancake & Waffle die to create a thinking of you style card. She accented her sentiment with a muffin from the Pastry Goodies dies.  
Project 5:  The final project for this week comes from our guest designer Sherry Wolfe. She created a recipe card using the Pastry Goodies dies. She is making a recipe book for her son and this will be a part of it. She used the Made with Love die for her book title page.

That's the samples for this week. I will have another set to show next Tuesday. Hope these samples have sparked your creativity. The dies are currently 25% off for a limited time in the online store.
 
Dies used to create cards:
 
http://www.scrappingcottage.com/cottagecutzpancakesandwaffle.aspx

http://www.scrappingcottage.com/cottagecutzcoffeeanddonuts.aspx

http://www.scrappingcottage.com/cottagecutzbreakfastplate.aspx

http://www.scrappingcottage.com/cottagecutzpastrygoodies.aspx

http://www.scrappingcottage.com/cottagecutzyogurtandfruit.aspx

http://www.scrappingcottage.com/cottagecutzmadewlovephrase.aspx

Monday, March 05, 2018

High Flying Bunny


Hi, Lois here today.  One of the things from my bucket list that I have been able to cross off is flying in a hot air balloon.  It was so quiet up there (except when they turn on the flame to get more hot air into the balloon).  So, when I saw this cute new die from CottageCutz, I knew I would have to make a card with it.


It was a pretty simple card to construct.  I cut the cardstock and paper as follows:

White - 8 1/2" x 5 1/2"
Navy - 4" x 5 1/4"
Cloud paper - 3 7/8" x 5 1/8"


Then I gathered some scraps of various colored cardstock and cut the bunny and balloon.


The clouds are cut from one of the new stitched dies from CottageCutz.  I stamped my Happy Easter sentiment on the larger cloud.


All that remained was to construct my card.  I used the illustration on the front of the Spring Hot Air Balloon package as my guide.  Easy Peasy!


Both the Spring and the Stitched series of dies are still 25% off, so be sure to check out the Scrapping Cottage/CottageCutz store for the entire line of dies.  CottageCutz dies used on my card are:

http://www.scrappingcottage.com/cottagecutzspringhotairballoon.aspx

http://www.scrappingcottage.com/cottagecutzstitchedsuncloudsandumbrella.aspx


Sunday, March 04, 2018

Easter Wreath

Hi everyone!

It's Anja here. Easter holidays are approaching and it's time to make some Easter cards. I decided to make an Easter wreath, using the new Fresh Spring Floral. It allows you to make a perfect wreath. I used eggs instead of flowers.


For this card I used:
- Cottage Cutz dies (Fresh Spring Floral, Happy Phrase, Mr. Peter Rabbit, Nested Stitched Scallop Circle Set, Pierced Circle Set),
- watercolors,
- white watercolor card stock for die cuts,
- white card base (13,5x 13,5 cm),
- patterned paper (13x13 cm),
- acetate foil,
- adhesive foam pads,
- double sided adhesve tape,
- washi tape,
- black pen,
- white pen,
- paper glue.

First I die cut the pieces for the wreath. I die cut two sets. I used my new Gansai Tambi watercolors to color the greenery and the little flowers.


I added small white dots with white pen to the middle of the flowers.


Then I used the same colors to color a piece of paper. I drew stripes of different colors. I let the paper to dry.

 
I cut Easter eggs from different colors.


Then I combined everything into the wreath and glued it together.


I cut a scalloped circle and then die cut  another circle into it to make a circle frame.  I glued the frame around the circle cut from the patterned paper.


Then I cut the circle into the card base and pattered paper. I used washi tape to hold the die to the middle of the paper.


I put stripes of double sided adhesive tape around the hole and glued acetate foil on it.


I added adhesive foam pads on the other side of the patterned paper.  Then I glued the wreath on the foil and then the patterned paper on the card base.


Something was missing, so I decided to put a sentiment on the card. I die cut phrase happy from white card stock and glued it over the wreath.


I decided to hand write the phrase Easter inside. I used black pen.


And this is my finished Easter card.


Don't forget to stop by in the store and check out the new stitched collection of dies. They are so loely and you can still get them 25 % off.

Have a nice Sunday. I'll be back again next week.
Anja Z.

Cottage Cutz dies I used:


Saturday, March 03, 2018

Sewing theme card

Hi, Janja here!

My today's card was made with a set of cute sewing elements.
I have some friends who love sewing. That's why I was especially pleased with the Stitched Sewing Notions die. With this die we can make a few cards or thank you cards, for everyone who loves sewing. I also prepared a matching tag.

The Stitched dies and the new Spring dies are currently 25% off. Check them out in The Scrapping Cottage store.


Supplies:
- white card base: 4.25 x 5.5" (10,7 x 13,9 cm), folded
- kraft cardstock: 3.7 x 4.8" (9,5 x 12,3cm)
- patterned paper
- white and kraft cardstock
- Distress ink pads: Festive Berries, Aged Mahogany, Vintage Photo
- glue, double-sided adhesive tape, self-adhesive pads

Prepare a card base from a white cardstock. Cut a smaller layer from a kraft cardstock, and attach to a card base. Die cut two rectangles from patterned paper and white cardstock (the largest die from both sets).
Make a matching tag using the Mail Tag Set die.  


Now cut out all the sewing elements. For shading I use bright and dark tones to add a dimension.  
Look how cute these cutouts are. Especially the "handmade" label with heart. The perfect end touch to handmade items.  


 Complete the card and tag.


Thank you for coming over. Have a nice day.