Thursday, January 04, 2018

Puppy Love!


Hello Scrapping Cottage Friends!

It is Pam crafting with you today!  And I have been cranking out some fun Valentine's Day cards over the past few days.  It is really cold out so it is the perfect time to be in my warm craft room!!

Design Steps


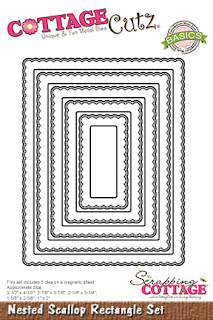
 1.  Use an A2 white card base. Cut a slightly smaller piece of pink DP and glue to the front.  Cut a piece of red glitter paper 2 x 5 1/4 and glue to the left side of the card. Next using the second to the largest Nested Stitched Scallop Rectangle cut out a piece of pink heart DP and a piece of red heart DP
 2.  Glue the pink heart DP flat to the card as shown and then mount the red heart DP to the card using dimensionals
3. Using the Puppy w/heart die cut out the pup in light gray card stock.  Cut out the bow and the heart in red glitter paper. Stamp the sentiment and layer onto pink DP

4.  Using Copic markers C0, C1, C2 and C3 shade the pup.  Color the nose black and glue to the pup add black rhinestones for the eyes.  Cut the inside of the ears using pink DP glue to pup


 5. Glue the heart to the mouth and add the bow to the top of the head.

Cottage Cutz Products


This is such a darling Valentine!  It will bring a small to anyone's face!!

Monday, January 01, 2018

January Birthday Card

Hi, Lois here wishing you a happy 2018!  I hope you and your family had a wonderful Christmas and are looking forward to a happy and healthy new year.

We all need birthday cards throughout the year, and CottageCutz has a series of stamp/die combos that can help you with that.  There is a set for each month of the year, celebrating the "flower-of-the-month."  My card today is for January and the Carnation.


The layout is simple, making the carnation the star of the show.  To begin my card, I stamped and colored the images.


I then cut them out with the coordinating dies.


The pieces for the card base are as follows:

Green base piece - 8 1/2" x 5 1/2" (scored at 4 1/4")
Patterned paper - 4" x 5 1/4"
Green oval - largest Stitched Scallop oval
White oval - next to the largest Double-Stitched oval


Constructing the card base was simple.


I added large foam pop dots to the back of the die-cut images, trimming the one for the butterfly just a bit.


I then adhered the die-cut images to the front of the card.


I added three sequins and brushed the carnations and butterfly with a clear Wink of Stella brush.  You may be able to see some of the "glitter" on the images.   IRL it is much more visible.


This again is my finished card.


There is a huge after Christmas sale going on right now with savings up to 80%. Check it out here.

CottageCutz dies  used on my card are:

http://www.scrappingcottage.com/cottagecutzcarnation-januarystampanddie.aspx


http://www.scrappingcottage.com/cottagecutznestedstitchedscallopovalset.aspx

http://www.scrappingcottage.com/cottagecutzdouble-stitchedovalsetbasics.aspx

Sunday, December 31, 2017

Look Through A Window

Hi!

It's Anja here on the last day of 2017. It was an awesome year for me. I got a new job, met a lot of new people and got a ton of new experiences. One of the highlights for sure was joining Cottage Cutz Design Team.

For my last craft project I made a card with a window and decorated interior. It was such a fun making it.


For this card I used:
 - Cottage Cutz dies (Fireplace w/ Accessories, Victorian Window, Lantern w/ Holly Vine),
- Distress Inks (Peeled Paint, Forest Moss, Pine Needles, Wild Honey, Mustard Seed) and Oxides (Fired Brick, Vintage Photo, Antique Linen, Walnut Stain, Black Soot),
- craft card base (14,5x10,5 cm),
- craft and white cardstock for background (10x14 cm),
- white cardstock for die cuts,
- white pigment ink pad,
- adhesive foam pads,
- double sided adhesive tape,
- textured plate - bricks,
- acetate foil
- craft knife,
- paper glue.

First I cut two holes for the window, one in the card base and the other into the craft rectangle. I die cut the window first two use it for drawing the cutting line. 


Then I made the brick background. I used white pigment ink to color around the edges of the craft paper.


I used acetate foil for the window. I adhered it with double sided tape.


I used adhesive foam pads to add the brick background.


I used Distress Oxides to color around white brick background.


Then I die cut and colored all the pieces for the window and the fireplace.


And then I had to glue everything together. This is the final result.


I'm off to my friends house now to spend the New Year's eve there.

I wish you all the best in 2018. Lots of peace, smiles, health, love and positive energy. Have a great celebration tonight.

See you again in 2018 :)
Anja Z.


Cottage Cutz product I used:


Saturday, December 30, 2017

A Blooming Heart

Good morning!  Mary is on vacation so it's Jeanne posting again this week.  And I have another Valentine's Day card today.
This is one of those cards that started one way and ended up completely different than planned.  I love this Blooming Heart die and planned to use it as a stencil.  (I received a set of 12 shimmer mists for Christmas and really wanted to play with them!)  So I first cut the heart from a piece of mixed media card stock.
I used temporary snail adhesive to stick the heart to another piece of mixed media card stock and I placed it in a box.
I used two colors of the shimmer mist to spray the card stock.
Then I used my heat gun to dry it.  (I'm pretty impatient when it comes to things like drying - so my heat gun is a favorite tool!)
When I removed the stencil I had a very pretty heart impression.  Hard to tell in the photo but it is VERY shimmery.  The shimmer is just perfect for this elegant heart.
I wasn't quite sure what I wanted to do with this piece, but I loved the "stencil" that was now also coated in the shimmer mist.
So I glued it to a piece of  white card stock that I had die cut with the Cross-Stitched Squares die. (The 3" square one.)
I then used a piece of 4" square paper for the background and glued it all to a top folding 4" square card.  As a final touch I added some rhinestones.

Sometimes just playing around with your supplies yields wonderful results.  I had planned to throw away the "stencil" but it ended up making a simple yet beautiful card!  And I still have the original piece, I just haven't decided what to make with it yet.

Dies used:
http://www.scrappingcottage.com/cottagecutzbloomingheart.aspx
http://www.scrappingcottage.com/cottagecutzcross-stitchedsquaresetbasics.aspx

Thanks for stopping by today.  I hope you have a very creative weekend!  And don't forget - Cottage Cutz is having a wonderful sale right now.  Click the owl above to be taken to the web site!