Sunday, November 19, 2017

Gingerbread Card


Hi,


it's Anja here with my new card. I made a simple one this week, because I was away from home and

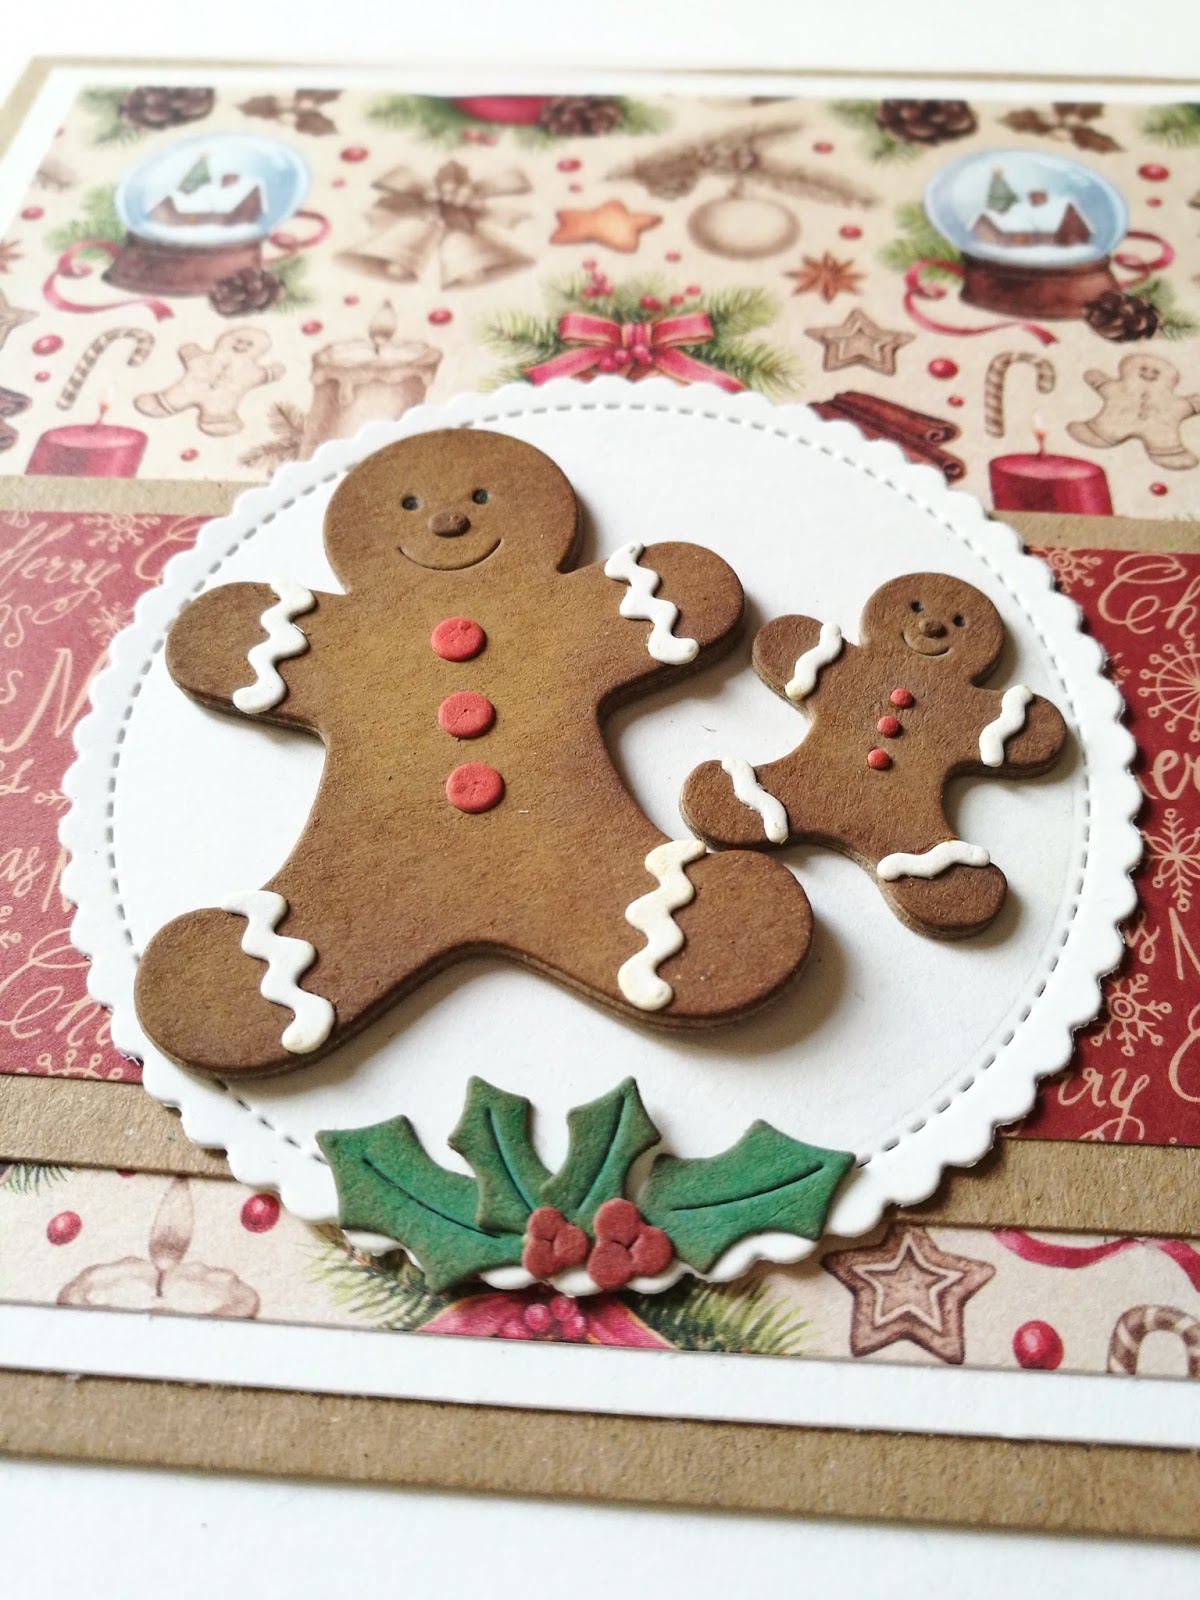
didn't have all my crafting materials with me. I combined two cute gingerbread men from two different sets. I love how Cottage Cutz sets complement each other so well. 

 
The materials I used for this card:
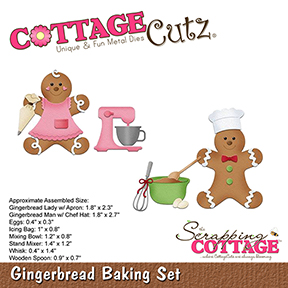
- Distress Oxides (Vintage Photo, Fossilized Amber, Fired Brick, Walnut Stain, Lucky Clover),
- craft card base (15x15 cm)
- white and craft card stock for die cuts,
- white (14x14 cm) and patterned (13x13 cm) paper for background,
- craft (14x6 cm) and patterned (14x5 cm) paper stips for background,
- paper glue.

First I die cut gingerbreads from craft card stock. I cut five bigger ones and four smaller ones. I colored them with Distress Oxides. I cut the smaller pieces from white card stock.Then I glued all the cut gingerbreads together to get a 3d effect.


I used the small holly branch leaves that were left from cutting the smaller gingerbread.


Then I cut all the other paper pieces for the background.


And then I just put everything together to get the final result. 


Gingerbread men could be easily used as little magnets for the fridge. They look quite realistic when you make them in layers. And they ares so easy to make.


Thank you for visiting the blog today. Make sure you check the new video from Janet. She is showcasing all the beautiful dies from our Black Friday release. It is the cutest "get well" set of dies
I've ever seen. It will be in the store soon, so stay tuned :)


Have fun and enjoy your Sunday. 
See you next week. 
Anja Z.


Cottage Cutz products I used:


Saturday, November 18, 2017

Feel Better (New Get Well Dies)

Hello Scrapping Cottage friends! Thanks for taking the time to stop and visit today. It's Mary Marsh here bringing you the Saturday edition of the Blog.

 Some exciting news! There is a new bundle of "Get Well" dies that are coming as part of the CottageCutz Black Friday release.  And, along with this new release will be some special pricing on all the dies. They will be in the online store soon.

Here is a short video that will show all the new dies in the Black Friday release.

Today, I am giving you a sneak peek of two of the new dies. I am using Chicken Soup and Ouch with Tooth dies. They are all so cute. This little chicken just made me giggle so I had to create a get well card with him as the star. So let's get started on my card details.

Step 1: Since I knew what dies I was going to use, I just needed to decide on my card colors plus the card layout. I found a great sketch that I thought would work well with my design. I chose the wonky striped patterned paper because I thought it would work well with the whimsical chicken image.

Yellow Card Base: 4 1/4" x 5 1/2"
Yellow Striped Patterned paper: 4 1/8" x 5 3/8"
Red Rectangle Layer: used the largest of the pierced rectangle dies.
White Image Layer: used the largest of the rectangle dies.
Step 2: I decided to cut and assemble my die pieces at this point just to make sure everything would fit in the layout I had chosen to use. Love the detail on the can of chicken soup. the chicken is just too cute sitting in the bowl along with the soup noodles.
Step 3:  Started my card assembly. I adhered the panels to the card base with double sided tape. It's my go to adhesive. I wasn't sure what I was going to use for the horizontal layer of the sketch. I thought of ribbon but because this is more of a fun card, I decided to use yellow cardstock. The panel measures 1 1/4" x 4 1/4".

Step 4: I am now ready to adhere the dies to the image panel. I used the chicken noodle soup can in place of the circle on the sketch. The detail on the soup can is amazing. I have a close-up photo and also you can click on the photo to make it even larger.
I finished off my card with a few sequins - hearts and regular circles. I thought it just added a finished element to the bright and cherry card.
 
That's it for me for another week. See you next Saturday. For all our US friends, hope your Thanksgiving Day celebration is a wonderful one.
 
Dies I used to create card:
 
 
http://www.scrappingcottage.com/cottagecutzrectanglesetbasics.aspx

http://www.scrappingcottage.com/cottagecutzpiercedrectanglesetbasics.aspx


Friday, November 17, 2017

Gingerbread Spice

Hi Cottage Cutz fans!  It's Jeanne today with a sweet card.  I decided to use pink and pastel green instead of traditional Christmas colors so this could be a thinking of you card, birthday card, or in more traditional colors a Christmas card.
I've collected gingerbread men for years so there are several of this year's Christmas release that I think are really special!  This card uses two of them.
To begin, I cut a piece of background patterned paper to 4 1/4 x 5 1/2 inch to fit on my A2 card base.  I die cut a white panel using the largest of the Nested Stitched Eyelet Rectangle dies.  Then I cut a 1/2 x 5 1/2 inch strip of white card stock and laid down a piece of washi tape.  I used the white base because otherwise the washi tape got lost on the dots of the patterned paper.
I die cut the main pieces of the image from a few colors of card stock and the smaller pieces from white.
I used Copic markers to color in the small bow, whisk and tip on the pastry bag.  And I sponged the edges of the girl, her dress and pocket, and the bowl with their corresponding colors of ink (Baked Brown Sugar, Pistachio Pudding and Mint Macaron - the names of the ink and the subject matter is making me hungry as I write this!)
I used a stamp from the Sweet Gingerbread stamp and die set for the sentiment. It is stamped in Baked Brown Sugar.
I adhered the panel to the card front at a slight angle using foam tape.
My final step was to glue the gingerbread girl down and add the bowl and pastry bag.  To give them some dimension I used foam dots underneath them.

http://www.scrappingcottage.com/cottagecutzgingerbreadbakingset.aspx

http://www.scrappingcottage.com/cottagecutzsweetgingerbreadstampanddie.aspx

http://www.scrappingcottage.com/cottagecutznestedstitchedeyeletrectangleset.aspx


Thanks for stopping by today and have a creative weekend!


Thursday, November 16, 2017

Nativity Blessings

Good Morning Scrapping Cottage Friends!

It is Pam on the blog today!  I just love the nativity scene that Cottage Cutz has created.  It is so beautifully detailed and everything looks so precious!


 Designer Steps:

 1.  Cut an A2 Kraft card base, cut a piece of wood grain DP 4 x 5 1/4. Cut a piece of navy dotted paper 4 x 5 1/4 and back it with foam. Use the Pierced Rectangle die to cut through the paper and foam to create the window
 2.  Glue down the wood grain paper then the frame on top of the wood grain
 3.  Cut out all of the pieces using the Cottage Cutz Nativity - Joseph & Animals and Mary, Angel and Baby.  I cut all the pieces out of white
 4.  Color all of the pieces with Copic Markers
5.  After the pieces are colored assemble them on the card as shown.  Cut the word blessings with the Cottage Cutz Expressions Blessings die out of kraft card stock and glue to the top of the card

Cottage Cutz Products


I hope you love this set as much as I do! It is the true meaning of Christmas!

Blessings
Pam