Tuesday, August 29, 2017

Rub-A-Dub-Dub Birthday!

Hello all! I hope the week is treating you well so far. It's back to school time and I'm sure many of you sent your students off to start a new year like I did yesterday. Time flies alarmingly fast!

For your viewing pleasure today, I'm taking a little break from the wedding theme to bring you a birthday card for a little one in your life. It features the Bathtub Time die that that was part of the baby release this spring. This die has ten individual elements you can use to create a large variety of scenes. It's a great die to play around with and easy to construct. There are enough pieces to decorate both the front and the inside of a card like I did on this one.

I also used the Stitched Oval Set to create the frame on the front and the mat inside the card. The Happy and Birthday Expression dies were used for the sentiment inside.

To learn how this card came together, please click on the YouTube thumbnail below. If you are a fan of embossing or want to some additional ideas on combining embossing techniques, I think you'll enjoy this one.


Thanks for spending a few minutes with me today. I'll be back tomorrow with another video.

- Janet
  SugarShine Designs

Dies Used For This Project:


Monday, August 28, 2017

Wedded Bliss Club

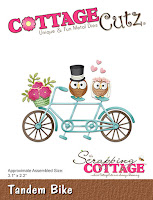
Hi, Lois here with my Monday post.  August has always been a month for weddings for me.  My late husband and I were married in August fifty-five years ago.  So I'm bringing you another card made with the newly-released wedding series of dies from CottageCutz.  This time that cute little owl couple, as well as the stitched rectangle scallops..


I cut the many pieces for my little scene from various scraps of colored cardstock.


I added some additional color to some of the pieces to give them a bit of dimension.


Purple is one of my favorite colors, and my card reflects that.  Both the card base and the patterned paper accent are in shades of purple.  The card base is 5 1/2" x 8 1/2", scored in half; the patterned paper is cut slightly smaller.  My scene will appear on a piece of pale blue cardstock glued to the largest stitched scallop rectangle die cut.  In addition I cut a 1" x 4" piece of black cardstock for the road and tore a narrow strip of green for the grass.


I constructed the background for my focal panel, as shown.  I "borrowed" an idea from my fellow DT member, Pam, and drew a broken white line down the center of the road.  I had seen that on a card that she made a few weeks ago.  Thanks, Pam for the idea!


Then came the fun part of putting the bicycle and owls together.  


I stamped the sentiment, punched it out, and finished my card.


I realize purple is not most people's first choice for a wedding card; but, as I mentioned, I love that color!  And I think it goes well with the whimsical bride and groom owls.

CottageCutz dies used on my card are:

http://www.scrappingcottage.com/cottagecutztandembike.aspx

http://www.scrappingcottage.com/cottagecutznestedstitchedscalloprectangleset.aspx

http://www.scrappingcottage.com/cottagecutzspringgrasselites.aspx


Sunday, August 27, 2017

Pretty Woman Card

Hi!

This is Anja again. I'm still playing with the new wedding dies. Today I made a card that can be used for one of your girl friends. The one that likes to look good, loves to dress up and put on some make up. All this small pieces are so fun to color and put together. With a little moderation you can use this card for a bride to be.


- Cottage Cutz Dies (Bridal Lingerie, Cosmetics, Wedding Gown, Live Laugh Love, Rose with Wedding Rings, Nested Wacky Stitched Circle Set),
- Distress Oxides (Worn Lipstick, Vintage Photo, Peeled Paint, Lucky Clover, Seedless Preserves, Antique Linen,Wilted Violet, Black Soot),
- white card base (12,5x12,5 cm),
- white card stock for die cuts,

- patterned paper (3 12,1x12,1 cm),
- silver ink pad,
- paper glue.

First I cut the squares from patterned paper and circles with the nested stitched die. I decided to decorate the inside of the card, that
's why I cut three of each.


Then I die cut all the small pieces for the cosmetics and clothes. I colored them with Distress Oxides and glued them together. 


When I had everything prepared I just assembled the card together. 


Have a beautiful and creative Sunday. See you again next week.
Anja Z.


Saturday, August 26, 2017

The Tandem Bike on a Scenic Route

Hello Scrapping Cottage friends! Thanks for taking the time to stop and visit today. It's Mary Marsh here bringing you the Saturday edition of the Blog.

Hope you have been enjoying all of the beautiful creations that the DT has been showing over these past weeks with the wedding dies. If you haven't seen them, just page back through the Blog for some delightful eye candy.

Today I am using one of the wedding dies, Tandem Bike, and decided to create a little outdoor scene with it. I am going to send this to a friend to let her know she is being thought of.  We ride bikes together at a local trail. So this die was perfect to use. Let's get started with some details of how I created my card. 
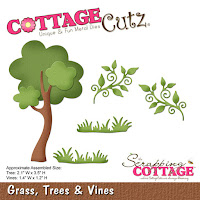
Step 1: For my outdoor scene, I wanted a tree (grass, trees and vine die) a fence (garden accessories die) and the tandem bike. Cut these pieces first and then I chose my card colors of a medium gray and the blue -green based on the color I used on the tandem bike.
 

Step 2:  I used a cloud template and sponged Tumbled Glass Distress ink for my clouds. I used a Taupe ink and sponged the ground at the bottom of my card.
Step 3:  I am ready to start assembly of the die cuts in my scene. I used multi matte medium, glue dots and dimensional adhesive to secure. The tandem bike has dimensional adhesive. I wanted it lifted slightly off the card base so it wouldn't be flush against the fence.  It gives it a bit more depth this way.
Step 4:  I wanted a sentiment on the front of my card and I found one in my stash that was ideal for this card. Especially since the bike trail we ride on is very scenic. Decided to stamp it inside a cloud with the blue-green ink that matches the bike and the layering panel. Adhere it with dimensional adhesive. The cloud is part of the clouds & sun die.

And that is my card for this week. I hope I have given you some inspiration on another way to use this new wedding die. See you next Saturday.

Dies I used to create card:
http://www.scrappingcottage.com/cottagecutztandembike.aspx

http://www.scrappingcottage.com/cottagecutzgardenaccessories.aspx

http://www.scrappingcottage.com/cottagecutzgrasstreeandvines.aspx

http://www.scrappingcottage.com/cottagecutzcloudsandsun.aspx
 

Friday, August 25, 2017

Beautiful Bride

Good morning!  It's Jeanne sharing with you today.  My nephew just got engaged and we're having a celebration lunch for his bride-to-be so I wanted to make her a special card.
This elegant card is fitting for her personality!  The card uses only two colors of card stock - white and vanilla.
It's a top folding card so I cut the vanilla base 4 1/4 x 11 and scored at the 5 1/2 inch mark. I used a piece of white card stock cut to 4 1/4 x 5 1/2 for the front panel and scraps of vanilla and white for the die cut pieces. (And I used a tiny piece of silver CS for the hanger!  You could cut it out of white and color it instead.)  My banner is 3 1/2 x 5/8 inches.  I used paper snips to cut a flag at one end.
I heat embossed the 4 1/4 x 5 1/2 inch white card stock and the white scrap using a lace background stamp and white embossing powder.  The powder I had came out a little bit cream color giving it a nice contrast to the white and blending well with the vanilla.
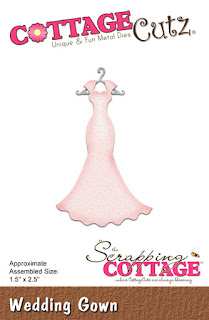
I die cut the dress from the scrap and trimmed the full panel down to 4 1/8 x 5 3/8.  I cut my ovals using the middle and second largest ovals from the Nested Stitched Eyelet Oval set.
The larger oval is adhered directly to the card so I used Scor-Tape to make certain it stuck to the embossing - any really strong adhesive should work.  The embossing is slick so the adhesive needs to be strong.  The smaller oval is popped off the card using foam dots. The die cut dress and hanger were added to the top.
I finished off the card by embossing the sentiment in silver and using silver ribbon and a crystal button. 
http://www.scrappingcottage.com/cottagecutzweddinggown.aspx
http://www.scrappingcottage.com/cottagecutznestedstitchedeyeletovalset.aspx

I hope you enjoyed this card - I had a lot of fun making it!

See you next week!
Jeanne