Sunday, August 27, 2017

Pretty Woman Card

Hi!

This is Anja again. I'm still playing with the new wedding dies. Today I made a card that can be used for one of your girl friends. The one that likes to look good, loves to dress up and put on some make up. All this small pieces are so fun to color and put together. With a little moderation you can use this card for a bride to be.


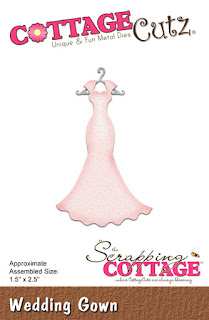
- Cottage Cutz Dies (Bridal Lingerie, Cosmetics, Wedding Gown, Live Laugh Love, Rose with Wedding Rings, Nested Wacky Stitched Circle Set),
- Distress Oxides (Worn Lipstick, Vintage Photo, Peeled Paint, Lucky Clover, Seedless Preserves, Antique Linen,Wilted Violet, Black Soot),
- white card base (12,5x12,5 cm),
- white card stock for die cuts,

- patterned paper (3 12,1x12,1 cm),
- silver ink pad,
- paper glue.

First I cut the squares from patterned paper and circles with the nested stitched die. I decided to decorate the inside of the card, that
's why I cut three of each.


Then I die cut all the small pieces for the cosmetics and clothes. I colored them with Distress Oxides and glued them together. 


When I had everything prepared I just assembled the card together. 


Have a beautiful and creative Sunday. See you again next week.
Anja Z.


Saturday, August 26, 2017

The Tandem Bike on a Scenic Route

Hello Scrapping Cottage friends! Thanks for taking the time to stop and visit today. It's Mary Marsh here bringing you the Saturday edition of the Blog.

Hope you have been enjoying all of the beautiful creations that the DT has been showing over these past weeks with the wedding dies. If you haven't seen them, just page back through the Blog for some delightful eye candy.

Today I am using one of the wedding dies, Tandem Bike, and decided to create a little outdoor scene with it. I am going to send this to a friend to let her know she is being thought of.  We ride bikes together at a local trail. So this die was perfect to use. Let's get started with some details of how I created my card. 
Step 1: For my outdoor scene, I wanted a tree (grass, trees and vine die) a fence (garden accessories die) and the tandem bike. Cut these pieces first and then I chose my card colors of a medium gray and the blue -green based on the color I used on the tandem bike.
 

Step 2:  I used a cloud template and sponged Tumbled Glass Distress ink for my clouds. I used a Taupe ink and sponged the ground at the bottom of my card.
Step 3:  I am ready to start assembly of the die cuts in my scene. I used multi matte medium, glue dots and dimensional adhesive to secure. The tandem bike has dimensional adhesive. I wanted it lifted slightly off the card base so it wouldn't be flush against the fence.  It gives it a bit more depth this way.
Step 4:  I wanted a sentiment on the front of my card and I found one in my stash that was ideal for this card. Especially since the bike trail we ride on is very scenic. Decided to stamp it inside a cloud with the blue-green ink that matches the bike and the layering panel. Adhere it with dimensional adhesive. The cloud is part of the clouds & sun die.

And that is my card for this week. I hope I have given you some inspiration on another way to use this new wedding die. See you next Saturday.

Dies I used to create card:
http://www.scrappingcottage.com/cottagecutztandembike.aspx

http://www.scrappingcottage.com/cottagecutzgardenaccessories.aspx

http://www.scrappingcottage.com/cottagecutzgrasstreeandvines.aspx

http://www.scrappingcottage.com/cottagecutzcloudsandsun.aspx
 

Friday, August 25, 2017

Beautiful Bride

Good morning!  It's Jeanne sharing with you today.  My nephew just got engaged and we're having a celebration lunch for his bride-to-be so I wanted to make her a special card.
This elegant card is fitting for her personality!  The card uses only two colors of card stock - white and vanilla.
It's a top folding card so I cut the vanilla base 4 1/4 x 11 and scored at the 5 1/2 inch mark. I used a piece of white card stock cut to 4 1/4 x 5 1/2 for the front panel and scraps of vanilla and white for the die cut pieces. (And I used a tiny piece of silver CS for the hanger!  You could cut it out of white and color it instead.)  My banner is 3 1/2 x 5/8 inches.  I used paper snips to cut a flag at one end.
I heat embossed the 4 1/4 x 5 1/2 inch white card stock and the white scrap using a lace background stamp and white embossing powder.  The powder I had came out a little bit cream color giving it a nice contrast to the white and blending well with the vanilla.
I die cut the dress from the scrap and trimmed the full panel down to 4 1/8 x 5 3/8.  I cut my ovals using the middle and second largest ovals from the Nested Stitched Eyelet Oval set.
The larger oval is adhered directly to the card so I used Scor-Tape to make certain it stuck to the embossing - any really strong adhesive should work.  The embossing is slick so the adhesive needs to be strong.  The smaller oval is popped off the card using foam dots. The die cut dress and hanger were added to the top.
I finished off the card by embossing the sentiment in silver and using silver ribbon and a crystal button. 
http://www.scrappingcottage.com/cottagecutzweddinggown.aspx
http://www.scrappingcottage.com/cottagecutznestedstitchedeyeletovalset.aspx

I hope you enjoyed this card - I had a lot of fun making it!

See you next week!
Jeanne

Thursday, August 24, 2017

Garden Wedding!

Good Morning Scrapping Cottage Fans!

Hello everyone it is Pam on the Blog today! I have another very special wedding die to share with you today and I paired it with two additional dies!

Design Step:
1.  Start by using the Cottage Cutz Garden Bride and Groom die and cut it on white card stock.  Color the flowers with Copic markers.
 2.  Using the largest Cottage Cutz Stitched Wide Rectangle Frame cut out a white card stock frame
 3.  Using Cottage Cutz Wildflower2 and Wildflower 5 cut out 6 flowers and color with Copic markers
 4.  To give the flowers some dimension use a stylus and round out the blooms
5.  Cut out a piece of pale pink Bazzill card stock 4 1/8 x 5 1/4 and pop up the frame and then glue the bride and groom flat.
6.  Add three flowers on each side and glue dot a ribbon to the flowers as shown
7.  Mount the pale pink card stock to an A2 white base.  Add a small butterfly from the Cottage Cutz Wildflower 5 die.

Cottage Cutz Products


These dies paired together make a wonderful garden wedding card! Hope you will visit our store and look around!

Blessings
Pam