Tuesday, May 02, 2017

Bear on cloud (gate fold card)

Hi, Janja here!

Teddy bears are so popular toys. They are so soft to touch and ideal for cuddling.
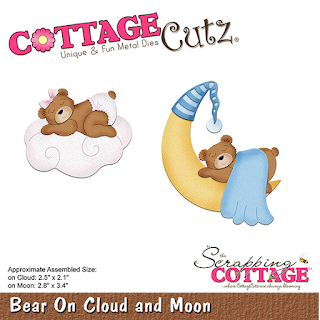
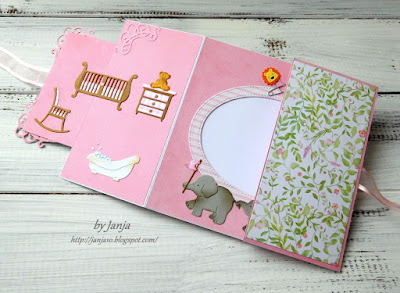
On a gate fold card, that I share with you today, I put a lovely bear on cloud.


Supplies:
- CottageCutz dies: Bear On Cloud and Moon, Baby, Nursery Furniture, Elephants on Parade, Baby Diaper Pins, Stroller mini, Baby Carrier mini, Bathtub mini, Fancy Victorian Frame, Cross-Stitched Square set, Stitched Wide Oval Frame set
- white cardstock for card base: 11.4 x 5.7" (29 x 14,5 cm)
- patterned paper
- white and colored cardstock
- light pink organza ribbon

For card base trim white cardstock and fold it at 2.85" and 8.55 " (7,25 cm and 21,75 cm)


Trim patterned paper. First, attach organza ribbon on card base, and then cover the base with patterned paper. Use two-sided adhesive tape.


Cut out a square from patterned paper with the largest die from cross-stitched square set. Place it on to a little larger square from white cardstock.
Also cut out frames from white and patterned paper. Cut them in half with scissors, and attach to the back of the square.


Place square over the center fold. Take care that the adhesive is applied only to one-half of a square.


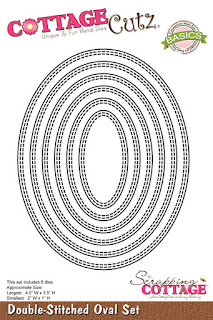
Add selected patterned paper also on the inside of the card. In the middle add space for text. Use the largest die from stitched wide oval frame set.


Cut out with dies all pieces, and assemble them into a whole.


To complete the card, mount all motives as shown, using glue and self-adhesive foam pads.


Thank you for coming over. Have a nice day.


Monday, May 01, 2017

Colorful Tri-Shutter Card

Hi, Lois here today with a card full of bright sunny colors -- and lots of folds!   Yellow/orange/lime green is such a happy color combination.   I used a die/stamp set and several other dies from CottageCutz.


Supplies used on today's card are:

Yellow cardstock - 12 x 5 1/2"
Lime green for the mats
Patterned paper for the panels
Scraps of orange and black for the sentiment and butterfly
Copic markers
Scor-Pal
Foam pop dots
CottageCutz dies - Marigolds - October (stamp/die set), Happy, Birthday, Double-stitched Ovals, Spring Butterfly 1

Cut the yellow cardstock  to 12" x 5 1/2" and score on the 2", 4", 8", and 10" marks.


Place the panel in your paper cutter with the long edge at the 1 1/2" mark.  Cut a slit from the 2" scoreline to the 10" scoreline.  Rotate 180 degrees and cut the same way on the other side.


Fold on the scorelines  as shown in the photo.


I used the card base and traced around the end T-shape section and cut a template.  I then cut 1/16" around the edge to make a template for the mat piece, and again another 1/16" to make a template for the patterned paper piece.


Cut the mat  and patterned paper pieces as follows:

Lime green - 4 pieces 1 3/8" x 1 7/8", 2 pieces 1 3/8" x 3 7/8", 1 piece 2 3/8" x 3 7/8", and two pieces using the larger of the two T-shaped templates.

Patterned paper - 4 pieces 1 1/4" x 1 3/4", 2 pieces 1 1/4" x 3 3/4", 1 piece 2 1/4" x 3 3/4", two pieces using the smaller of the two T-shaped templates.

Layer and adhere the patterned paper to the lime green pieces.  Adhere to the card base, as shown.


Stamp and color the marigolds onto white cardstock and then cut all the die-cut pieces.


Apply the die-cut pieces to your card, and you're finished.


This is such a fun card to make.  I hope you'll give it a try.

CottageCutz dies used on my card are:


http://www.scrappingcottage.com/cottagecutzmarigolds-octoberstampanddie.aspx

http://www.scrappingcottage.com/cottagecutzexpressionshappy.aspx

http://www.scrappingcottage.com/cottagecutzexpressionsbirthday.aspx

http://www.scrappingcottage.com/cottagecutzdouble-stitchedovalsetbasics.aspx

http://www.scrappingcottage.com/cottagecutzspringbutterfly1.aspx


Sunday, April 30, 2017

Twist Pop-Up Card for Baby


Hi everyone! It's Janet from SugarShine Designs and I'm bringing you a card that will really wow your recipients! It's called the Twist Pop-Up card and it's an eye catcher.


Today's project continues to feature some of the new dies that were released in the GIGANTIC baby release that happened earlier this month. It has been so much fun working with the new release and many of these wonderful dies!

My card features six designs highlighting all things baby. I've geared it for a girl but of course you can always change the colors to be gender neutral or boyish.

This card has a surprise when you open it. Describing it isn't adequate so please go to the link below for the video showing the effect and how I decorated this fun card base.


I've posted another video that shows in detail how to make the card base itself. I'm confident you will be able to make this card after you watch it but I will answer any questions you leave for me there.


Thanks for joining me on this beautiful Sunday morning. Enjoy the rest of the weekend!

PHOTOS AND LINKS TO PRODUCTS USED IN THE COTTAGECUTZ DIES STORE:

http://www.scrappingcottage.com/cottagecutzbearoncloudandmoon.aspx


Saturday, April 29, 2017

Baby Girl Christening Card

Hello Scrapping Cottage friends! Thanks for taking the time to stop and visit today. It's Mary Marsh here bringing you the Saturday edition of the Blog.

We just had the cutest release of baby dies. There are 42 different designs. So perfect for creating cards to welcome the new baby, baby birthday cards or even as baby shower invitations. I have several nieces who recently married and now are expecting so I will need baby cards as well as Christening cards very soon.

So today for your viewing pleasure, I am showcasing the new girl christening gown die. It's such a beautiful die that cuts a sweet baby dress. So let's get started with some details on what I did this week.

I already had the card idea in mind. So when I saw the sketch #642 on Splitcoaststampers this week, I knew it would work perfectly as my layout. It's a square layout this week. I haven't made a square card for awhile.

Vanilla Card Base: 5" square
Blush Pink Layer: 4 1/4" square
Blush Pink Patterned Paper Layer: 4 1/8" square
Champagne Mesh Ribbon Layer: 1 1/2"
Blush Pink Ribbon Layer:  1/2"

Step 1. I figured out my card sizes and then cut all the cardstock and patterned paper. I found this pretty blush pink paper in my stash. I liked how the hearts are cascading down the paper. On the reverse side is a pretty sand color lace pattern.

Step 2:  I wanted to have a cross in this design because it is a christening. And in this Christian ceremony the baby is dedicated to God. I decided to stencil the cross pattern instead of using the die cut. I was going after a very soft look for this card.

I used the Easter Cross die and cut the stencil from a window sheet. I used blush pink ink to stencil the cross. The paper size on this vanilla panel is 1 3/4" x 3 1/4" and the pink layering panel is 1 7/8" x 3 3/8". I used a corner rounder for some added interest. It's layer #6 on this sketch.
I decided to stamp my sentiment directly over the stenciled cross. I used a brown sugar ink. This sentiment is layer #7 in this sketch.


Step 3: I cut the christening gown in vanilla cardstock. The other pieces are cut in blush pink. This is another of the detailed dies from CottageCutz. With this die you can cut the collar, buttons, sleeve trim, waistband, bow and hemline. You have the option to cut in white and color the pieces,  or do as I did and cut with colored cardstock. I really like how this gown turned out. It's so soft and girlie.

Step 4: Time for card assembly. I originally was going to use the lace pattern that is on the reverse side of my patterned paper. But when I placed it on the card I thought it was a bit dark. So I used a champagne mesh and blush pink ribbon. It kept the softness of my card. To finish it off I added some pearls in the corner and a butterfly to the cross panel.
 
 
Well, that's it for me for this post. I hope I have given you some inspiration for using this new die. So until next time........hugs to you Blogger friends!


Dies I used to create this card:
http://www.scrappingcottage.com/cottagecutzgirlchristeninggown.aspx


Friday, April 28, 2017

HAPPY DAYS WITH BABY ANIMALS

Hello Folks !!!

Happy Friday !! It's Anita here with the new release baby dies. CottageCutz has released a whole new collection of adorable baby theme dies and I am sure you will love them all. you can see them here.

I had made two cards with these cute dies last week. If you missed that post, do check it out here.

I loved the way this card has turned out. I am sure all kids will adore this card.


To make this card, follow the instructions below.
1. Cut a frame with Stitched Rectangle die using the largest die and small die.
2. Adhere it on a card stock a little larger than the frame.
3. Cut clouds, sun , grass baby animals and balloons  from card stock .
4. Colour them with copic markers.
5. Arrange the die cuts as shown.
6. Assemble the animals pieces together. For this , follow the picture given on the package.
7. Stamp a flower and colour it.
7. Add the sentiment.

CottageCutz dies used.


Used the balloons from this die.


Grass 


sentiment

Do check the store for all the amazing collection. I hope you liked my card.