Tuesday, December 20, 2016

Shaker card with mailbox

Hi, Janja here!

Christmas time is almost here. In Slovenia we don't have any snow yet, and the weather forecast is not promising us a white Christmas. Never mind, today I will take care of snow :).


For the card we need:
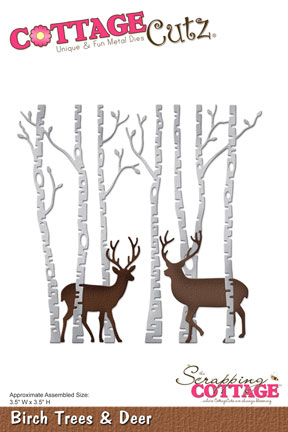
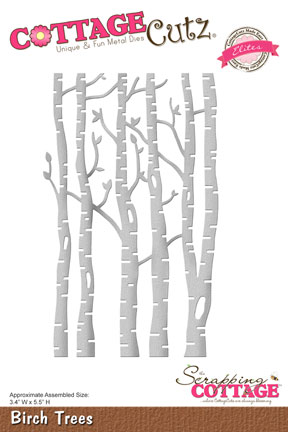
- CottageCutz dies: woodland mailbox, forest trees, stitched wide rectangle frame set (the largest die from set)
- kraft card base: 4.1 x 5.3" (10,5 x 13,5 cm), folded
- white and colored cardstock
- glitter
- white embossing powder
- Distress ink: Worn Lipstick, Festive Berries, Vintage Photo, Mowed Lawn, Peeled Paint, Black Soot

Prepare a card base from kraft cardstock. Cut out a frame from white cardstock with a frame die and a sheet of transparent foil in the frame size.


Coat the frame with glue and sprinkle it with glitter.


On kraft base stamp "Warm Wishes" and treat it with hot embossing technique. Use white powder.
Glue transparent foil to the back of the frame, and fasten across it self-adhesive foam tape. Finally, add snowflakes and attach the base card to the frame.


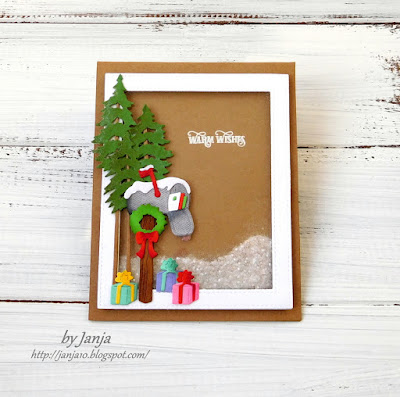
From colored cardstock cut out all the elements for the mailbox and spruces. Shadow them with Distress inks.


To finish the card, fix mailbox with gifts and spruces as shown using foam adhesive pads.


Another view to the snow-covered card, after we shake it.


I wish you a Merry Christmas.

Thank you for coming over and see you next Tuesday.


Sunday, December 18, 2016

Hello

Hello everyone!

It's Donna here I decided to change it up a little and show you this cute critter that was released in October.  The release was called "In the Forest" in case you missed it. There are so many adorable critters,there are fox, rabbits, dogs, you name it, go and check them out if you missed them

Here is my card, I am featuring the raccoon from the Forest Peekers, Fox & Raccoon set.  This set comes with the fox and the raccoon.  There are also a couple of positions you can create the critters peaking out...there are so many possibilities.


Here is how I put my card together:

1.  I die cut all my pieces,
2.  The raccoon I die cut him out with white cardstock and then colored him with copics,
3.  I die cut the stump from the Tree Stump & Log for Peekers
4.  I glued the pieces together and assembled my card.
5.  I finished my card off by adding the "Hello" from the Hello Spring set.


DIES USED:


Saturday, December 17, 2016

Merry Christmas Gift Bag

Hello Scrapping Cottage friends! Thanks for taking the time to stop and visit today. It's Mary Marsh here bringing you the Saturday edition of the Blog.

Well, it's only a week until Christmas. I finished all my cards and the last of them went in the mail today. I started wrapping gifts today and I realized I needed a couple of small bags for some little gifts. I recently purchased the Gift Bag Punch Board and decided to use it today for my gift bag project. The dies for my project are the Merry Christmas Notecard and the Elegant Angel Ornament.

Let's get started with some details on what I did to alter the bag I just made. If you don't have the Punch Board, here is a link to tutorials to make one using a scoreboard and another link to make one just by folding the cardstock.

My Bag: started with white cardstock measuring 6" x 11" and then followed the instructions on the punch board for a medium bag. The bag size ended up at 4 11/16" high and 3 1/8" wide. I also punched the holes at the top in order to run my ribbon through for bag closure.

There are a number of ways to add your ribbon. You could just punch holes on both sides and make ribbon handles. Or use cardstock and a brad and make a single handle running from side to side.

For decorating the bag I kept it simple. The Merry Christmas Notecard die is so pretty and decorative that I didn't need anything else.  Here is a close-up so you can see the detail on this die.
 

I used red cardstock for a layering panel and it measures 4 1/16" x 3". I finished off this bag with my 1/8" red striped ribbon.

My 2nd Bag: I started with white cardstock measuring 6" x 10" and then followed the instructions on the punch board for a small bag. The bag size ended up at 4 11/16" high and 2 5/8" wide. I also punched the holes at the top in order to run my ribbon through for bag closure.

For decorating this bag I used the elegant angel ornament die, merry Christmas ribbon (for the stars) and the expressions joy dies.
 
 
I used blue patterned paper for the layering panel and it measures 4" x 2 1/2". I finished off this bag with my 3/8" navy ribbon. The angel was adhered with dimensional foam tape and the joy word and stars with Ranger multi-matte medium.
 
Well, that's it for me for this week. I hope I have inspired you to look at your dies for other uses besides card making. See you next week!

 
http://www.scrappingcottage.com/search.aspx?find=merry+christmas+ribbon

http://www.scrappingcottage.com/cottagecutzelegantangelornamentelites.aspx

http://www.scrappingcottage.com/cottagecutzexpressionsjoy.aspx


Friday, December 16, 2016

SPARKLING SNOW AND CHRISTMAS CARD


HELLO FRIENDS !!

It's Anita here !!
Winter is all in its beauty with sparkling snow fields and woodlands covered with snow and those adorable forest creatures !!!! Ah !!! the natural surroundings in a countryside in the snowy winter months looks awesome.

To capture that look I have a Step card with sparkling snow land amidst the woodlands and that country scene , all together in one card, actually made possible because of the amazing Christmas collection found at the CottageCutz Store.

Here is my card and all the close up pictures. Its a very simple card and I have added a sparkling dust powder on the die cuts to create that shimmery look.


To make the card,

Cut all the die cuts from CottageCutz dies in white card stock.


For the card base, cut a piece in white measuring 6 Inches by 12 inches. Score at 1", 2" 4" and 6". Fold along the score lines to make a step card.


Create three panels for each step that have a wavy top edge.


Distress wit Tumbled Glass Distress ink and apply clear glue. 

Add the sparkling dust powder and remove the excess. This will create the snowy ground.

Adhere these panels on each step.

For the last panel, Add a frame from Stitched Wide rectangle frame die and top of it adhere the die cuts as shown to create a snowy woodland scene.


On each step, add the die cuts to build up the scene.


Add a sentiment on top to finish the card.

CottageCutz dies used.


I hope you liked this sparkling winter card. Have a great and fun filled Christmas  !!!

Wednesday, December 14, 2016

Gift Tags

Hi, Lois here today with a quick, last-minute project.  I'm sure we're all in the midst of buying and wrapping Christmas gifts this week. I am showing some gift tags made with CottageCutz Christmas ornament dies and Peachy Keen face stamps.  This was a fun and easy project.

Supplies used on these tags are:

White. green, silver and gold cardstock
Memento Tuxedo Black ink
Copic markers (R20, R24)
Sakura white jelly roll pen
Silver and gold cord
CottageCutz dies - Nested Ornaments Teardrop, Nested Ornaments Ball
Peachy Keen 1 5/8" Candy Cane Face Stamps
1/8" Scor-Tape

Start by stamping the faces and cutting out the ornaments:


Do a little coloring with the markers and white pen:


Add the ornament caps and cord:


Stamp the backs with a To/From stamp of your choice and you're done:


 Here's one of my tags attached to a gift.


Dies and stamps used on this project are: