Thursday, December 29, 2016

ENJOY YOUR GOOD LIFE


Hello dear friends !!!

It's Anita here!!!!

An end to a year !!! And what a year it has been for me !! Full of good memories , some moments to be cherished forever!!!
I wish you all a very Happy New Year and loads of fun and fabulous crafting in the coming year.
To share my happiness with you, here is my last card for 2016.


Instructions 
The finished card measures 4" x 7" . 
I have used the double stitched rectangle dies and the Wide Rectangle Frame dies to create windows that will allow me to add flowers and my sentiments.
The flowers are moulded and shaped after I have coloured with Archival inks.
I have added frosted sugar powder to the flower petals.
Cottage Cutz Dies Used
Happy New Year Ornament
3D Flower # 7
Double Stitched Rectangle die
Stitched Wide Rectangle Frame Set

There is a Huge Sale going on at the Scrapping Cottage Store.
Do stop by and pick the most amazing dies at the lowest cost.

Once again, have a Super Awesome year ahead!!!

Wednesday, December 28, 2016

Champagne Glass Cheers

Hello Scrapping Cottage friends! Thanks for taking the time to stop and visit today. It's Mary Marsh here bringing you the Wednesday edition of the Blog.

Well another Christmas has come and gone and now we are looking forward to the New Year Celebration.  For my last card post of 2016, I will be sharing a celebration card.

You could use this as a New Year's card, a wedding card or a congratulations card. I am choosing a congratulations card  and sending this to my niece who just got engaged over Christmas.

So let's get started with some details on how I created this one.

Black Card Base: 3 1/2" x 5" (note card size)
Gold Foil Vellum Paper: 3 1/4" x 4 7/8"
White cardstock under layer: 3 1/4" x 4 7/8"
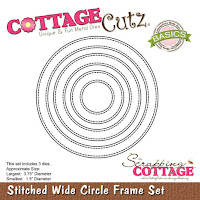
Pierce Wide Circle Frame: 2nd largest

I started my card by die cutting the elegant champagne glasses with bows and the stitched wide circle frame. My photo shows the bows in black but once I started the card assembly I didn't like the black. So I changed to gold bows. I thought they looked better against the black circle frame.
I started the card assembly. Since my background paper was vellum I used glue dots on the gold hearts and attached it to white cardstock. Then layered that on my black card base. I had intended to use a tag with a cheers sentiment. But I didn't like that look. So I decided to stamp directly on the vellum. I used a pigment ink and then embossed it with a black embossing powder.
 
Well, that concludes my card for this week. I would like to extend all of you a happy New Year. I will be back next week with a card using some brand new dies. Until next time........inky hugs!
 
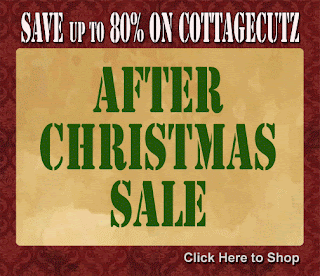
Also there is a big sale after Christmas sale going on right now in the online store with savings up to 80%. There are over a  1,000 dies on sale. In fact, the champagne glasses I used on today's card are 50% off right now.
http://www.scrappingcottage.com/
 
 
http://www.scrappingcottage.com/cottagecutzelegantchampagneglasselites.aspx

http://www.scrappingcottage.com/cottagecutzstitchedwidecircleframesetbasics.aspx

Tuesday, December 27, 2016

Mistletoe

Hi, Janja here!

For the last card in this year I selected mistletoe. Supposedly mistletoe brings good luck in the coming year. While, other plants in winter rests, the mistletoe is full of life. Her greenery keeps the hope for the arrival of spring.


For the card we need:
- CottageCutz dies: holiday greenery, circle set, stitched circle set
- white cardstock
- patterned paper
- kraft cardstock
- cartstock in golden and green color
- string

Cut white cardstock to size 15.9 x 5.3" (40,5 x 13,5 cm). The folds are made on 5,3" and 10.6" (13,5 cm and 27 cm). Cut both tabs along the diagonal.


Cut selected paper:
- 3x for background: 5.2 x 5.2" (13,1 x 13,1 cm), one cut in half diagonally
- 1x for tag: 4.7 x 4.7" (12 x 12 cm)
- kraft cardstock: 5 x 5" (12,6 x 12,6 cm)


Cut out two circles with the largest die from circle set and other two with stitched circle set (the 8th die from the center) . Two white circles, one from kraft and one from golden cardstock. I replaced the green one on photo with golden one.
 

Prepare a few mistletoe and twigs cutouts. Apply pearl dots on them.
 

Paste patterned paper on kraft base. In the middle of the upper part, attach the eyelet and insert a string.
 

Cover the card base with selected patterned paper. Paste both triangular parts on the card base with double-side adhesive tape.
 

Stamp "Happy New Year" with golden ink on circle, and arrange mistletoe together with twigs and golden bow.
 

Fix circle on the card base. 


Thank you for coming over and have a great day.


Sunday, December 25, 2016

Merry Christmas - Wisdom Tree

Merry Christmas everyone!

It's Donna here, I hope you all are relaxed and enjoying your family and friends this holiday season!  I want to wish everyone that celebrates the Christ of Jesus, Merry Christmas.  I love being with family and I am enjoying being with my family and my grandchildren this holiday season.

I have a CAS card for you today!  I am using the Wisdom Tree die today because it says it all about the season. 


Here is how I put my card together. 
1.  My card base is 4 x 5 1/2,
2.  I cut all my pieces out that I want to use on my card,


3.  I glued the wisdom tree to the white card base that I cut out using the Double Stitched Rectangle die.  I used the largest frame.
4.  I finished my card by adding some bling to my card to give it some more definition. 

Everyone seems to have an after Christmas sale, please check the CottageCutz store tomorrow, there is going to be an after Christmas sale!  You don't want to miss out if you have been looking at a certain die.

Supplies Used:


Friday, December 23, 2016

Yum, More Christmas Cookies

Hi, Lois here with my last Christmas card of the year.  A couple of weeks ago I made a card using the CottageCutz ornament dies and Peachy Keen face stamps, dishing up a plate of gingerbread cookies.   After I made the card, I thought, "Wouldn't it be fun to have someone take a bite out of one of those cookies?"  Thus, the idea for today's card was born.


Supplies for this card:

Cream cardstock base (pre-cut) 10" x 6 1/2", folded in half
Green cardstock - 4 3/4" x 6 1/4"
Patterned paper - 4 5/8" x 6 1/8"
Kraft cardstock
Red cardstock (scraps)
Green cardstock (scraps)
Kraft-colored cardboard
White detail embossing powder
Versamark ink
Doily
White gel pen
Red craft paint and brush
Scallop Circle punch

Cut three of the smallest star ornaments and three of the smallest circle ornaments from Kraft cardstock; then cut six of each from the cardboard. 


Using the punch, cut out the "bite marks" from one Kraft circle and two cardboard circles -- ensuring that the punches are the same size.  Then "build" the cookies by gluing two cardboard pieces and one Kraft piece together.   After stamping and embossing the faces on each of the cookies, add some extra icing with a white gel pen.  Paint a touch of red on the candy canes.


Cut the holly leaves and sentiment.


Construct the card, leaving an open space on the doily to show that the cookie had originally been there.


Used on this card:


Thursday, December 22, 2016

CAS CARD WITH COTTAGECUTZ DIES


Hello

It's Anita here . It is the most super busy time of the year and we all are doing innumerable tasks all at the same time. With so much workload, it becomes very difficult to make heavy cards and projects.
So  I have a very simple and elegant card for you that can be made very quickly.

Do have a look here.


This is a card with an embossed panel and just three die cuts.


CottageCutz store has a huge supply of dies for all themes. do stop by and browse for the design of your choice.