Friday, November 04, 2016

LAYERED MINIATURE CARD

Hello Everyone

It's Anita here with new Christmas inspirations.
Today I have something which you all will love as these are quick to make but gives you really beautiful layered ornate cards.
CottageCutz has some really awesome dies that compliment with each other to give you a multi layered card. All one has to do is place them well on the card.
The card shown here is a miniature card not bigger than 5 inches by 3 inches.
I have used many dies here and the step by step pictures below will give you an insight as to how I have worked on it.
 Let us have a look at the card first.


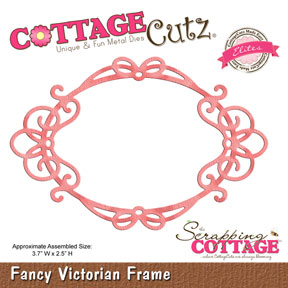
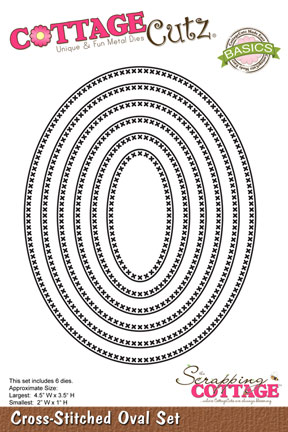
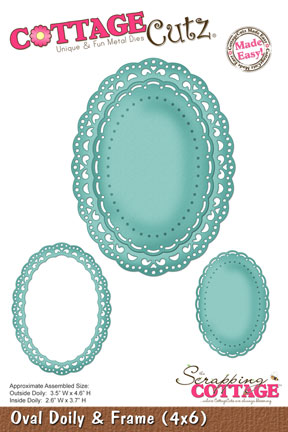
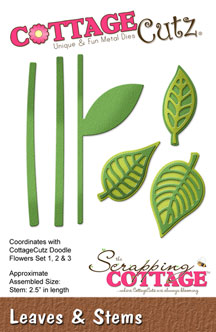
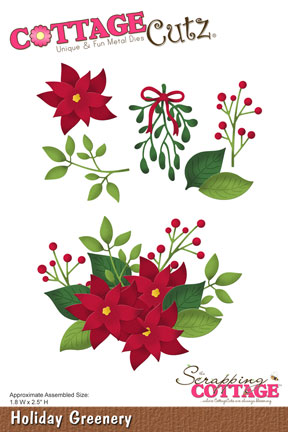
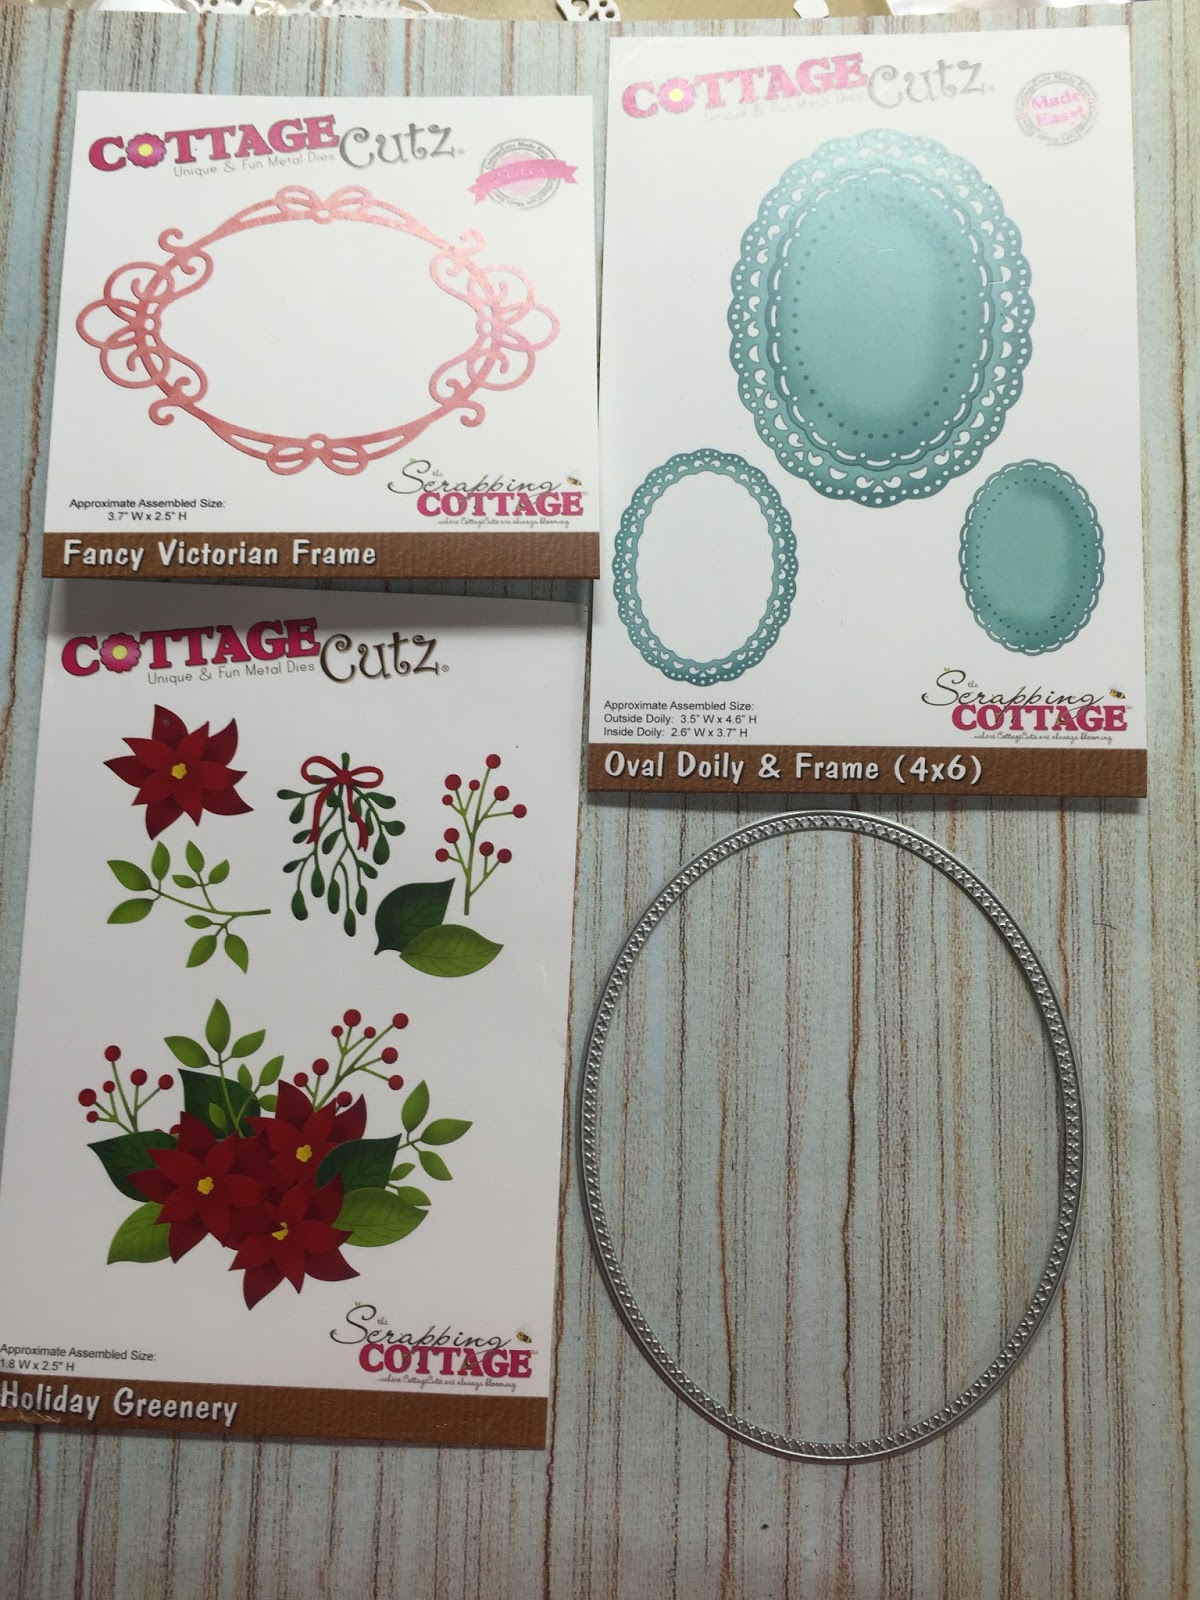
These are the dies used for making the card- CottageCutz Fancy Victorian Frame, CottageCutz Oval Doily and frame, CottageCutz Holiday Greenery, CottageCutz Cross stitched Oval and CottageCutz Leaves and stem


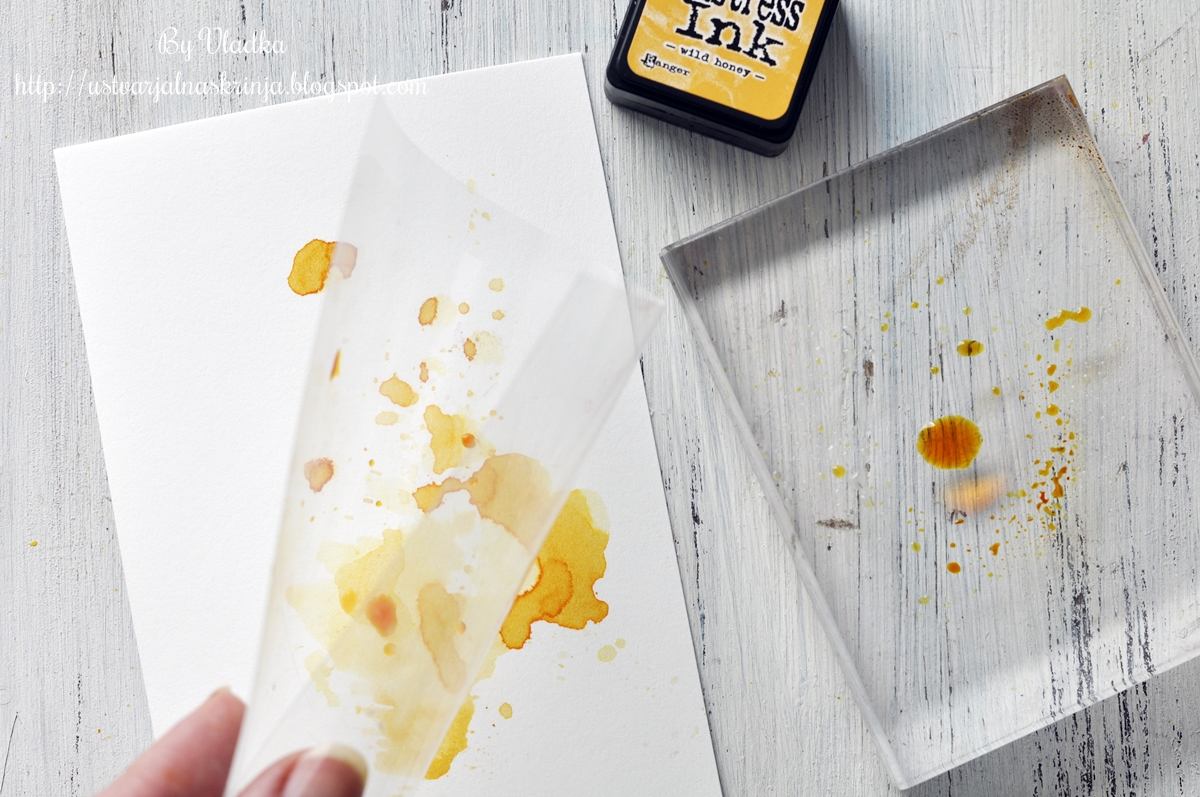
 Cut all the die cuts as shown.


Make an aperture card from Cross  stitched oval die. Cut out the coordinating die from oval die and apply foam tape.


Layer the die cuts as shown.

Make cuts in the Victorian frame as shown

Adhere the die cuts in layers as shown here.

The finished card.

 CottageCutz Dies Used.


Wednesday, November 02, 2016

Let it snow

Hi, Janja here!

Thank you very much for all 34 beautiful cards and projects you've made for Challenge #7. Two lucky winners will be announced at the end of this post. 
So, stay tuned.

We have entered into the penultimate month of the year. Snow has not yet surprised us, and therefore I took care today for thick snow cover.


For the card we need:
- white card base: 5.3 x 5.3" (13,5 x 13,5 cm), folded
- patterned paper: 5 x 5" (12,7 x 12,7 cm)
- white and color cardstock
- Distress ink: Iced Spruce, Mowed Lawn, Tumbled Glass

Trim patterned paper and white cardstock for the card base. Also prepare a strip of patterned paper. Tear it with hands.
From white cardstock cut out jingle bells and oval with the 2nd die from oval set. Stamp "Let it snow".


Even today will not go without snowy trees. Shadow some of them with Distress ink and paste a snow. The other are left white.


Cut out adorable snowman with a winter snowman die.


On the background first attach white spruces. Put snow-covered spruces on them with self-adhesive foam pads. Attach the tape from patterned paper and put a snowman with jingle bells on it.
Apply glitter on the jingle bells and snow-cowered spruces.


---------------------------------------------------------------------------
And now is time to see who the two lucky winners are.
 
1st Gift certificate value of 50$ goes to Kaleidoscope Creations. Her card was linked under number 16:

2nd Gift Certificate value of 25$ goes to Just Jill. Her card was linked under number 10:

Congratulations!

Please, contact Joanne at scrappingcottage@cox.net 
to claim your Gift Certificate. 
---------------------------------------------------------------------------------

Thank you for coming over and have a great day.


Monday, October 31, 2016

Feathers


Hi, Vladka is here!

Today, I have "just a note" card, where I used this cute little Feathers. And I also have a note for all of you. This is actually my last post here on CottageCutz blog. I loved to work with all these great dies and it was real honor for me to work for such a great company. But I need time for other things in my life now. It was not easy decision to make. I want to thank you all for all your comments and support through all these years. And of course I will continue to use CottageCutz dies and you are more than welcome to visit my blog and see what I will create with them in the future.

And now is time, to check my card.


Basics:

White card base: 4 1/4 x 6 inches (cut 4 1/4 x 12 inches, fold in half)
Additional piece of white cardstock and some white cardstock to cut out the die cuts. 

Other Supplies:

CottageCutz Dies: Listed Below
Distress Ink:  Brushed Corduroy and Wild Honey
Other: Scissors, Paper trimmer, Sizzix machine, acetate, acrylic block, gold spray

1. First, cut all three feathers out of white cardstock:


2. Apply Brushed Corduroy and Wild Honey distress ink on acrylic block or any other smooth surface, mixed it with little water and color the feathers. Use paint brush for coloring. Let it dry.


3. In this step use just Wild Honey distress ink and pressed feathers against the block  to pick some of the ink...


... so, you will get such splodges:


4. Now it is time for smooshing. Take a piece of plastic acetate and gentle pressed it against the block to pick up some of the ink. Now, press the plastic on the paper to transfer the ink. Put paper aside to dry or use heat gun to dry it:


5. Stamp "Just a little note" or any other sentiment on additional piece of paper and use third biggest rectangle from Cross-Stitched Rectangle Set. Put rectangle on the paper as seen on the photo and cut it out.


6. Now use second biggest rectangle die and put it on the rectangle which you cut out in previous step. Cut it out again to get little paper frame.


7. Now glue additional piece of paper on the card base diagonally as shown on the photo. Cut off the upper and left corner of paper to fit the card base.


8. Glue also little paper frame and all three feathers and flick some droplets of gold shimmer spray and let it dry. Card is now finished.


And here is the finished card again:


Have fun creating!

Sunday, October 30, 2016

Season's Greetings!

Hello everyone!

It's Donna here and CottageCutz has partnered with Peachy Keen Stamps to celebrate their new release of face stamps that work perfectly with the CottageCutz Christmas ornament dies. TWO NEW SIZES of Face Stamps have been added to their release, 1 5/8" and 1 7/8" to fit the super fun ornaments by CottageCutz.  Please stop over at Peachy Keen Stamps because Kathy is offering some promotional pricing on her new stamps sets that will go perfectly with the CottageCutz dies.

Ornament 1 1/8th" (smaller circle).  I am using the Cottagecutz Nested Ornaments:  Ball.


Here is how I put my card together:
  1.  The card is an A2 card 4 1/4 x 5 1/2,
  2. The red design paper is the same size as the base of the card, 
  3. The blue frame is die cut from the largest Cottagecutz "Stitched Wide Rectangle Frame Set",
  4. I die cut two of the Cottagecutz Nested Ornaments:  Ball (I used the medium and small sizes,


     5.  I used my Misti to line up the stamp on the circle,


     6.  Here is how it looks after I have stamped the face,


7.  I colored the snowmen faces with copics.  I used Y17, Y38 and YG68 on the snowmen's noses, B0000 on the eyes and R00 on the checks.  I used my white gel pen on the circle part of the eyes to make them stand out,
8.  I finished my card off by adding the sentiment by CottageCutz "Season's Greetings".

If you have not joined the challenge for this month, you have until Monday.   The theme is fall. Here is the link for more info.

Dies used:


Peachy Keen Stamps used:


Saturday, October 29, 2016

SHINING ORNAMENT CARD


Hello everyone,

 It's Anita here, with another inspiration project for you with CottageCutz dies. It is the festive time of the year and everyone is busy in the preparations for coming season. In India, we are celebrating the festival of lights -Diwali. It is that time of the year when gifts are exchanged and celebrations are in full swing. It is also important to thank everyone for everything. So today I have a thank you card for you in Christmas theme.
I have again used non traditional Christmas colours for this card.


The finished card measures 7.25 inches by 5.75 inches.
Cut a matte layer in white card stock measuring 7 inches by 5.5 inches.
Distress using Carved Pumpkin Distress ink and Ripe Persimmon.
Add some texture by using a stencil and the darker shade of distress ink. Randomly print design on the matte layer.
Using the CottageCutz Nested Star ornament die, cut out a space in the bottom right side. Stamp a sentiment on the card front.
Now adhere the Matte Layer on the card front using 3D tape.
Add  twine.
Cut out three die cuts from star die.
Add texture by using a stencil and Prima golden crackle paste.
Once it dries, cracks will appear.
Use them on the card as shown.


Do share your entries with us as you play along the challenge -7.
Do leave some good words on the blog as you stop by.