Tuesday, September 13, 2016

Christmas bells

Hi, Janja here!

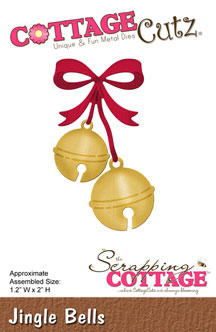
Bells are an indispensable element on holiday cards. On the card which I share with you today, I used the die Christmas holly bells from the 2nd part of the Christmas dies.


For the card we need:
- white scalloped card base: 5.3 x 5.3" (13,5 x 13,5 cm), folded
- patterned paper in green: 5 x 5" (12,6 x 12,6 cm)
- plaid patterned paper: 2.5 x 5" (6,3 x 12,6 cm)
- white cardstock: 4 x 4" (10,2 x 10,2 cm)
- patterned paper: 3.7 x 3.7" (9,5 x 9,5 cm)
- white and color cardstock
- Distress ink: Festive Berries, Aged Mahogany, Moved Lawn, Peeled Paint
- Memento ink: Cantaloupe

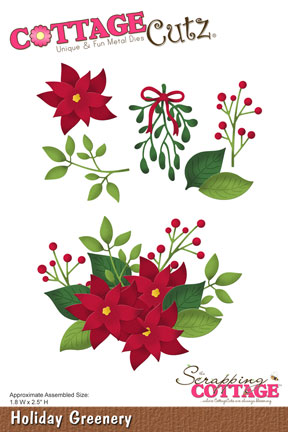
We cut out the bells and holly branch. For bells use a cardstock in the color of champagne, other cutouts are white.


We will also need a few spruce stems.


Shadow all cutouts plentiful with Distress inks.


Trim plaid patterned paper and attach it on to green patterned paper, and fasten both together on white card base with double-sided adhesive tape.
Stamp "Merry Christmas" on a small square. Attach it in the middle of the background with a foam tape, for more dimensions.


At the end, arrange spruce stems with holly branch. In the middle fix a bells with a bow.


Thank you for stopping by.


Monday, September 12, 2016

Magic candleholders for Halloween "Wonderland"

Hello friends!
Thanks for taking the time to stop and visit today. This is Yuliya here). It's here share some of the new Autumn release with you!
Do you like Halloween?) I made for your inspiration a lot of interesting projects!) I will be sharing how to make this Magic candles for Halloween using the CottageCutz dies.

"There was nothing so VERY remarkable in that; nordid Alice think it so VERY much out of the way to hearthe Rabbit say to itself, 
'Oh dear!Oh dear!
I shall be late!' 
For the decor we need:
- black cardstock
- patterned paper
- glue
- sequins
- glossy accents
Attention! It is better to use electronic candle.
Follow me!
1.Prepare strips of paper for the candleholders. The size of my strips 1.5 cm * 14 cm
2. Glue on the candleholders
3. Prepare some die-cuts. I use CottageCutz Haunted Castle (Elites) ...
4.
5. Glue sequins and glue Spiderweb  to the bottom of the candleholders
6. Glue pictures: Qeen, Mad Hatter and Rabbit)


I hope you have been inspired by my project today. More photo in my blog)
Are you starting your Halloween DIYs?)
would like to remind you on our challenge #6
You still have time to share your projects with us. 


Sunday, September 11, 2016

Boo!

Hello all,

It's Donna to share the cutest Halloween card.  I don't normally send out Halloween cards, but I just had to make this one.  The "Witchy Ghost" die is so adorable.  and I thought the "Spiderweb" went well with this set.  Both of these dies are from the 2nd Christmas and Autumn dies release. If you haven't been over to the online store, you should definitely go and take a look at all the new goodies.  


Inside of the card.

Here is how I put my card together:

1.  The size of the card is 4 x 4, 


2.  The first layer is die cut from the CottageCutz square set (the largest one) which measures 3 1/2 x 3 1/2,

3.  The second layer is 3 1/4 x 3 1/4,

4.  To make the background of my card, I cut out a 2" circle and offset it on the layer, I distressed some inks to make the background of the card.  I added some distress inks to the moon to give it an eerie look,


5.  I die cut all my pieces and inked some of the edges,


6.  I added the sentiment, cutting it out with the smallest die from the cross-stitched rectangle set,

7.  I added foam tape to the ghost and die cut another spider out and added foam tape behind it.  I wanted it to look like the spider had a shadow going down the moon,

8.  The inside die is from the "Haunted Tree" which is also from the new release,

9.  I finished the inside by adding the sentiment.


CottageCutz Dies used:


Saturday, September 10, 2016

POINSETTIA ON CHRISTMAS CARD

Hello dear friends,

 This is Anita here.How are you all doing?? Can you feel the magic of Christmas in the air.? There has been loads of Christmas inspirations in the market and CottageCutz has released some wonderful dies for you and you can check them out here.

I have used the pretty poinsettia flowers to adorn the card. Poinsettias and Christmas go together. So I found them apt for my card.


Step-by-step Instructions

Cut out all the die cuts from white card stock. Colour them using Zig Markers


Apply Peeled paint distress ink on the craft mat. 
Spray some water and swish the card base to apply colour.


This is how it looks like.


Emboss Wide Oval stitched frame die on a card stock ans cut out the shape.


 Stamp Christmas sentiment and layer another oval frame die on top with foam tape. 


Start layering the flowers and leaves as shown with foam tape.


CottageCutz Dies used.


CottageCutz Holiday Greenery

CottageCutz Stitched Wide Oval Frame Set (Basics)

The CottageCutz challenge #6 is going on at the blog with Holiday theme. Please do take part to win amazing price.