Tuesday, June 07, 2016

Tri-fold card with rose corner

Hi everyone, Janja here!

For today's post, I prepared a tri-fold card with a bookmark. I used a part of the new release of CottageCutz dies - This N That.
Let's see how it is made.


For the card we need:
  • white card base: 12.75 x 5.5", folded at 4.25 and 8.5"
  • patterned paper: 4 x 5.2" (6 pieces)
  • white cardstock: 3.7 x 5"
  • brown cardsrock
  • white pearl cardstock
  • cord and wooden beads
Fold the card base 2 times. With the largest die from rectangle set, cut corners on one side of the card base.


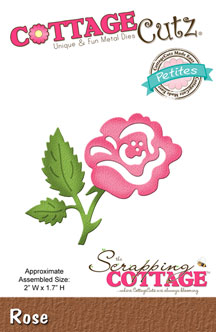
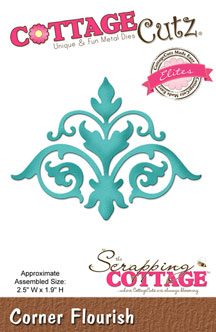
Cut out the patterned paper and roses with the dies: English Rose Corner and Victorian Rose Vine.

First make the interior of the card. The best way to cut the flap from patterned paper is if it is placed on a white card base and draw edge. 

Repeat the process on the outer side of the card. Cut out words - best wishes, and attach it together with the rose corner to the card.

For closing the card use self adhesive round pads. On is covered with tiny loops and the other with tiny flexible hooks. 

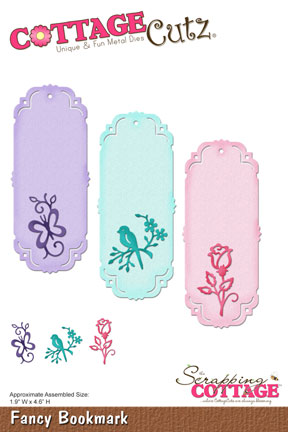
As a small attention we add a bookmark in the pocket. Cut it out of pearly paper with the die Fancy Bookmark and decorate it. Insert the rope and add wooden beads. 
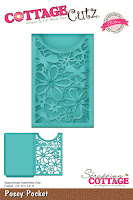
We decorate same way the pocket for the bookmark, which was cut out from the patterned paper with the Fancy pocket plus die.


For the end I would like to remind you on our 

Ejoy and have fun.
Janja 

List of used dies: 


Monday, June 06, 2016

CottageCutz Challenge #3 - POCKET

Hi, Vladka is here!

Thank you very much for all your great cards and projects you've made for Challenge #2. Two lucky winners will be announced at the end of this post. So, stay tuned.


And here is time to start new challenge. 
This time theme is POCKET. 

So, create a pocket on your card or on any other project an decorate it with CottageCutz dies.
And please, use ONLY CottageCutz dies and not any other dies. "Add your link" button is available under the list of used dies. If you are not familiar with this button, please check this post for more explanation. Challenge will be closed on 30th of June!

Ok, let's go to my project. I hope this will inspire you a little bit. 

Here is list of all supplies I used:
Cardstock: kraft Cardstock for the pocket and white cardstock for butterflies and greenery 
CottageCutz Dies: Listed Below
Distress Ink: Peeled Paint
Other: Scissors, Sizzix machine


I made a really simple pocket with new Posey Pocket die and used it for summer table decoration. All you need to do is to cut it out with kraft cardstock and cut off the lower fold, so that pocket is open also there. Glue it just on the side. So, you will be able to put cutlery through the pocket:


With Leafy Swirls cut some greenery out of white cardstock and colored it with Peeled Paint distress ink:


For the finish touch cut the butterflies out with butterfly die (I used Fancy Pocket Plus die) and white cardstock. Glue everything together as shown on the photo. 


So, this is my project for today and I can't wait to see yours. 

-------------------------------------------------------------

And now go back to our challenge a little bit more. As I told you before, two lucky winners will be randomly chosen and will get gift certificate for Scrapping Cottage store.

First one will get gift certificate value of 50$...

... and second one in the value of 25$.

You have time till 30th of June to participate. 
Both winners will be announced in the same post as new challenge (for June) will begin.

All you need to do is take your CottageCutz dies and start creating! 
Please, use only CottageCutz dies!
Have fun and don´t forget to show us all your projects.

"Add your link" button is available under the list of used dies.

-------------------------------------------------------------

And of course we should not forget about the winners for the first challenge.

1st Gift certificate value of 50$ goes to Damjana. Her card was linked under number 4:


2nd Gift Certificate value of 25$ goes to Cebelica. Her card was linked under number 11:


Congratulations!
Please, contact Joanne at scrappingcottage@cox.net to claim your Gift Certificate.
This is it for today. Have fun!


Saturday, June 04, 2016

Bookmarks/tags with Anita Kejriwal

Hello everyone,

It's Saturday today and I'm Anita here with a super fun post for CottageCutz. This May, we have come up with many new dies and it's called This and That. It's a super collection and you will certainly love all the new release dies.
I'm using the CottageCutz Fancy Bookmark die today to create many fun things. This die is so good that you can create not only bookmarks but also tags and labels and even backgrounds for cards. Look at my projects and you will know how.


Bookmarks or Tags


This die comes with three design cut outs . 


Distressed Bookmark/Tag


  1.  For the first tag here, have cut out the die cut in white card stock and distressed it well with Candied Apple, Mustard seed and Spiced Marmalade Distress inks. Spray some water and heat set. 
  2. Cut out the Bird design two times in black card stock and adhere to the tag/bookmark as shown. Add ribbon on top.

Rose Bookmark/tag


  1. Cut out the die cut from Fancy Bookmark die in white card stock and distress with Spun Sugar and bundled sage distress ink.
  2. Cut out three designs from CottageCutz Rose(petites) and the rose design given with the with bookmark die. Shade with distress inks in pink and green. Adhere to the bookmark. Add sequins. Adhere corner die cut from CottageCutz Corner Flourish die on top.

Monochromatic bookmark/tag


  1. Cut out two die cuts in white card stock from the Fancy Bookmark die. 
  2. Tear one of them in half and distresswith Peeled Paint Distress ink. 
  3. Add to the left side of the bookmark. 
  4. Colour the butterfly with Espresso Distress ink and adhere onto the tag as shown.


Card with CottageCutz Fancy Bookmark die.

I have created a simple yet colourful card with this die. Cut out three die cuts from Fancy Bookmark die in similar shades of pattern paper. I have taken orange in my card.
Cut out the top of the tag .
Cut out the card base in white card stock measuring 5.5 inches x 4.25 inches.
Add the cut bookmarks with foam tape as shown.
Cut out the Plumeria flowers from the CottageCutz Plumeria Die in different colours as shown. Layer them size wise and adhere to the base of each tag. Add a pearl as centre.
Add a twine on top.
Add a sentiment in black from the CottageCutz Best Wishes Die.

So you see, this one die is so good that it can be used for many projects.
Do leave your comments. I love to read them.


Friday, June 03, 2016

Birthday Party!

Hello everyone,

It's Donna here and I am featuring one of the new releases from May which is the "Pillow Box Plus". This is a great set, you get the pillow box die which is one piece, plus it comes with many different pieces to decorate the box.  There is a bee and ladybug, five petals and centers, four stems with leaves and an oval decorated die.  There are so many possibilities for this set.  I decided to decorate the pillow box with a birthday theme. I had the perfect festive paper for this project.  I have had this paper in my stash, so I am really happy the way the pillows came out.  Can you image having one of these sitting at each setting on the table?  I think it would look so nice!  I may have to make more of these for one of my grand baby's birthday parties this summer!


Here is a blue box with matching ribbon and twine.  I used the doily from the "Gift Tag Topper" and one of the "Party Hats" and added a rhinestone for this pillow box.

Here is a green box with matching ribbon and twine.  I used the doily from the "Gift Tag Topper" and one of the "Party Hats" and added a rhinestone for this pillow box.

Here is a orange box with matching ribbon and twine.  I used the dies from the "Gift Tag Topper" for this pillow box.

Here is a pink box with matching ribbon and twine.  I used the doily from the "Gift Tag Topper" and one of the "Party Hats" and added a rhinestone for this pillow box.


Here is how I put my box together.

The best part about this pillow box die is you can use a 6x6 piece of paper to cut your box out.  The score lines are very clear with just one cut.

I  scored the fold with my bone folder and used a piece of score tape to put my box together.

Here is what the doily and birthday looks like in the "Gift Tag Topper".


Thanks for taking the time to read my post, I hope you enjoyed viewing these lovely boxes.  Please leave me a comment on how you like them.  

Dies I used on my project: