Friday, December 07, 2018

Warm Wishes

Happy Friday!  I had two motivations for today's card: 1) it's getting closer to Christmas so I need quick cards to make (I'm a little behind) and 2) I wanted something cozy.  We've had some cold weather here for the past two days (okay, 52 degrees, but COLD for Southern California!)  So my card fits both those criteria.
The cable knit embossing folder coupled with a plaid that reminds me of flannel is the perfect pairing for the sweater from Ugly But Cute Sweater die.  This card goes together quickly.
I die cut all pieces in white using the sweater from Ugly But Cute Sweater, mittens from Coffee & Cocoa Warm Wishes and snowflake from Season's Greetings w/ Snowflakes dies.
I used markers to color all the pieces except the snowflake.
Then I assembled them.
I embossed an A2 white panel using the cable knit embossing folder and cut a 5 1/2 x 1 1/2 inch panel from the plaid.  I also used a self adhesive sheet and cut "Warm Wishes" from green card stock.
I glues all the pieces down except the sweater which I popped up using foam dots.  After I had it assembled I decided the sentiment didn't stand out enough for my liking so I cut another using gold card stock.  By using the self adhesive sheet under the card stock it was easy to just adhere the gold sentiment over the green one.  I like how it turned out.  It gives the sentiment a little dimensions and you can just see a bit of green shadow!

Dies used:

Thanks for stopping by today.  I hope you have a wonderful and creative weekend!

Thursday, December 06, 2018

Cozy Christmas!

Good Morning Scrapping Cottage Fans!

I am still cranking out my Christmas cards.  I make the cards mainly for family, close friends and especially the kids.  The one I am making today is going to a friend's little son!  He is just 2 which is the perfect age at Christmas.  He is just so excited about everything!!

Design Steps:
 1.  Cut all the piece out using the Cozy Fireplace Pets die.  I cut them out of the different colored card stocks seen above. Add shading with red, brown, dark green, and gray ink.  After shading assemble all of the pieces
 2.  Use an A2 white card base cut a slightly smaller piece of yellow card stock and cut a piece of yellow striped DP slightly smaller then the yellow card stock
 3.  Cut a piece of brown card stock 4 x 1 1/2.  Glue the striped DP to the yellow card stock and then add the brown to the bottom of the striped paper
 4.  Glue to the A2 white card base
 5.  Place the fireplace onto the card first and then add the rug with the little critters
6.  Stamp your sentiment and layer onto red card stock.  Glue to the upper center of the card as shown
below

CottageCutz Products

I am just in love with this cute card.  It is going to be very difficult for me to give it away!
Blessings


Pam

Wednesday, December 05, 2018

Merry Christmas Card and Treats

Hello!  This Sukie and I'm back with a fun project idea for my guest designer post.  I used the Cottage Cutz Christmas Tag Topper set for my card and treats. This set is so versatile and can be used for so many different projects.
I found the papers in my stash from the DCWV Winter mat stack, the papers are a lighter card stock which works best for wrapping the Hershey's Nuggets.  I trimmed the wrappers to 1"x3" which is the perfect size for the chocolate.  I used Glue Dots Temporary Adhesive tape to adhere the wrappers to the Nuggets.
The tray for the Nuggets was cut at 2"x4" in a heavier card stock.  I scored the sides at 1/4" to create the tray.
The tag toppers were die cut to coordinate with the Hershey's Nuggets.  I used a pen to detail the snowmen faces and buttons.
Once I wrapped all of the Nuggets, they were secured to the trays with a removable Glue Dot, this helps to keep them from shifting in the clear bags.  I cut out the rectangles from the Cottage Cutz Nested Stitched Scallop Rectangle set and folded it in half to create the bag topper.  The base of my card was inked on the edges and splattered with some blue paint for a bit of detail.
I adhered the banners to the card based and used some Totally Blue Trendy Twine to accent the top of  my card.  
Here are the dies used on my project available over in the shop:

Tuesday, December 04, 2018

May Your Holidays Sparkle & Shine

Hello! This is Sukie and I have a project to share for my guest designer post.  With the holidays right around the corner, I created a set of cards which can easily be mass produced.
My cards feature the adorable Wrapped Candy and the Nested Wacky Stitched Rectangle Cottage Cutz die sets.
Once I cut out my card base and candy pieces, I accented the top layer of the candy pieces with the Art-C Red and Green Glitter Waterbrush for the perfect amount of sparkle and shine.
The sentiment is from the Scrappy Moms (retired) "Merry and Bright" stamp set.  I opted to stamp the sentiment in 2 different areas to create a variation of the card design.  Coordinating gems and sequins were sprinkled amongst the candy as embellishments on my cards.
Here are the dies used for my cards available over at Cottage Cutz:

Monday, December 03, 2018

Christmas Ornaments

Hi, Lois here for my regular Monday post.  I hope you liked the multiple cards we showed on the blog last week, using the new Pets release.  And be sure to check out the CottageCutz store for some bargains -- up to 70% off on some of the dies.

I have a really quick project for today -- some Christmas ornaments made with a couple of CottageCutz dies.


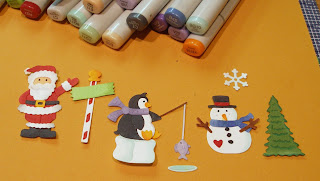
To start I cut all the pieces of the Snowglobe, Winter Accessories die from white cardstock.


I then colored the individual pieces with Copic markers and constructed each character.


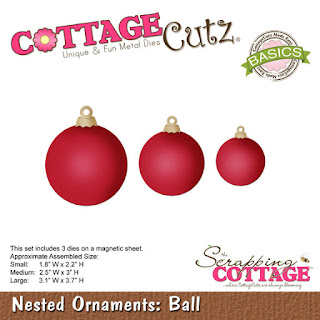
I then cut the largest Nested Ornaments: Ball die from three different colors and the caps from gold cardstock.


It was just a matter of choosing which character would go on which ornament.


I added a bit of gold twine to each ornament. and they were done.


CottageCutz dies used on my ornaments were:

http://www.scrappingcottage.com/cottagecutzsnowglobewinteraccessories4x6.aspx

http://www.scrappingcottage.com/cottagecutznestedornamentsballbasics.aspx

It looks like the Snowglobe, Winter Accessories is currently out of stock, but it will return soon.


Sunday, December 02, 2018

Light the Candle

Hi!

It's Anja again. December is here. All the lights are out and slowly Christmas spirit is starting to feel.
Can't believe how fast this year ran by.

As we light the first candle in our Advent wreath, I wanted to use the candle as my main motive today. And this is what I came up with.


For this card I used:
-  Cottage Cutz dies (Country Candles, Pierced Square Set),
- Distress Inks (Mustard Seed, Spiced Marmalade, Wild Honey, Fired Brick, Vintage Photo, Black Soot, Pine Needles, Mowed Lawn, Peeled Paint, Antique Linen, Tumbled Glass),
- craft card base (15x15 cm),
- craft paper for die cuts,
- silver card stock for background (14,5x14,5 cm and 8,5x8,5 cm),
- patterned paper for background (14x14 cm),
- white card stock for die cuts,
- white pigment ink,
- glossy accent,
- adhesive foam pads,
- paper glue.

First I cut all the pieces and colored it. I cut more greenery.


The I cut all the elements for the background. I used second largest square die.


I cut other background elements out of silver and patterned paper.


I used adhesive foam pads for the smaller squares.


I used a bit ow white pigment ink to make the glow.


And then I just arranged and glued the candle and the greenery on the card. I used glossy accent for the red berries and my card was finished.


Before I go I just want to remind you that there are some new dies available in the store. Go and check it out.

I'll be back next Sunday. Have a wonderful day and the whole week.

Anja Z.


Cottage Cutz dies I used: