Wednesday, August 22, 2018

Christmas Release Design Team Samples (Part 1)

Hello Scrapping Cottage friends! Thanks for taking the time to stop and visit today. We are sampling DT cards from the new 2018 Christmas release. There are 29 new designs in this release and it's just Part 1 of what we will be releasing for Christmas. And, they are currently 25% off for a limited time.

We have had a good response when we do a group post on a release. It gives you the opportunity to see more card samples from the Design Team. So we are continuing that again for this release. We have 4 samples for your viewing pleasure today.

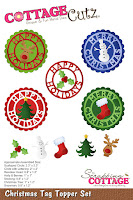
Card 1:  This first sample is from Jeanne Knobbe. She used the Santa Hat Cat and the Christmas Tag Toppers dies to create her card in traditional Christmas colors. The striped patterned paper and image panel placed on an angle give it that extra flair. 
Looks like the Santa Hat Cat is temporarily out of stock. But check back on that one soon. How cute would this card be for the cat lover that we all know. The tag toppers are a great way to add your greeting to a card. This design would be so easy to reproduce if you want to send several of these.
Card 2:  This next sample is from Lois Bak. She is great at creating such fun folds and this one doesn't disappoint. She used the Teapot Snowman and Sweet Christmas dies to create this super cute side step card. This card would be perfect for the tea lover or even the friend we all have who loves to bake.
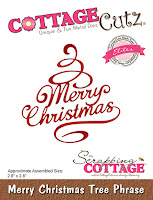
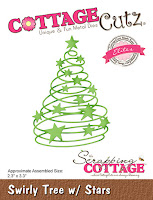
Card 3: This next sample is another one from Lois Bak. On this card she used the new Swirly Tree with Stars  and Merry Christmas Tree Phrase dies. Love how she took her patterned paper strips and created a sunburst for such a unique and different Christmas card.
Card 4: Our last sample today is from Pam MacKay. She used the sweet Hugging Penguins and Christmas Tag Toppers dies to create this precious Christmas card. Her embossed background and patterned paper just add to the charm of this card. Notice how she created her image panel? She used the pierced rectangle die to cut her background and snowbank. It's a creative idea.

I hope the samples shown today have sparked some ideas for ways to use these new dies.  And, remember they are currently 25% off in the online store.

dies used to create cards:
http://www.scrappingcottage.com/cottagecutzchristmastagtopperset.aspx

http://www.scrappingcottage.com/cottagecutzhuggingpenguins.aspx

http://www.scrappingcottage.com/cottagecutzsweetchristmas.aspx

http://www.scrappingcottage.com/cottagecutzteapotsnowman.aspx

http://www.scrappingcottage.com/cottagecutzmerrychristmastreephraseelites.aspx

http://www.scrappingcottage.com/cottagecutzswirlytreewstarselites.aspx


Tuesday, August 21, 2018

Winter cabin in holiday ornament

Hi, Janja here!
New Christmas dies are already in the store. They are currently on sale for 25% off.
Since my dies are still on the way, I have chosen some older ones and made the holiday card.


- CottageCutz dies: Winter Cabin Border, Spruce Stems, Nested Ornaments: Bulb, Oval Set, Nested Scallop Oval Set
- white card base: 5.3 x 5.3" (13,5 x 13,5 cm), folded
- white and brown cardstock
- embossing folder
- double-sided adhesive tape, self-adhesive foam tape, glue
- colored ink pads

Cut out the ornament from a brown cardstock. Then cut out the opening with an oval die in the ornament. Prepare two more ovals. The cuts on the edges are shaded and glued together.


Cut out the winter cabin border. Shorten it with scissors to fit the size of the ornament.
Assemble ornament.


Prepare a white card base. Trim two squares of white and brown cardstock (4.7 x 4.7" and 4.9 x 4.9").
Cut out round openings in the middle of both to match.
Stamp a sentiment. 


Cut out another square from a white cardstock and emboss it. Attach it to the back side with self-adhesive foam tape.
Cut some spruce stems.


Finish the card.


Thanks for stopping by. Have a lovely day.


Monday, August 20, 2018

Rainbow Nativity

Hi, Lois here with another card made with one of the new CottageCutz Christmas dies, which are currently on sale for 25% off for a limited time.  Be sure to check them out in the store.

Coincidentally, I used the same die that Pam used last Thursday.  This one is relatively simple, but I think it says a lot.


I used a precut 8" x 11" card base, and cut two smaller panels 4 1/4" x 5 1/2" -- one white and one black.


Using the Journey to Bethlehem die,  I cut two images -- one from the white panel and one from the black panel.   I was going to use the black one on my card, but the white one would be used as I was creating my background.  I may use it for another project.


I started sponging my rainbow at the bottom right-hand corner.  The colors I was going to use are Ranger Distress inks -- Dried Marigold, Fossilized Amber, Bundled Sage, Tumbled Glass, Milled Lavender, and Worn Lipstick.


I wanted the green to be high on the paper to show through the palm trees, so I checked the placement as I went along.


After I determined that the trees would be green, I continued my sponging up to the top left-hand corner.


I laid the black silhouette onto the background and marked where I wanted to trim the rainbow panel.


After I trimmed the background, I applied glue to the back of the die-cut scene -- using a fine-tip glue bottle.


I then placed the die-cut panel onto to rainbow background, and it was ready to be adhered to the white cardbase.  As I had said previously, it was a relatively simple-to-make card.  Here again is my finished card.  I chose not to put a sentiment on the front of the card


The CottageCutz die used on my card is:

http://www.scrappingcottage.com/cottagecutzjourneytobethlehemelites.aspx


Sunday, August 19, 2018

Owl Good

Hi!

This is Anja. The other DT ladies started making Christmas cards, so slowly I'm getting in this mood too. The new dies take longer to come to me, so I used the ones I already have and made a card that could also be used for sending holidays wishes.


For this project I used:
- Cottage Cutz dies (Stylized Owl, Angel With Holly, Christmas Holly Bells, Lantern w/ Holly Vine, Retro Tag Toppers, Oval Set),
- Distress Inks (Vintage Photo, Crushed Olive, Pine Needles, Aged Mahogany, Barn Door, Walnut Stain, Tea Dye, Mustard Seed, Spiced Marmalade, Black Soot),
- craft card base (10x15 cm),
- black card stock for background (10x15 cm),
- white card stock for die cuts,
- wood patterned stamp, 
- brown card stock (10x15 cm, 5 pieces),
- white pigment ink,
- black pen,
- adhesive foam pads,
- paper glue,
- scissors.

First I made the owl. I used white card stock and then colored the edges with Distress Inks. I used black pen for the eyes.


I used different dies for the vines. I again used Distress Inks for coloring.


I made the banner with Retro Toppers dies. I wrote the sentiment by myself with black pen. I used Distress Ink to color around the edges.


Then I made the background. First I cut five 10x15 cm pieces of paper from brown card stock. I used Oval Set dies to cut the ovals from the paper.


Then I colored the edges of the ovals and the paper with Distress Ink.


Next I used the same Distress Ink to stamp the wood pattern on the background.


Then I glued all five pieces of paper together and distress the edges with the scissors.


I decided to color the edges with white ink to make them a bit softer. I also glued the back with black paper.


And then I glued the background to the craft colored card base and then added the holly vines and owl (I used adhesive foam pads).  In the end I glued the sentiment on top of the vines.

And this is my finished card.


The new dies are still 25 % off, so don't forget to check it out.

May your Sunday be sunny and fun.

See you again next week.

Anja Z.


Cottage Cutz dies I used: