Saturday, April 28, 2018

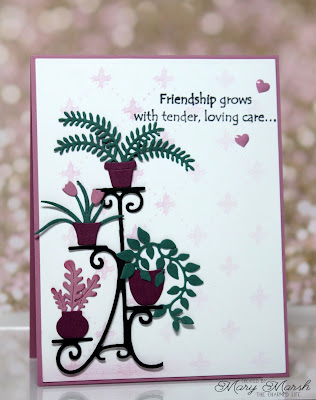
Friendship Grows


Hello Scrapping Cottage friends! Thanks for taking the time to stop and visit with us today. It's Mary Marsh here bringing you the Saturday edition of the Blog. Before I get started with my card for today, I wanted to give you a heads-up on a new release of dies and a sale.

There is a brand new release of Mother's Day dies with 22 different designs and they are on sale right now at 25% off. The Design Team has begun showing samples using these dies. Check out the previous days Blog posts to see those samples.

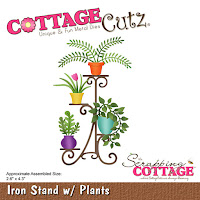
Now let's move onto my card for today. This one I created with the Iron Stand w/plants die from the Llamas & Botanical release. So let's get started with some details on how I created my card.

Step 1: This week I started my card with the card colors. I used the colors from the Tuesday Splitcoaststampers color challenge #684. They were sweet sugarplum, rich razzleberry and tranquil tide.

sweet sugarplum, rich razzleberry, tranquil tide

Step 2: I used a stencil to add some subtle color to my white background panel. Anytime I use a stencil I secure it with painters tape. That works best for me and it doesn't allow the stencil to move around. The stencil I used is a vintage quilt and is from Stampers Anonymous.
I used a stencil brush because I just wanted some light color and a somewhat faint design for the background.
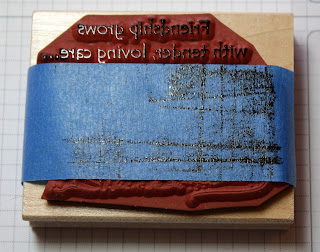
Step 3: I stamped my sentiment before I added my images. I only wanted the sentiment portion of this stamp. So I used painters tape to tape off the image and inked my stamp.

My Stamp-a-ma-jig is my go to tool when stamping with red rubber stamps. Stamped first on the plastic sheet and then used the sheet for placement and to make sure it was stamped straight.
 
 
Step 4: I cut the plant stand in black cardstock and then the plants and pots in the challenge colors.
 I wanted the plant stand lifted somewhat from the background so I rolled small glue dots to create a dimensional adhesive.  Used multi medium matte to secure the images to the card base.
Step 5: To complete my card I attached the image panel to the sweet sugarplum card base and added 2 enamel hearts.
Well, I hope I have given you some inspiration on a way to use this die. And, by changing the sentiment you could easily use this for Mother's Day or a birthday card.
that's it for me for this week. See you next Saturday.
 
dies I used to create card:
http://www.scrappingcottage.com/cottagecutzironstandwplants.aspx


Friday, April 27, 2018

Foxy Mama Card

Happy Friday Cottage Cutz fans.  It's Jeanne posting today with a card created with dies from the new Mother's Day release.  These beautiful dies are on sale for 25% off for a limited time at the online store.
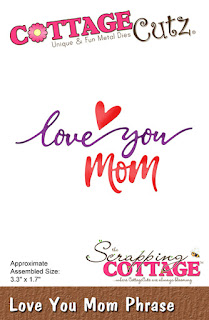
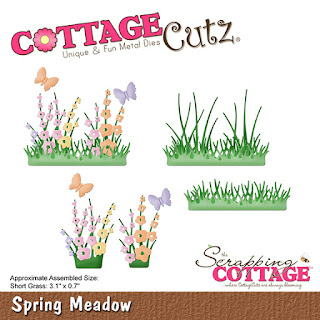
For my card I used the adorable Mama Fox and Baby, the Love You Mom Phrase and the grass from Spring Meadow dies.
I cut a white side fold A2 card base and a panel of Wisteria Wonder card stock the same size as the front - 5 1/2 x 4 1/4 inches.  I personally like cards that have a white base since I find it easier to write inside and I don't have to add a panel to the inside.  However, you could make this card using just the Wisteria Wonder as the base.
Next I cut the foxes from Very Vanilla and Cajun Craze.  I used a Multi-Liner pen to color the eyes and Copic markers to color the noses and inside ear pieces.
I used a sponge dauber with black ink to color the legs since I did not want them solid black. I assembled the pieces.
I cut a panel 5 3/8 x 4 1/8 from white cardstock and using a sponge dauber, I stenciled hearts in Soft Sky.  The grass is cut from Pear Pizzazz using the Spring Meadow die and the sentiment in Wisteria Wonder using the Love You Mom Phrase.
Finally, I assembled everything.  This card makes a precious CAS Mothers Day card!

Dies used:
http://www.scrappingcottage.com/cottagecutzmamafoxandbaby.aspx
http://www.scrappingcottage.com/cottagecutzloveyoumomphrase.aspx
http://www.scrappingcottage.com/cottagecutzspringmeadow.aspx

Don't forget to visit the online store to see the new release which is on sale for 25% off for a limited time!

Thanks for stopping by and have a creative weekend!


Thursday, April 26, 2018

New Release Alert!!

Good Morning Scrapping Cottage Friends!

It is Pam creating with you today!

BIG NEWS!!! We have a NEW Mother's Day Release available in the online store.  And the dies are currently on sale for a limited time at 25% off the retail price.  There are 22 fantastic dies!  These dies are so adorable don't miss out on this sale price!!
Now on with today's project!  I used the sweet little mama duck with her ducklings for a Mother's Day card!

Design Steps:

 1.  Use an A2 white card base cut a slightly smaller piece of blue card stock and a piece of DP 4 x 5 1/8

2.  Glue the blue card stock to the back of the DP and add the ribbon.  Then glue to the white card base

 3.  Cut the ducks using the Mama Duck & Ducklings die on yellow card stock.  Use an orange Copic marker and color the beaks
4.  Use a slightly darker yellow ink and shade the mama and ducklings.  Add small black pearls for the eyes
 5.  Use the Wave Border die and cut out 2 of the waves.  Glue the waves to some cloud DP and then cut the DP with the Nested Stitched Eyelet Rectangle die
6.  Add the Mama and Ducklings to the waves
7.  Using foam pop the rectangle to the front of the card as shown
8.  Using foam with adhesive on one side stick the blue card stock to the foam and then run through the Love You Mom Phrase die.  Glue the phrase to the card as shown

Cottage Cutz Products


Thanks so much for stopping by!  Please make sure to check out this fabulous new release you won't be disappointed!!

Blessings
Pam


Wednesday, April 25, 2018

Love Ya Mom! Botanical Mother's Day


Hello everyone! It's Janet here with a delicate botanical mother's day card. I like the mix of hard black and white with all the soft pastels that frame the Mom tag sentiment. Perhaps I should have chosen a slightly more muted yellow ribbon but in person it isn't as bright as the photo shows here.

Speaking of MotherÅ› Day, 22 new dies have just been released to celebrate the occasion. The dies are currently on sale so go check them out and take advantage of the discount. The link can be found HERE.

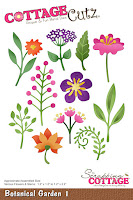
My flowers and greenery are all from the new Botanical Garden 1 die that is part of the Llamas and Botanicals release. Rather than color the flowers with markers, I used white panels that I first covered in blended distressed oxide inks, splattered with water to create additional texture, and then sprayed with gold glimmer spray. These panels of color created a really special array of flowers for the card. I raised the card front with the wide black frame up on foam tape to create a window which was a perfect base to arrange all the individual flower die cuts. I used the versatile Mail Tag die to use as the sentiment to tell Mom just how much she's loved.

The video shows how I created the panels, how the individual flowers go together and how I created the card front with the framed and raised front panel. You can watch the video by clicking HERE or clicking on the thumbnail below.


Thanks for spending some time with us here today. See you again soon!

Hugs,
Janet

DIES USED IN THIS CARD:


Tuesday, April 24, 2018

Llamas & Botanical Samples (Part 3)


Hello Scrapping Cottage friends! Thanks for taking the time to stop and visit today. We have a release of Llamas & Botanical dies available in the online store.

The dies have a couple of super cute Llama images as well as cactus and other succulents. And, let's not dismiss our sweet hummingbird and a great garden bird image.
 
There are so many different ways to use these dies, and the Design Team has been featuring these dies in their posts over the past 2 weeks. If you haven't' seen them look back over the blog for some great eye candy.
 
Today we are showing you 3 additional cards using different dies from this release. You can also see a couple of other group samples here and here.
 
Card 1: This first sample is done by Anja Zurga. She used the Iron Stand w/Plants die to create a beautiful card of encouragement. She did some background stenciling to give some added emphasis to the plant stand.
Her sentiment fits so many occasions. Whether you are sending this card off to a friend or to your significant other, the message complements the flower images so well.  
 
Card 2: Our next sample is done by Jeanne Knobbe. She used the Garden Hummingbird to create a beautiful floral card. She paired the images with some great designer papers. Nothing says garden to me like gingham paper. It harmonizes with these images really well.
 
Card 3: This last sample is done by me - Mary Marsh. I used the Botanical Garden 1 and Botanical Garden 2 dies to create a sympathy card. The background is a watercolored card base that I stamped with flowers. I used the stamping off technique to make them lighter.
Cut the ornamental grass from Botanical Garden 2 and some other ornamental greenery from Botanical Garden 1 and layered it on the card.  A sympathy  sentiment and a few sequins completed this card.
 
That's our card samples for today.  Hope these samples have sparked some ideas for additional ways to use these dies. They are so versatile and could be used for a variety of occasions. 
 
dies used to create cards:
 
 
http://www.scrappingcottage.com/cottagecutzgardenhummingbird.aspx
http://www.scrappingcottage.com/cottagecutzbotanicalgarden1.aspx

http://www.scrappingcottage.com/cottagecutzbotanicalgarden2.aspx