Saturday, February 10, 2018

Stitched HB2U Birthday

Hello Scrapping Cottage friends! Thanks for taking the time to stop and visit today. It's Mary Marsh here bringing you the Saturday edition of the Blog. Hope you are staying warm during this cold snap that is currently with us.

Here is some good news that comes in the middle of winter! We have a new release of dies. There is a In-Stitches release with 12 new dies and a Spring release with 21 new designs. And, some other good news is that for a limited time, you can get the new dies at 25% off. Just in time to create your Easter or Springs cards.

Today, I am using the new Stitched Alphabet, Stitched Owl and Bird and the Stitched Sun, Clouds and Umbrella dies to create a birthday card for a little girl.  So let's get started with some details on how I created my card.

Step 1: Since I was creating an outdoor scene, I started by sponging my cardstock with distress inks. I used tumbled glass and mowed green lawn on distress ink cardstock.
I sprayed the panel with a mister to move the ink around a bit and get a more muted look.
I used my heat tool to speed up the drying process. I like the water spots and how the ink splattered a bit in the comer of the card.
Step 2: I started cutting my images.
Bird: cucumber crush cardstock for the body and pacific point cardstock for the wing.
Cloud: I cut it from the sponged background
Sun: I cut this out intending to use it in the corner of my card. When I started assembly, I forgot I had it and put the bird image up to high on the panel (LOL)!!!
Tree Branch: cut in brown sugar cardstock and the leaves are cut in garden green cardstock.
HB2U: cut in cucumber crush cardstock.. I just love the look of the stitched letters.
 
Step 3: Now that all the images are cut, I am ready to start card assembly. I think this little stitched bird is just to cute. She could be used for a variety of occasions, but today I am using for a birthday card.
Step 4: I finished off my card by stamping the sentiment directly on the cloud. I thought it added interest and didn't interfere with my sponged background. Used my MISTI for placement and also to insure I would get a good stamped image.
I wanted to add some enamel dots but I didn't have any in the cucumber color. So I cut some small circles and used those on the card. I secured the image panel to the card base to complete this card.
Cucumber Card Base: 4 1/4" x 5 1/2"
Image Panel: 4 1/8" x 5 3/8"
Well, that's it for me for this post. I hope I have given you an idea for the new stitched dies. Here is a link to another card I created in different colors using these same dies. See you next Saturday.
Dies I used to create card:
http://www.scrappingcottage.com/cottagecutzstitchedalphabet.aspx

http://www.scrappingcottage.com/cottagecutzstitchednumbers.aspx

http://www.scrappingcottage.com/cottagecutzstitchedowlandbird.aspx

http://www.scrappingcottage.com/cottagecutzstitchedsuncloudsandumbrella.aspx
http://www.scrappingcottage.com/cottagecutzstitchedhoneybees.aspx


Friday, February 09, 2018

A Bunny Valentine

It's Jeanne today and I couldn't resist making one more Valentine!  Today's card is a tri-fold and features dies from the new Spring release.
I started with a piece of red 12 x 4 inch cardstock and scored it 4 inches from each side so I would have a 4 inch square card.  I cut  three white squares using the largest of the Nested Stitched Eyelet Squares Set.
I then cut the bunny and hearts from different colors of cardstock.  I wanted various shades of pink and red for the hearts so I went through my scraps.  A good way to use them up!
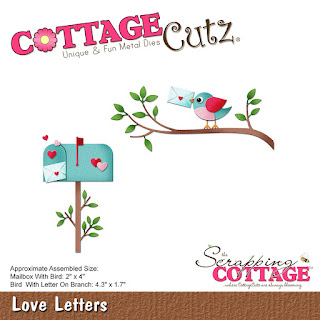
I did use two different dies for the envelope since I wasn't certain which one would be the correct size for the bunny.  I ended up using the one from the Love Letters die.  I cut the hearts from the Love Letters and Love Bird Branch dies.  I used a black multi-liner to color the bunny's eye and nose and a Copic marker to color the center of the wheel.
I assembled the bunny and cart and used many but not all the hearts.  I decided the front of the card needed a little bit of a pop so I cut a navy blue square the same size as the outer edge of the eyelet square and glued it to the back.  It added just enough contrast.
I then assembled the second panel with the sentiment and added some of the extra hearts.
And finally glued the back panel on the center of the card with the balance of the hearts.

Dies used:
http://www.scrappingcottage.com/cottagecutzmrpeterrabbit.aspx

http://www.scrappingcottage.com/cottagecutzsomebunnylovesyou.aspx

http://www.scrappingcottage.com/cottagecutznestedstitchedeyeletsquareset.aspx
http://www.scrappingcottage.com/cottagecutzlovebirdbranch.aspx

http://www.scrappingcottage.com/cottagecutzloveletters.aspx

I hope you enjoyed my card today.  It would make a great Valentine for "some bunny" special!

The new Spring dies are 25% off for a limited time.  Visit the store and  order yours today!


Thursday, February 08, 2018

Bunny Love

Good Morning Scrapping Cottage Family!

It is Pam sharing with you today! Cottage Cutz has a brand new release of two collections of dies.  They are In Stitches and Spring Designs in all there are 33 new dies.  And for a limited time the new dies are 25% off!
Today, I am really excited to be sharing one of our brand new Easter dies! The die is Some Bunny Loves You!  This die is just adorable!


Design Steps:

 1.  Using the Some Bunny Loves You die cut out the bunnies in gray and the phrase and tails in white
 2.  Use TH Distress ink to add some shadows to the bunnies
 3.  Use the Spring Grass die and the Victorian Fence die to cut out the grass in green and the fence in white
 4.  Use an A2 white card base and a slightly smaller piece of green, a piece of designer paper 4 x 5 1/4 and a piece of pink DP 2 x 5 1/4
5.  Assemble the card as shown. I popped up the bunnies onto the grass

Cottage Cutz Products Used for the Card


Please make sure you stop by our store.  It is just full of awesome dies and stamps!

Blessings
Pam

Tuesday, February 06, 2018

Get To Know Janja Albrecht

Hello Scrapping Cottage friends! Thanks for taking the time to stop and visit with us. We started a new feature several weeks ago that we are continuing with today on the Blog.  We would like to give you a closer look at our designers.  It's  a "get to know the design team"  and today we are featuring Janja Albrecht.

Hello, my name is Janja. I live in Ljubljana, the capital of Slovenia, with my husband. We are together over 41 years. Mom of two grown-up children, and a grandma of three wonderful grandchildren, all boys.
Welcome to Slovenia, the only country with the word LOVE in its name! It is located in the heart of Europe, on the sunny side of the Alps.
I have been crafting for as long as I can remember, and I do all different types of craft. Seriously, I began my paper crafting journey when I retired.  
I have always loved to paint and draw, and paper has always been my favorite material. I'm addicted to it, so that instead of souvenirs, I carry home from different journeys all kinds of papers.
 
Socializing with grandchildren and reading fairy tales is reflected on my creations.
I always try to create a story on cards. First, I make a sketch for the entire scene on a white paper. Then I choose the colors, and start creating.
 
Animals are my favorite motives. Among the CottageCutz dies there are many of them, and they are all very cute. CottageCutz dies can be beautifully combined to each other.
I also like vivid colors. You will recognize my cards by them.
My creative space:

Since February 2016,  I have been a member of the design team at The Scrapping Cottage. During this time, a lot of cards were created. These are some of my favorites.


Monday, February 05, 2018

Easter Morning

Hi, Lois here today.  I'm hoping that winter is over here in Florida.  I don't do well in the cold!  To keep my spirits up, I've been enjoying playing with the new release of Easter/Spring dies from CottageCutz.  Be sure to check them out over on the website while they're 25% off.  My card today uses the Spring Tree of Life die.


I wanted to try a bit of background sponging on my card to depict a sunrise, so I cut the image from white cardstock -- which would not take away from the background.


Using sponges, I made my background from Ranger Distress inks -- Scattered Straw, Wild Honey, Worn Lipstick, Milled Lavender, and Tumbled Glass.  I wanted the sun to be in the lower right-hand corner, so I slanted the colors.


I then laid my die-cut onto the sponged background and marked the edges.


I trimmed the panel slightly inside the pencil marks and glued down the diecut.


Then I cut my card base:

Purple - 8 1/2" x 5 1/2"
Pale yellow patterned paper (a watercolor wash) - 4" x 5 1/4"


Lining up my yellow paper in my MISTI stamp positioner, I stamped my Easter greeting . . .


. . . and constructed my card, placing the die-cut piece at an angle.


I cut a frame from the same purple cardstock as the base and added strips of foam tape to the back.


I then mounted the frame on top of my die-cut -- and I was finished.


CottageCutz dies used on my card are:

http://www.scrappingcottage.com/cottagecutzspringtreeoflife.aspx

http://www.scrappingcottage.com/cottagecutzpiercedwidesquareframesetbasics.aspx