Tuesday, January 07, 2020

Birthday card for boys

Hi, Janja is here with you.
One of my three grandchildren is celebrating his birthday in January. So for the first posting of the new year, I prepared a birthday card.


- CottageCutz dies: Dump Truck, BulldozerFireplace w/ Accessories (gifts)
- craft card base: 5.3 x 5.3" (13,5 x 13,5 cm), folded
- white cardstock
- colored cardstock
- clear embossing ink pad
- white embossing powder
- heat tool for embossing powder
- cloud stencil
- light blue ink pad
- glue, double-sided adhesive tape, self-adhesive foam pads

First, I cut the truck and bulldozer out of yellow and gray cardstock.


Then I prepared some gifts from colored cardstock.

Alternatively, you can add hearts instead of gifts, and get a Valentine's Day card.


For the background I used a cloud stencil and a light blue ink pad. I ripped off a craft cardstock and glued it to the bottom.


I took a blank craft card and a white cardstock. I cut the frame out with two square dies. The outside dimensions are: 5 x 5 inches (12,7 x 12,7 cm). The frame width is 1/2 inch.
For the sentiment I used a white embossing powder.


When I cut all the pieces, I started assembling the card. Finally, I added a yellow enamel dot to the sentiment strip.


Have a nice day.
Janja


Sunday, January 05, 2020

Holiday Card With A Pocket

Hi!

It's Anja here. Hope you had a good time during the holidays. I had a few days off work and it was so nice to spend it at home not doing much.

But I took some time for crafting. One of the projects was this cute holiday card I did for a gift. It my give you an idea as a gift card holder.


For this card I used:
- Cottage Cutz dies (Moose Pulling Gnome Sled, Holiday Corners, Santa Over Christmas Town, Peeker Pocket, Nested Wacky Stitched Square Set),
- Distress Inks,
- craft card base (15x15 cm),
- dark red cardstock for background (3 pieces of 14x14 cm) and die cuts,
- patterned paper (3 pieces of 13,5x13,5 cm),
- white card stock for die cuts,
- glitter embossing powder,
- embossing ink,
- black pen,
- heat gun,
- paper glue.

First I cut and colored the moose and the gnomes.


Next I cut and embossed the corners with glitter powder.


I did the same with the snowflakes.


Then I cut all six squares for the background and insides.


And last I cut additional squares and the pocket. I used red card stock for the pocket.


And when all that was cut and colored I assembled the card together.


This is the inside of the card with a pocket to hold your gift card.
 

And that's all form me. I wish you a nice start of the new week and see you again on Sunday.

Anja Z.


Cottage Cutz dies I used:


Saturday, January 04, 2020

Tons of Love


Hello Scrapping Cottage Friends

It is time to start my Valentine cards!  I am finding that the cute Arctic Animals are perfect little critters to make adorable Valentines for friends and family.  I am starting out by using the Whale from the Arctic Whale and Narwhal die.


Designer Steps:

 1.  Use an A2 white card base cut a piece of red card stock 4 1/8 x 5 1/4.  And glue it to the white base card. Cut a piece of DP as shown

 2.  Cut a piece of blue card stock 4 x 5 1/8.  Use some blue ink and brush onto blue card stock to add some texture for the sky then glue to the red card stock
3.  Glue the DP to the blue card stock
4.  Using the Arctic Whale and Narwhal die cut out the whale using black and white card stock and then assemble.  Pop up the whale to the card and add the hearts and sentiment.  Your card is complete!

CottageCutz Products

Hope you enjoyed visiting the site today!  We appreciate you stopping by!
Blessings
Pam

Friday, January 03, 2020

Adventure Awaits!

Happy New Year Cottage Cutz fans!  I hope your year has started off great!  Mine has been quite nice although having a day off in the middle of the week has thrown me off a bit.

For today's card, I'm using new dies from the Arctic Friends and 2019 Christmas release.
This card would be perfect for anyone who loves to camp or go on road trips.
To start, I cut all the pieces from various colors of cardstock and vellum, and assembled.  I used Distress Oxide inks in Vintage Photo to give some shading to the edges.
Next I cut two sets of mountains in two shades of gray using the Snowy Mountains dies.  To give variety, I used the snow portion in gray for one set.  I decided that if I were camping, it probably wouldn't be in the winter, so I wanted my mountains "snow free".  I used the DO ink on the edges here as well.
For the sky I used a cloud stencil and a light blue ink.
I created the grass by blending three colors of green ink.  After these were done I began assembling the card on a top folding A2 card base.
I first layered the cloud panel, then the grass and finally placed my mountains.  I cut off the over hanging edges of the mountains.
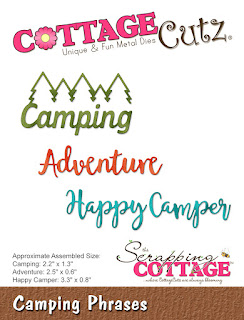
I placed washi tape that looks like a road about 3/4" from the bottom and adhered the word Adventure from the Camping Phrases die.
Using foam dots, I popped up the card and trailer.  I'm very pleased with how this card came out - it may be my husband's birthday card!  However that's not for a several months and I'll probably make him ten more cards by then!  ;)

Dies used:
http://www.scrappingcottage.com/cottagecutzchristmascarandtrailer.aspx
http://www.scrappingcottage.com/cottagecutzsnowymountains.aspx
http://www.scrappingcottage.com/cottagecutzcampingphrases.aspx

Be sure to visit the online store where these and other select dies are on sale for a very limited time!

Thanks for stopping by - I hope you have a fun and creative weekend!


Thursday, January 02, 2020

Baby It's Cold Outside


Hello Scrapping Cottage Friends

HAPPY NEW YEAR TO YOU!! It is Pam creating with you today!

ONLY A FEW MORE DAYS FOR THE FANTASTIC SALE GOING ON IN OUR STORE SO DON'T MISS OUT!
I was in Ohio for Christmas with my sister and brother.  And it was really cold compared to South Carolina.  So that was my inspiration for this card.  I am sending it up to my sister to thank her for hosting us during the holidays and showing us such a wonderful time.


Design Steps:

 1.  Start by cutting all of the pieces out of white card stock using the Arctic Penguins and Igloo die
 2.  Color all the pieces with your markers and assemble them
 3.  Use a white A2 card base, cut a piece of navy card stock just slightly smaller then the card front.  Cut a piece of DP 4 x 5 1/4.  And then make two banks of snow
 4.  Glue the DP to the navy card stock.  Glue down the two banks of snow layering one on top of the other then add in the igloo
 5.  Next pop up the penguins with dimension dots

6.  Using the Border Icicle die cut out the icicles using white glitter card stock.  Attach the icicles to the top of the card.  Add your sentiment and some silver glitter and your card is complete

CottageCutz Products

I have not made any New Year's resolutions other then have fun creating!!!
Blessings
Pam