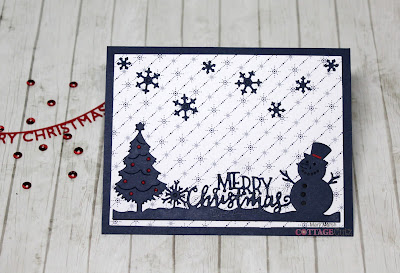
We have the new release of Christmas Part 2 in the online store and they are all in stock and available for delivery. There are 34 new designs in this release.
This release has something for everyone. So if you prefer a more religious tone to your cards- we have you covered. If you like a more whimsical design featuring Santa, reindeer, gnomes, moose or even a hot chocolate theme you will find some really cute dies.
I actually do a combo of religious and whimsical for my Christmas cards. Today, for your viewing pleasure, I am going whimsical with the new Merry Christmas Border die. It's from the Part 2 release. It's only a month until Christmas, so if you haven't started your cards as yet this die would be a good one to use to make multiples.
I thought I would bring you a sample today that is on the clean and simple side. One that would be easy to mass produce since it's only a month until Christmas. We all have designer paper in our stash that we haven't used. This die is perfect with a snowy, snowflakes or starry background paper. So let's get started with some details on how I created my card.
Step 1: Since I had the die in mind to use, I looked for the right designer paper. I found this starry background paper and thought it would work well.
Navy Card Base: 4 1/4" x 5 1/2"
Designer Paper: 3 7/8" x 5 1/8"
The stars on the designer paper are a navy color and cutting the border image in navy would make it pop on the paper.
Step 2: Next, I started card assembly. The border image is attached to the background paper with glue dots and Ranger multi medium matte. I cut the tree again in red cardstock to add some red ornaments onto the tree. And, for the snowman I put a little red band on his hat.
I decided to scatter a few snowflakes in no particular order to my card. I cut them with the Holiday Hedgehog die. Attached the card base and my card is finished.
dies used to create card:


