Friday, July 19, 2019

Hats Off to You!

Happy Friday Cottage Cutz fans!  It's Jeanne today and I think I may have a new favorite die!  It's from the brand new birthday release.  I used it today to make this festive birthday card.
I started with a sketch from Splitcoaststampers.  Ultimately, I altered the sketch a bit but I did follow it in the basics.
Because the Party Hats die has the potential for a lot of colors, I decided this would be a good time to use my scraps.   I went to my scrap stash and picked out colors I thought would look good together.  I cut the die seven times.
Then I just started making hats.  I knew I wanted three hats, but I decided to make seven and save the others for later.  I also had a lot of extra streamers left over.
I made a card base from purple card stock 6 x 9 inches folded in half to 6 x 4.5 inches.  This varies from the sketch which is square.  I cut an orange panel 5.75 x 4.25 inches and two strips 1.125x 4.25 inches.
I glued the strips 1.125 inches from the top and bottom.  I used the two largest stitched rectangle dies to cut a panel in peacock and one in white.  I stamped the sentiment at an angle to go with the idea of throwing the hats in the air.
The panel is centered on the card base - another variation from the sketch.  I added the hats on foam dots and filled the white space with streamers. 
For the card interior I used the Birthday Cupcake Greeting die and snipped off the cupcake since I didn't think it went with the party hat theme.  However, the font and balloon coordinated super well with the streamers on the card.
I adhered this to a white panel on the inside of the card.
By cutting the die seven times I had lots of choices for the hats and I had leftover hats, streamers and hat pieces for other cards.  As an added bonus, I used up some of my scraps!

The Birthday release is on sale for a limited time and features some great dies.  Stop by the online store to see them all!

Dies used:
http://www.scrappingcottage.com/cottagecutzpartyhats.aspx
http://www.scrappingcottage.com/cottagecutzbirthdaycupcakegreetingelite.aspx
http://www.scrappingcottage.com/cottagecutzstitchedrectanglesetbasics.aspx

Thanks for stopping by today!  Have a wonderful and creative weekend!


Thursday, July 18, 2019

Birthday Mice! New Release

Hello Scrapping Cottage Friends!!

It is Pam creating with you on the blog today!

It is NEW RELEASE TIME!!!  We have an amazing new release for birthdays.  These new dies will make your birthday cards unique and special! Check them out in our store they are now 25% off!

I am using 3 of the dies that features the sweetest little mice!
Designer Steps:

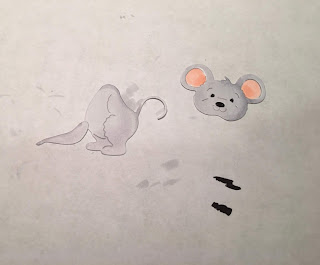
 1.  Using the Mouse w/cakeBirthday Mouse Cupcake and Mouse w/cupcake dies cut them out in white card stock
 2.  Color all of the pieces using your favorite markers or inks.  Assemble the pieces
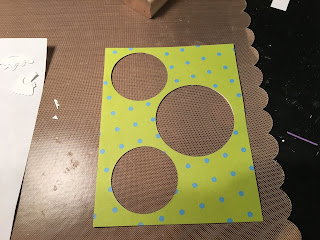
 3.  Cut a Green Polka Dot DP 4 x 5 1/4 and then cut out 3 circles using the Cross Stitch Circle dies
 4.  Cut a piece of blue flowered DP the same size as the Green Polka Dot DP.  Glue the blue DP behind the green polka dot DP
5.  Add the little mice to each of the circles as shown.  Glue to a white A2 card base then add the sentiment and rhinestones

CottageCutz Products


Make sure to check out this wonderful new release!!  It will make your birthday cards look fantastic!

Blessings
Pam


Wednesday, July 17, 2019

Happy Birthday!

Hello!  This is Sukie and today I'm sharing this birthday card featuring the new Birthday release dies.  I love every single one of the new birthday mouse die cuts and wanted to find a way to include them on one card.
I cut out all of the pieces and shaded them with with my Oxide Inks.  I used different shades of pink for a cohesive theme.  All of the white die cuts were accented with some Wink of Stella for a sparkly finish.
I created a tea-length card (4"x9.25") for the mice to be placed along the bottom edge of my card.  I used a single color of Oxide Ink to shade the background of my card.
I placed the Birthday Mouse Cupcake on the left side of my card and the Mouse with Cake on the opposite end.
The Ballerina Mouse and the Mouse with Cupcake filled in the center of my card creating a birthday parade.  I used pop dots behind the die cuts for added depth and dimension.
The sentiment is from the Festive Birthday Greeting die set.  The pennant was tucked into the corner leaving the perfect amount of space for the birthday sentiment.
A balloon bouquet was nestled behind the Mouse with Cake.  The bits and pieces of confetti were scattered throughout my card base as a finishing accent on my card.
Here are the dies used on my card, available in the shop and currently on sale:

Sunday, July 14, 2019

Sweet Fairy


Hi!

It's Anja here. I have a lovely little fairy card for you today.


For this card I used:
- Cottage Cutz dies (Sweet Fairy, Cottage w/Petal Roof),
- Distress Inks (Pumice Stone, Vintage Photo, Peeled Paint, Tattered Roe, Spun Sugar, Worn Lipstick, Tumbled Glass, Seedless Preserves, Dusty Concord, Cracked Pistachio, Mustard Seed),
- white card base (15x15 cm),
- white card stock for die cuts and background (14x14 cm),
- patterned paper (12x12 cm),
- gold pigment ink,
- black pigment ink,
- black pen,
- scissors,
- brushes,
- sentiment stamp,
- paper glue.

First I cut and colored both dies.


Next I used gold pigment ink to color the wings and the star.


Then I started on the background. I cut patterned paper and white card stock. Next I colored white paper with Distress Inks. This time I used brushes for coloring. When coloring was done, I used scissors to distress the edges of both papers.


Next I stamped the sentiment on a small piece of paper.


When I had all the pieces cut and colored, I arranged all the pieces on the card base and glued it together.

And my card was done.


Before I go, I want to let you know that the new Birthday Release is out in the store. Can't wait to get it and start crafting and creating with all new adorable dies.

Wish you all a beautiful Sunday d see you again next week.

Anja Z.


Cottage Cutz dies I used for this card:


Saturday, July 13, 2019

Party Animal Bus (new die)

Hello Scrapping Cottage friends! Thanks for taking the time to stop and visit with us today. It's Mary Marsh here bringing you the Saturday edition of the Blog. 

We have a brand new release of Birthday dies in the online store. There are 25 new designs and they are currently on sale at 25% off. This release is filled with cute little whimsical animals, birthday cakes, cupcakes and birthday phrases. Everything you need to create some outstanding birthday cards.

Today, I am featuring the Party Animal Bus. So let's get started with some details on how I created my card. 

Step 1:   As I have said so many times before, having a layout in mind at the start of my card is always a big boost for me. It jump starts my creative thought process. I love working with the sketches that are out there in the online world. That way I just choose the colors and designer paper and I am good to go. 

I had this sketch saved on one of my Pinterest boards.  I wanted to use festive designer paper and this sketch was perfect for it. The dimensions are already provided and that's a plus. I changed the dimensions just a bit.

This also fits with the inspiration challenge #710 on Splitcoaststampers. 
Gray Card Base: 4 1/4" x 5 1/2"
Pennants Designer Paper Layer: 4 1/8" x 5 3/8"
Coral Center Panel: 3" x 3 5/8"
Confetti Image Panel: 2 7/8" x 3 1/2"
Step 2: I cut the party animal bus using various cardstocks and used the die packaging for the colors. 
I cut the Birthday phrase in coral cardstock and it's from the Fairytale Birthday die. 
Used my MISTI to stamp the sentiment on coral cardstock in black ink. It helps with stamp placement and also if you have to repeat stamp an image. 
After I stamped I cut it to 1/2" x 4"  and then snipped in the flag ends. 


Step 3:  I am ready to start my card assembly. Attached all the layers with double sided tape. 

The image is adhered with dimensional adhesive. I wanted it lifted off the confetti designer paper. 
To complete my card, I attached the birthday phrase with Ranger multi medium matte. And, that's my card for this week. 
I hope I have given you an idea for a way to use this new super cute birthday die. See you next Saturday!

dies I used to create card: