Hello Scrapping Cottage friends! Thanks for taking the time to stop and visit today. It's Mary Marsh here bringing you the Monday edition of the Blog.
Yikes, can you believe that October is almost a wrap? If you haven't started your Christmas cards yet, it's definitely time to get them started. I have about 10 or so made. Not nearly enough that's for sure. That's where my samples will be headed each week for awhile.
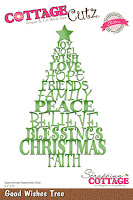
Today, I used a new die Good Wishes Tree, for my sample card. I wanted to show a card that would be fairly easy to mass produce using this new die. So let's get started with some details on how I created my card.
Step 1: I wanted to use red & green as the main colors and I found this paper in my Christmas collection. I thought the music background would work well with the Christmas words. I matched the designer paper with a pine green, a cherry red and kraft cardstocks.

The patterned paper had a nostalgic look to it so I decided to use burlap ribbon.
Step 2: I cut the good wishes words in the cherry red cardstock. I like the different style font that is used on each word.
I secured this to the patterned paper panel with glue dots. I used mini ones and rolled them into small lines.
Secured the image panel to the cherry red card base, I liked how the panels pop with the addition of the red card base.
Red Card base: 4 1/2" x 5 3/4"
Green Layering Panel: 4 1/4" x 5 1/2"
Patterned Paper Panel: 4 1/8" x 5 3/8"
Step 3: I thought the panel needed something else to complete it. I tried a small bow but that didn't work. So I cut some bells and added them to the corner and scattered some gold sequins. It completed the card nicely.
Well that's my card for this week. I hope I have given you some inspiration on a way to use the new Good Wishes Tree die. I will be back again on Saturday with another Christmas card idea for you.
Dies I used to create card:


