Friday, September 16, 2016

~Tree Tops Glisten~


Hello Scrapping Cottage friends! Thanks for taking the time to stop and visit today. It's Mary Marsh here bringing you the Friday edition of the Blog.

Even though the temperatures are still soaring like summer is never going to end, we all know that our summer season is fading away rapidly. Next week marks the official start of Autumn. And, before you know it Christmas will be knocking on our doors.

So it's not too early to start working on your Christmas cards. That way when December rolls around there will be time for all the other festive holiday traditions. So with that in mind today I am bringing you a Christmas card using one of the new CottageCutz Christmas 2016 dies.

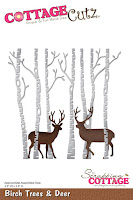
This one is the Birch Trees & Deer dies. The die cuts the trees in 4 different pieces. I think that makes it much easier for placement and attaching to your cardstock. And, I love the antlers on the deer. They cut so smoothly.

Without further delay, let's get started on some details of how I made this card.

White Card Base:  4 1/4" x 5 1/2"
Light Gray Layer: 4" x 5 1/8"
Image Layer: 3 7/8" x 5"

I started my card by creating the background. It was done by using both a brayer and a large sponge dauber. My ink colors are a medium blue-green and a teal.

Tips on using Brayer: I always use dye based inks because it dries quickly and when you mix the inks they will stay true to color. I use a soft rubber brayer from Speedball.
My cardstock is a smooth white cardstock. Because it's so smooth you won't get a lot of spots in your work like you would by using a textured cardstock.

When you ink up your brayer, roll in one direction. If you roll it back and forth you won't ink the entire brayer.
When I start the actual brayering, I have the brayer right next to my cardstock and roll upwards and then come back and catch the edge of the paper. And then go back and forth, back and forth.

I used the lightest shade of ink and went about 1/3 of the way down my cardstock. I repeated this several times until I got the shade and look I wanted.

Then I inked up my dauber and started sponging the darker shade of ink. I kept applying color until I had the shade I wanted. I didn't cover the entire background because I knew I was going to add a snowbank to this card.
Once this part of my background was complete, I pulled out a snowflake stencil to create some background snow. I secured the stencil with some painters tape. Works like a charm for me.
I used 3-D molding paste and smoothed it over the stencil with a spatula. Once I have the paste in place  I remove the tape and carefully lift off the stencil. I set it aside for about an hour to dry.
While this was drying I cut the snowbank from white cardstock and stamped my sentiment in the teal ink. Then I added some glue and chunky glitter. Just wanted a little sparkle on the card.
 
I cut the trees in a light gray cardstock and my deer in a medium brown cardstock. I also added chunky glitter to the treetops to make them glisten and sparkle just like my sentiment says.
Now with all the elements complete, I am ready for the card assembly. I attached the trees with Ranger multi-medium matte and I used glue dots for the deer. The image panel is layered over the light gray cardstock. And, to this layer I cut some white fun foam to lift it off the base panel. It just creates more dimension on your card. You could also use mounting tape.
 
Here are some close up shots of the trees and the deer. You can also see the little bit of chunky glitter I added to the treetops for the glistening effect.  
Well my friends, that's my post for this week. I hope my card has given you some ideas of ways to use this new die set.
Just a reminder that our 6th challenge is going on with a Holiday theme this time around. Get info here.
Until next time.......inky hugs!!!
http://www.scrappingcottage.com/cottagecutzbirchtreesanddeer.aspx


Thursday, September 15, 2016

Shine wreath with greetings

Hi, Vladka here!

I have another CAS Christmas card for you. So, let's take closer look to how I created it.


Basics:

White cardstock for the card base: 5 x  inches (cut 5 x 10 inches, fold in half)
Additional piece of white and kraft cardstock and some white and red cardstock for die cuts

Other Supplies:

CottageCutz Dies: Listed Below
Distress Ink:  Aged Mahogany, Peeled Paint, Forest Moss
Other: perfect Pearls, Scissors, Paper trimmer, Sizzix machine, Scor-buddy, Water, spray bottle, red paint

1. First use the biggest Cross-Stitched Square die and cut the square out of white and kraft cardstock. In spray bottle, mixed also water with Perfect Pearls. Spray it on both squares (and also on card base). This will give some shine to the finished card.


2. Cut the Holiday Wreath out of white cardstock and color it with green distress ink. After that spray some previous prepared mixture on it and let it dry:


3. Apply some red paint on berries and give it a side to let it dry.


4. Cut also greeting out of red cardstock. Distress the edges with Aged Mahogany distress ink and also spray it with mixture of perfect pearls and water. Let it dry.


Now put all pieces together as shown on my finished card. Quick and easy :) It is hard to see all the shine here on the photo but in real live is beautiful.


I hope you like it. Have fun creating. And don't forget, sixth CottageCutz challenge is waiting for you. This time theme is HOLIDAY. You can linked your project here. And please, use only Scrapping Cottage dies.

Tuesday, September 13, 2016

Christmas bells

Hi, Janja here!

Bells are an indispensable element on holiday cards. On the card which I share with you today, I used the die Christmas holly bells from the 2nd part of the Christmas dies.


For the card we need:
- white scalloped card base: 5.3 x 5.3" (13,5 x 13,5 cm), folded
- patterned paper in green: 5 x 5" (12,6 x 12,6 cm)
- plaid patterned paper: 2.5 x 5" (6,3 x 12,6 cm)
- white cardstock: 4 x 4" (10,2 x 10,2 cm)
- patterned paper: 3.7 x 3.7" (9,5 x 9,5 cm)
- white and color cardstock
- Distress ink: Festive Berries, Aged Mahogany, Moved Lawn, Peeled Paint
- Memento ink: Cantaloupe

We cut out the bells and holly branch. For bells use a cardstock in the color of champagne, other cutouts are white.


We will also need a few spruce stems.


Shadow all cutouts plentiful with Distress inks.


Trim plaid patterned paper and attach it on to green patterned paper, and fasten both together on white card base with double-sided adhesive tape.
Stamp "Merry Christmas" on a small square. Attach it in the middle of the background with a foam tape, for more dimensions.


At the end, arrange spruce stems with holly branch. In the middle fix a bells with a bow.


Thank you for stopping by.


Monday, September 12, 2016

Magic candleholders for Halloween "Wonderland"

Hello friends!
Thanks for taking the time to stop and visit today. This is Yuliya here). It's here share some of the new Autumn release with you!
Do you like Halloween?) I made for your inspiration a lot of interesting projects!) I will be sharing how to make this Magic candles for Halloween using the CottageCutz dies.

"There was nothing so VERY remarkable in that; nordid Alice think it so VERY much out of the way to hearthe Rabbit say to itself, 
'Oh dear!Oh dear!
I shall be late!' 
For the decor we need:
- black cardstock
- patterned paper
- glue
- sequins
- glossy accents
Attention! It is better to use electronic candle.
Follow me!
1.Prepare strips of paper for the candleholders. The size of my strips 1.5 cm * 14 cm
2. Glue on the candleholders
3. Prepare some die-cuts. I use CottageCutz Haunted Castle (Elites) ...
4.
5. Glue sequins and glue Spiderweb  to the bottom of the candleholders
6. Glue pictures: Qeen, Mad Hatter and Rabbit)


I hope you have been inspired by my project today. More photo in my blog)
Are you starting your Halloween DIYs?)
would like to remind you on our challenge #6
You still have time to share your projects with us. 


Sunday, September 11, 2016

Boo!

Hello all,

It's Donna to share the cutest Halloween card.  I don't normally send out Halloween cards, but I just had to make this one.  The "Witchy Ghost" die is so adorable.  and I thought the "Spiderweb" went well with this set.  Both of these dies are from the 2nd Christmas and Autumn dies release. If you haven't been over to the online store, you should definitely go and take a look at all the new goodies.  


Inside of the card.

Here is how I put my card together:

1.  The size of the card is 4 x 4, 


2.  The first layer is die cut from the CottageCutz square set (the largest one) which measures 3 1/2 x 3 1/2,

3.  The second layer is 3 1/4 x 3 1/4,

4.  To make the background of my card, I cut out a 2" circle and offset it on the layer, I distressed some inks to make the background of the card.  I added some distress inks to the moon to give it an eerie look,


5.  I die cut all my pieces and inked some of the edges,


6.  I added the sentiment, cutting it out with the smallest die from the cross-stitched rectangle set,

7.  I added foam tape to the ghost and die cut another spider out and added foam tape behind it.  I wanted it to look like the spider had a shadow going down the moon,

8.  The inside die is from the "Haunted Tree" which is also from the new release,

9.  I finished the inside by adding the sentiment.


CottageCutz Dies used: