Wednesday, April 06, 2016

Gate Fold Flower Card


Hello Scrapping Cottage fans. Thanks for taking the time to drop by and visit with us today. It's Mary Marsh here with the Wednesday edition of the Blog.

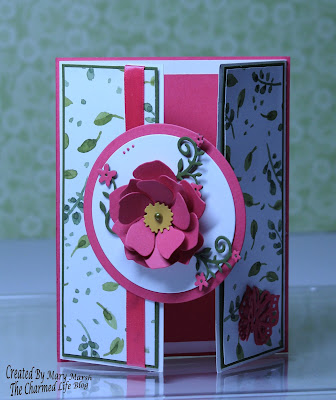
Today for your viewing pleasure, I have created a fancy fold card and used some fabulous CottageCutz dies. The fold is called the Gate Fold and I have all the instructions on how you can make one. So let's get started.

Card Base: White Card Stock 8½” x 5½” and scored at 2 1/8” and 6 3/8”
 
 
White Panels: when folded are 2 1/8” x 5 ½”. Card is still 4 1/4" x 5 1/2".
 
Dark Green Layer: 2” x 5 3/8”
Patterned Paper: 1 7/8” x 5 ¼”
Pink Rear Panel: 5 5/8" x 4 3/8"
 
Taped layers with double sided tape and adhered to white card base. After I took this picture, I remembered I wanted to use some pink ribbon. Oops! I had to remove the left panel to  add my ribbon. But, I forgot to take another photo.
 
Now for the die cuts: I used the 3D Flower #2 from the March release and cut in pink cardstock.  Between each layer of the flower I used dimensional adhesive. I also used a bone folder and curled the ends of the petals. It creates a nice rounded look to the flowers.


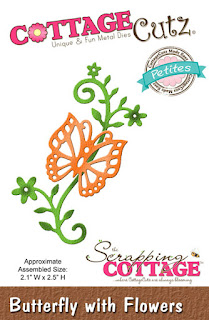
For some added greenery, I used the CottageCutz Butterfly with Flowers die. I cut once in dark green and once in pink. I cut the pink flowers and adhered them over the green.
The CottageCutz circle set basics is the backdrop for my flower. I used the 3rd largest die and cut in white and then the 4th largest die and cut in pink. Attached this to my card, but I just taped the left side of the circle. That way it won't interfere with the card opening.
 
To finish off the front of my card I cut a butterfly from the Butterfly with Flowers die. I attached one to the patterned paper and then for some added height I cut another one and used glue to secure just the middle.
 
 
I also finished the inside of the card simply by adding a piece of pink cardstock and stamping a sentiment.
 
 
Well, that's it for me for today. I hope my card has inspired you to try a gate fold card. So until next time......inky hugs!


Tuesday, April 05, 2016

Pelican

Hi, Janja here!

I'm glad that spring is here, and even more, I am looking forward to summer. This year so much that we already booked our holidays. Since the holidays are still far away, my dreams are being realized with cards.
So let's get started ...


For the card we need:
  • white card base: 8.5 x 5.5" (21,5 x 14 cm) folded
  • blue and white cardstock: 4 x 5.2" (10 x 13,2 cm) and 3.7 x 4.9" (9,5 x 12,6 cm)
  • scraps of colored cardstock
  • Distress inks: Broken China, Faded Jeans, Vintage Photo, Wild Honey and Pumice Stone
  • blue ribbon
  • glue and adhesive pads

I printed the inscription in Word and painted the background with Distress inks, water and a brush. Before painting paper was wet with water for more beautiful flowing.


For the pelican I used a CottageCutz die. All cutouts are shaded with the Distress inks. With shading we achieved look of depth. 
I applied adhesive foam pads to the back of my pelican and attached it. 
With scissors, we draw around the edges of the cardstock. At the lower end of the cardstock I glued a ribbon, bound in a knot. 
When card was completed, I added some seagulls and fish.


List of dies used:


Have a nice day.

Janja

Monday, April 04, 2016

The Easter baskets "Happy Easter"

Hi, Yuliya here!)
In Russia Easter in 2016 will be may 1. And now I make home decor and cards for Easter holiday. Today I want to share with you little tutorial how to make a very nice Easter Baskets. I use  CottageCutz Filigree Fall Leaves, Set of 3 (4x6)


For the basket we need (I make 2 baskets):
- cardstock for base of basket or scrapbook paper - 2 pc 12"*12"
- scrapbook paper - 1 pc 12"*12"
- die-cut Filigree Fall Leaves CottageCutz
- die-cut CottageCutz Autumn Centerpiece (4x4)
- delicate chipboard
- glue and glue-marker ZIG memory system
- scissors and line
- shabby ribbon

 1. Prepare paper - 2 pc 8,26"*8,26" (21 cm*21cm)
 2. Fold it at  2,75" and 5,5" on both sides (7 cm and 14 cm)
 3. Cut the folded lines as it is shown on the picture.
 4. Punch the cutted sides as it is shown on the picture.
 5. So, we can glue it all together
6. Let it dry
7. Make neat corners
 8.Cut out 8 details from paper sheets

 10. Glue
 11. I make a handle for our basket

 13. Prepare some die-cuts. 


 15. Add white delicate chipboard. Glue delikate chipboard on the top.
16. Finally adding some crystals!))


List of dies I used:


I hope I have inspired you!:)

Sunday, April 03, 2016

Nautical Thank You

Hello everyone,

It's Donna here to share another nautical card with some of the new releases from March.  Here is my card.


How I made this card....

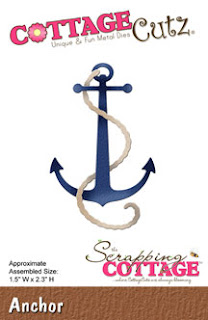
My card is an A2 size which is 4 1/4 x 5 1/2.  My first layer is the same size as the A2.  I cut two circles using the Circle Set dies.  The red piece is cut at 4 1/4 x 2.  I centered the first circle and adhered it to my card, I adhered the 2" layer and then added the smaller circle.  I die cut the Life Preserver and glued all the pieces and used foam tape and popped it up.  I die cut the sea gull and popped it up on top of the life persever.  I cut the anchor out of glitter paper and tied a piece of twine in a bow.  I finished the card with the Thank You sentiment.  I die cut the words ywith black cardstock and then cut it again with black foam and glued the cardstock to the foam.  Very simple card.  I hope you will give this card a try.

List of dies I used:


I hope I have inspired you enough to try and make this card!

Thursday, March 31, 2016

Birthday Celebration!

Hello everyone,

It's Donna here sharing with you a birthday card which is another shaker card!  Here is my card:


Closer look at the presents and shaker


How I made this card........

The size of my card is an A2(4 1/4 X 5 1/2), the solid layer is the same size and the design layer is 4 x 5.  Who has used the Stitched Wide Frames?  They are wonderful to make shaker cards.  The circle stitched frame on my card is from the Stitched Wide Circle Frame Set.  There are three sizes in the set.  I used the largest circle.   To make the shaker I cut a circle from a clear plastic sheet and fused the edges leaving an opening to put my sequins in.  Once I filled it, I fused the small opening I left open.  I then used my tape runner to tape the circle and the pouch I made.  Then I taped it to the card.  So simple, no message glue to deal with!

I used the Present die to cut the two presents.  After cutting the two presents, I shaded the edges with ink and cut small boxes for the back of the presents so you could not see through the back.  Also, you can see the hearts that run down the center of the box.

I finished the card off with a sentiment.  That was easy peasy!  Why don't you give it a try and make this card with the Present die!

Please come back soon to see some more creations from the design team!