Tuesday, February 11, 2014

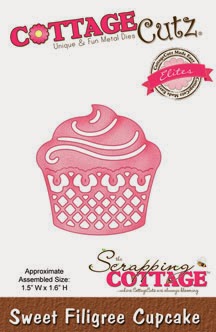
Sweet Filigree Cupcake


Hi everyone!

Kathy here with you!   Today I have a birthday card using the Sweet Filigree Cupcake Die from the Sweet Love Release and paired it with the Cupcake Pocket with Note Card Die!


For my card, I used the Sweet Mat Stack papers from DCWV and a white card base.  Notice my cupcakes are chocolate...my favorite kind!  I added a little Diamond Stickles the "frosting" on the cupcakes to make them look even yummier.  The sentiment is stamped with brown ink using Teeny Tiny Wishes from Stampin' Up.  I added a little brown twine bow and some buttons to finish it off.

Here's a picture of the cupcake card outside it's pocket.  You can write a little note on it or stamp it.  You can also glue it in the pocket to keep it in place.


Here are the dies I used:

http://www.scrappingcottage.com/cottagecutzsweetfiligreecupcakeelites.aspx


Monday, February 10, 2014

Cheers to you Treat Bag


Hello everyone, Cheryl here today to share a Treat Bag made for the Scrapping Cottage using the darling CottageCutz Dies. I love making treat bags, as they are super fun to decorate using the CottageCutz Dies! Today I used the CottageCutz Sweetheart Tiered Cake,Sweet Cupcake Border, Tea Time Doily,Sweet Love Doily, and Love Tags,all CottageCutz Dies.


For my Tiered Cake, I used white card stock to cut out all the pieces, and then colored them with Copics. I left the cake stand white and used some really pretty glitter to glitz it up a bit. I also did the same for the leaves on the Strawberry. My Sweet Cupcake Border ,Sweet Love Doily, and Tea Time Doily were both cut in white as well. For the Love tag, I cut it in pink, and then distressed it with pink distressed ink.

Photo's below are linked for easy finding at 


Thank you for looking and have a super wonderful day!
Hugs to all,
Cheryl

Sunday, February 09, 2014

CottageCutz Valentine Mini Album


Greetings CottageCutz friends!  Today it is Carol here with a Valentime Mini Album created with the adorable CottageCutz Dies.  My cover features Mr. Love Bug and the Flourish Love Heart that he is mounted on.  If you look at my heart shaped mini, it is abstract.  That is because I purchased a heart box from the dollar store and used it as my template.  I am making the box to match this mini to hold some Chocolate treats.  I'll show you that at a later date.
The first page is decorated with the Elegant Envelope.  They're are a couple cute tags inside.  The second page has the Fancy Floral Corner #2 to hold the sweet little tags.
 
Page three is a mat to hold a photo.  Page four uses Confectionery Bag, Small to hold a tag and behind that is the Sweet Floral Heart and hot pink glitter.
 Page five has the darling Sweet Heart Die that will hold a photo.  Page 6 is also designed to hold another photo.
Page 7 uses the Flourish Love Heart which is mounted on a heart that opens to reveal a place for a photo and a pocket with more tags.   Page 8 is a pocket that holds 2 tags made from the Sweet Floral Heart
 Page 9 features a pocket of tags decorated with the Sweet Heart Die.  Page 10 is another pocket that has been decorated with the Filigree Cupid die.
Page 11 is a pocket the holds the Classic Petite Envelope.  It is decorated with the Sweet Heart die and Sweet Lovebirds.  For the last page the Lovebirds are gracing the Elegant Love Heart.
So grab some CottageCutz dies and make your sweetie a cute little mini for Valentine's Day.  Thanks so much for stopping by.  Happy Crafting.  Here are the dies I used:


Saturday, February 08, 2014

Polkadot Cake

As I promised yesterday, here is another polkadot card from me, this time with birthday cake.
Red and white, really irresistible combination like dies from Sweet Love are irresistible. Cake is cut out with  Sweetheart Tiered Cake die and for background I used  Magnolia Doily die. White cardstock and red distress Ink is all you need  beside dies and card is created.
I hope you get inspired! Have a nice day!


Friday, February 07, 2014

Polkadot Tea Cups

Hi, Vladka here!
Polkadot is always funny, specially in red-white combination don´t you think? I use it again and again. This time I cut out tea cups from the white cardstock, for which I used Teacup Trio die and stamped on it with my polkadot stamp.
White borders, also cut out with the same die, give them such a cute look. For the finish look, I added sentiment and this teabag stamp and card was finished. Clean and simple, perfect when you don´t have a lot of time to create the card. And this is not all, I will be back also tomorrow with another polkadot.
See you soon!


Thursday, February 06, 2014

Spring Floral Basket


Hello everyone from Simona!

Here I am with a new post for The Scrapping Cottage Blog.
Today's card was made with gorgeous new die 
Spring Floral Basket from the NEW Garden Delight Release.


I fell in love with the Spring Floral Basket  die the moment
I saw it. Here is how I used the die on my card.
I cut the die out 2x out of the Bearly Mine Digi paper
(1x pink, 1x green). I snipped the basket from the whole die
and glued it on top of the whole pink die. I also cut out the 
green butterfly.


I cut the corner die 2x out of different shades of pink paper.
I cut out the butterflies and glued them on top of the whole corner 
die. I used liquid pearls on the butterflies.


I distress the edges and added a satin ribbon and a bow with
a brad. I wanted to try something different so I took a pink
copic marker and colored in the tulips. I did the same with
the leaves, but used the green marker. To get that special effect
I used Glossy Accent on the tulips and let it dry.

I am very happy with the final result and I hope you
found some inspiration in today's project.

See you all next time!

Hugs,
Simona


The dies used: