Hello! This is Sukie and today I'm sharing this slimline Halloween card. This card features several awesome dies from the Cottage Cutz Halloween die release.
Wednesday, October 07, 2020
Halloween!
Tuesday, October 06, 2020
Hooray, It's Halloween Time!
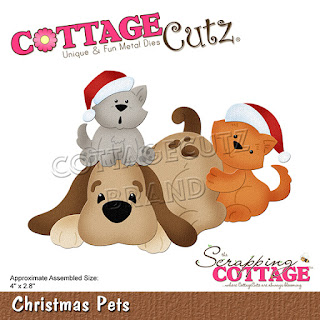
Hello! This is Sukie and today I have a sweet Halloween card to share. I went with a non-traditional card bringing in a variety of dies. The little puppy from the Christmas Pets die set is one of my favorites with his adorable pirate hat which is borrowed from the Pirate Monkey. He's definitely ready for a night of Halloween!
Sunday, October 04, 2020
Witch's Brew
Hi!
It's Anja here. Today I have a Halloween card for you today. I used the Witch's Brew die from the latest Halloween Release.
For this card I used:
- Cottage Cutz dies (Witch's Brew, Circle Set)
- Die Inks,
- craft card base (12,5x12,5 cm),
- white card stock for die cuts,
- black card stock for background (11,8x11,8 cm),
- orange card stock for background (12x12 cm),
- white acrylic paint,
- baby wipes,
- heat gun,
- scissors,
- paper glue.
First I cut and colored all the witch's pieces.
Next I trimmed the paper for the background.
Then I started on the night sky. I used white acrylic paint and baby wipe to color the background. I used a bit of black ink to color around the edges.
Then I made a paper stencil using a circle die. I used the same technique of coloring to make the moon.
Then I cut a piece of paper and colored it to make the ground.
And then I put all the pieces together and my card was done.
This is all from me for today. Have a nice week and see you again next Sunday.
Anja Z.
Cottage Cutz dies I used:
Saturday, October 03, 2020
Slime Cupcake
We have three brand new releases in the online store. It's Christmas Part 1 (22 new designs), Christmas Part 2 (21 new designs) and a Halloween release (14 new designs). They are all currently on sale and you can save anywhere from 25% to 60%.
Today, I am here with a card from the Halloween release. Many of you create cards for Halloween and are looking for ideas to use these new dies. So, I am featuring the new Slime Cupcake die.
Friday, October 02, 2020
Hocus Pocus
Happy Friday! It's Jeanne today with a Halloween card for someone far away. I planning to send this to my daughter who lives a few hours away in another city.
My card uses two of the dies from the new Halloween release and one from the Magical Fantasy release. The Halloween release features 14 new dies that are on sale for a limited time in the online store!
To begin I cut most of my pieces from white cardstock. For the gnome's wand I used black glitter paper and gold foil.
I have cups I use to separate my pieces. For this card, I used one for the gnome, one for the tree stump/broom and one for the wand. I find it easier to keep track of the pieces and assemble when I do this.
I colored my pieces using Distress Oxide ink and then glued them together. I even mixed up the die pieces a bit and used the broom handle from one die and the broom straw from the other! Below are the colors I used.
For my card front, I cut a panel 4 1/4 x 5 1/2 inches from starry paper, a panel 4 1/4 x 2 inches from striped paper and three strips of coordinating colors (green, purple and black glitter) 1/2 x 4 inches to use as banners.
I used the second largest of the Stitched Circle dies to cut a white backdrop for my scene. My sentiment is stamped on what will be the middle banner.
After adhering the striped panel to the starry panel, I glued the circle overlapping the striped panel by 3/4 inch.
I fishtailed the ends on the purple and glitter strips then I glued them down at an angle. The ends hang off the left side of the card for now. The images were added after the banners.
I attached my green sentiment strip and used scissors to trim off the excess from the left side. Using a glue dot, I adhered some metallic twine to the left side of the banner. I wanted this to mimic the gnome's wand.
To cover up where they are attached, I cut a few more stars in gold and black glitter from the Once Upon a Time die and used a foam dots to adhere them to the card.Dies used:
Be sure to visit the online store for these and other fun dies! There are also new Christmas dies just in time for holiday card making!
Thanks for stopping by today. I hope you have a fun and creative weekend!


