Wednesday, June 12, 2019

Happy Father's Day!

Hello!  This is Sukie and today I'm sharing this Father's Day card. These masculine dies made it easy to create this fun card for celebrating dad!
I created my card by cutting the pieces from the Hats, Glasses & MustachesHappy Father's Day Phrase and the Nested Stitched Scallop Square die sets.
I found this mustache themed paper in the Doodlebug Day to Day paper pad and coordinated the solid colors with the patterned paper.
Once I created my card base, I layered the background with the larger Nested Stitched Scallop Square.
The smaller Nested Stitched Scallop Square was turned on it's side and adorned with the die cuts.  I added some Glossy Accents inside the glasses.
While the Glossy Accents were drying, I worked on the inside of my card by adhering the sentiment along with the hat and mustache.  I also stamped a sentiment on a hand cut flag from the Scrappy Moms (retired) Fun Celebrations stamp set.  A piece of solid card stock was also added as a decorative element.
Finally my card was ready to be put together by adhering the die cut pieces to the card base. 
To finish off my card, I added the stamped sentiment at the bottom portion of my card.  The whimsical design of this card will be so fun for Father's Day.
Here are the dies used on my card, available in the store:


Tuesday, June 11, 2019

Have a purr-fect day

Hi everyone! It's Janja here with a card for all cat lovers.


- kraft card base: 4.25 x 5.5" (10,8 x 14 cm), folded
- patterned paper: 4 x 5.2" (10,2 x 13,2 cm)
- colored cardstock
- colored ink pads

Cut out all the pieces from a colored cardstock. Color them around the edges with colored ink pads.


Prepare a card base from a kraft cardstock. Trim a piece of patterned paper and stamp a sentiment in the color of coffee.


Attach the background to the front of the card with a double-sided adhesive tape. Paste cutouts with glue and self-adhesive foam pads.


Recently, the new release Magical Garden was added to the shop. All new dies are currently on sale at 25% off.

Thanks for stopping here and happy crafting.
Janja


Sunday, June 09, 2019

Unicorn With Flowers

Hi!

It's Anja here. I have another quick project for you today. I made a magical scene, using an unicorn and decorating it with flowers.


For this card I used:
- Cottage Cutz dies (Unicorn Floral, Nested Stitched Eyelet Circle Set),
- Distress Inks (Mustard Seed, Spun Sugar, Worn Lipstick, Dusty Concord, Twisted Citron, Peeled Paint, Mowed Lawn, Pumice Stone, Broken China),
- white card base (21x10 cm),
- white card stock for die cuts,
- patterned paper (20,5x9,5 cm),
- liquid drops (pink, yellow),
- adhesive foam pads,
- paper glue.

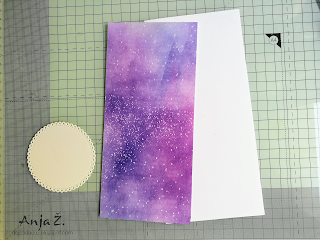
First I cut and colored the unicorn and all the flowers and greenery.


Next I cut all the pieces for the background.


And when I had everything cut and colored I glued all the pieces to the card base. In the end  used liquid drops to add a bit of dimension to the flowers.


And my card was done.


This is all from me for today. Don't forget to stop by at the store for the new release.

See you again next week.

Anja Z.


Cottage Cutz dies I used for this card:


Saturday, June 08, 2019

Fairy Tale Birthday

Hello Scrapping Cottage friends! Thanks for taking the time to stop and visit with us today. It's Mary Marsh here bringing you the Saturday edition of the Blog. 

We have released the new Magical Garden dies. There are 14 new designs and they are currently on sale at 25% off.
If you love fairies, fairy gardens, gnomes and flowers, you will love these dies. We will have several group posts to jump start your creativity starting next week. In the meantime, check out this little teaser from Jeanne using  the Mushroom Fairy Garden and the Fairy Garden Flowers dies.

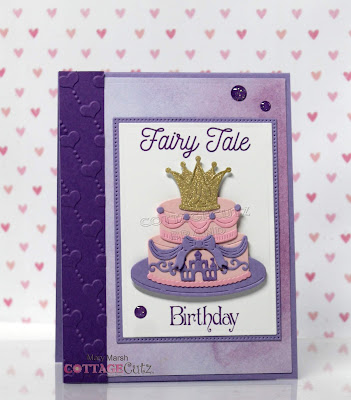
Today, I am featuring the Princess Cake die. This one is from the Magical Fantasy collection of dies. I wanted the cake to be the center of attention on this card so I kept my design on the simple side. Let's get started with some details on how I created it.

Step 1: I was looking for a more clean and simple layout for this card. When I checked out the Splitcoaststampers Wednesday sketch challenge #752, it was just what I was looking for. The beauty of any sketch is that you can always bump it up a notch with designer paper, ribbon and embellishments. I stuck pretty much to the sketch layout this time.
Step 2:  I selected my card colors based off the designer paper I chose to use. I bought a pack of watercolor papers at Hobby Lobby a few weeks ago. The colors are perfect for all the cards I have been creating using the Magical Fantasy dies.
Light Purple Card Base: 4 1/8" x 5 1/4"
Designer Paper Layer: 3 7/8" x 5 1/8"
White Image Panel: 2nd largest rectangle die (2 11/16" x 3 11/16")
Light Purple Layer:  2nd largest pierced rectangle die (2 7/8" x 3 7/8")

Next, I cut the princess cake. I used 2 shades of pink and a light purple. The princess crown I cut in a metallic gold. I liked all the sparkle for a cake topper.
I stamped the sentiment on the white image panel. I only wanted the words Write Your Own Fairy Tale and Happy Birthday. Since both of the sentiments had more words that what I wanted to use, I taped off the portion that I didn't want and inked up the remainder. Used my MISTI just in case I need to ink the stamp a 2nd time. But, today with the grape ink once was sufficient.
Step 3: I am ready to start card assembly. Attached the designer paper to the card base using double sided tape. For element 2 of the sketch, I cut a 3/4" piece of grape cardstock and embossed it with hearts.
Added the cake to the white panel using dimensional adhesive.
Added the image panel to the card base using double sided tape. The sketch layout was to have the image panel a little further down on the card base. I decided to center this panel. To finish off my card, I decided to use a few glitter enamel dots.

Well, that's it for me for this week. See you next Saturday.

dies I used to create card:


Friday, June 07, 2019

A Fairy Happy Birthday!

Happy Friday!  It's Jeanne and today I'm featuring a card made with the new Magical Garden dies.  These adorable dies are 25% off on the website for a limited time.
I'm trying to make more birthday cards this year and these cute fairies went perfectly with the sentiment I had.  One more done!  For the layout I used the sketch challenge this week at Splitcoaststampers and for the colors I chose some designer paper and used the colors from it.  I thought the clouds and sprinkles went well with the fairies.
I started by cutting the pieces in white and vanilla card stock, using ink and sponge daubers to color the pieces.  I used the vanilla for the fairies skin and the under part of the mushroom cap.
I assembled and glued my pieces together on a silicone mat.  This allows the assembled element to dry and prevents it from sticking to my paper or table.
I decided to make an A6 card - 4 1/2 x 6 inches.  I cut one panel this size, a strip 1 1/2 x 6, a rectangle using the largest of the Scalloped Stitched Rectangle dies, and a white square using the third largest of the Stitched Squares dies.
I then heat embossed my sentiment in white on the scalloped panel.
I glued the white square on top and added my fairies and floral pieces.  The fairies and mushroom caps are covered in several coats of Wink of Stella.  I used gold Wink of Stella to add a few "drips" from the watering can.
I adhered the panel and the strip to the card base along with a piece of ribbon.  Then I used foam tape to pop the panel up from the front of the card.
Since fairies are magical creatures that seem to beg for sparkle, I added a few sequins to the scene.  In this photo you can really see the Wink of Stella.

I hope you enjoyed my card today.  Don't forget to stop by the store and check out all the new dies!

Dies used:
http://www.scrappingcottage.com/cottagecutzmushroomfairygarden.aspx
http://www.scrappingcottage.com/cottagecutzfairygardenflowers.aspx
http://www.scrappingcottage.com/cottagecutzstitchedsquaresetbasics.aspx

http://www.scrappingcottage.com/cottagecutznestedstitchedscalloprectangleset.aspx

Thanks for visiting - I hope you have a fun and creative weekend!