Saturday, October 13, 2018

A Pie & Latte Treat

Hello Scrapping Cottage friends! Thanks for taking the time to stop and visit with us today. It's Mary Marsh here bringing you the Saturday edition of the Blog. 

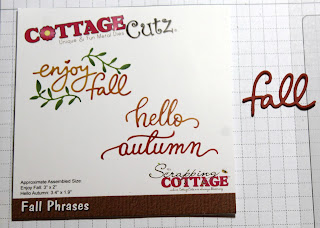
We have a new release of dies over at the online store. Our Autumn 2018 dies are here with 10 new designs. They are currently 25% off for a limited time. I am featuring the Pumpkin Pie & Latte + the Fall Phrases dies today. I also have a sample with these new dies here.

So let's get started with some detail on my card for this week.

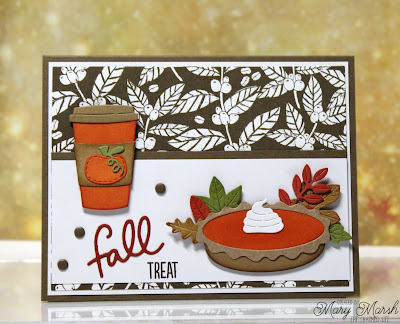
Step 1: I started with my layout this week. I am using the Splitcoaststampers sketch #718. It's more of a clean & simple layout but I added a couple of extra layers to change it up a bit.
Step 2: Since this is an Autumn card I wanted to use patterned paper that had more of a fall appeal to it. I found this leaf paper and thought it would work well with the pumpkin pie and latte images.
Soft Suede card base: 5 1/2" x 4 1/4"
White layering panel: 5 3/8" x 4 1/8"
Patterned Paper Panel: 5 1/8" x 3 7/8"
White Image Panel: 2 1/8" x 5 1/8"
Step 3: I cut my pumpkin pie and latte cup using the package colors as my guide. You can color your images but my preference is usually to cut them in colored cardstock. It requires a few more steps but I am always pleased with the outcome. You can check out some of the other DT cards to see the beautiful Copic or Distress ink coloring they do.
Cut the Fall Phrase in a rich cinnamon (cajun craze) cardstock.

Step 4: All my card elements are ready, so it's time to start the card assembly.   I attached the card base and layering panels first.
Then I moved to the image panel. I wanted to stamp my sentiment before I attached the die cut images. I laid the images on the panel then figured out where to stamp the sentiment.
The sentiment had more words than what I wanted to use so I taped off what I didn't want and inked up the word "treat". I used my MISTI just in case I needed to re-stamp the word.  I didn't have to because it inked evenly and dark enough on my first attempt.
I added my images to the panel using dimensional adhesive. For the fall phrase I used Ranger multi matte medium, it dries clear and has a strong bond. I decided to add a little top border to the image panel- just for added interest. I cut a strip of soft suede cardstock 1/4" x 5 1/8" and attached with double sided tape.
To complete the card I used a few soft suede enamel dots. I thought that finished it of nicely. Well that's it for me for this post. I hope I have sparked an idea for using the pumpkin pie & latte cup image. See you next Saturday!
 
dies I used to create card:
http://www.scrappingcottage.com/cottagecutzfallphrases.aspx
 

http://www.scrappingcottage.com/cottagecutzpumpkinpieandlatte.aspx


Friday, October 12, 2018

Carmel Apple Treat Bags

Happy Friday!  It's Jeanne today with a super quick and easy tag  for treat bags.  Even though I don't have little ones, I get Trick-or-Treaters; mostly neighbors' kids and I love to do something extra for them. This project is perfect for the little ones that you want to do a little extra for, or if you're a mom and have a classroom of kids that needs treats, this is also for you!
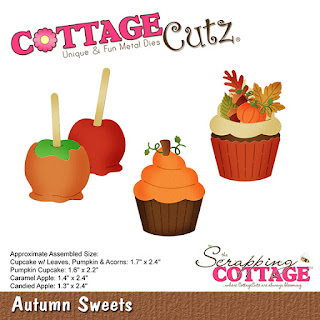
This project uses the new Happy Halloween and Autumn Sweets dies along with the Mail Tag Set (a super versatile set and one of my favorites!).
I cut the apples from the appropriate colors of card stock and two sentiments and tags/reinforcements. This makes two double sided tags.
I used a sponge dauber and the matching ink colors to add some depth to the edge.  If I were making multiples (let's say 30 for a classroom) I would not do this and they would still be very cute.
For each tag, I assembled an apple and glued it to the front of the tag.  I added the reinforcement at the top.
Then I glued the Happy Halloween to the back of the tag along with another reinforcement.
These are tied to the bags with ribbon - so cute and so easy.  A fun treat for those little ones! (Although my husband and adult daughter have been eyeing the candy corn!  LOL!)

Be sure to visit the online store where the new Autumn, Halloween and Christmas Part 3 dies are on sale for a limited time.  There are so many cute designs to choose from!

Dies:
http://www.scrappingcottage.com/cottagecutzautumnsweets.aspx
http://www.scrappingcottage.com/cottagecutzhappyhalloweenelites.aspx
http://www.scrappingcottage.com/cottagecutzmailtagset.aspx

Thanks for stopping by today!  I hope you have a relaxing and creative weekend!


Thursday, October 11, 2018

Boo to You!

Hello Scrapping Cottage Buddies!

It is Pam on the blog today!

I can't believe how fast October is going! To be truthful I don't even know where September went! It is still very warm here in South Carolina so needless to say I am ready for a cool down!  I have been playing with the new Halloween dies and I am just in love with all the great details each of the dies have.  Today, I am working with the Spooky Stacked Pumpkins so cute!

Be sure to check out the store our Autumn Designs, Halloween and Handmade Christmas dies are all on sale now.  It is just in time for these fall and winter holidays!  They make great gifts too!  The sale is for a whooping 25% off! Check them out!

Design Steps:
 1.  Using the Spooky Stacked Pumpkins die cut it out of white card stock
 2.  Use your favorite markers to color the die: YR68 for pumpkins, Y32 for eyes and broom, 100 for cat, bat and hat, C1 for the web, and E44 for the broom handle
 3.  Use an A2 black card base cut a slighly smaller piece of orange dotted DP.  Use the second largest  Pierced Wide Frame Rectangle die to cut out the green DP frame. And then cut the purple DP to fit behind the green frame
 4.  Glue the orange DP to the black card base, glue the purple DP in the center of the orange DP and then using dimension tape around the frame pop it on top of the purple
5.  Glue the colored die cut onto the front slightly to the left and then add the sentiment


CottageCutz Products


Thanks so much for stopping by today!  We hope you come again soon and be sure to stop in the store for all the wonderful sales!

Blessings
Pam


Monday, October 08, 2018

Snowy Village

Hi, Lois here with a Christmas card today, made with Christmas Village 1 from the new Christmas release from CottageCutz.  There is also a Christmas Village 2, which has two additional buildings.  It's on my wish list!  Be sure to check the website for the Christmas (part3) and Halloween releases, which are currently on sale at 25% off.


To start my card I cut my cardstock and snow-patterned paper, as follows:

White - 5 1/2" x 8 1/2", scored at 4 1/4"; and 4" x 5 1/4"
Patterned paper - 3 3/4" x 5"


After folding the card base, I glued the patterned paper in the center.


I then cut an oval into the smaller white panel and cut the oval in half.  These half-ovals will form the snowdrifts on my card.


I wanted the white panel raised up a bit, so I put foam tape strategically onto the back of the panel . . .


. . . and placed the half-ovals behind the opening.


I then adhered the panel to the card base.


I cut the images from a scrap of white cardstock.


I wanted a little splash of color, so I dabbed some Copic markers onto a small scrap, cut it to the size of the church window openings and glued it behind the openings.  I then colored the church doors and the heart over the house door with red, placed small strips of Scotch tape behind the openings and inserted the small die-cut pieces.


I applied a bit of BG0000 Copic marker along the edges of the snow drifts to give some dimension . . . 


. . . and placed the buildings and the tree within the opening.


At this point, I decided that the scene needed another tree and a bit of glitter, so I added some Stickles along the roof lines and cut another tree and slipped it behind the house.  My card was now finished!


CottageCutz dies used on this card are:

http://www.scrappingcottage.com/cottagecutzchristmasvillage1elites.aspx

http://www.scrappingcottage.com/cottagecutzdouble-stitchedovalsetbasics.aspx


Sunday, October 07, 2018

Gnome's Cottage

Hi!

This's Anja here on this Sunday. It's getting cold outside. Warm clothes are necessary here in Slovenia. Autumn is definitely here.

But before I get my new Autumn dies I made another holiday card. A simple one.


For this project I used:
- Cottage Cutz die (Woodland Gnomes & Cottage),
- Derwent watercolor pencils
- white card base (13x13 cm),
- watercolor paper for die cuts,
- red card stock for background (12,5x12,5 cm),
- patterned paper for background (12x12 cm),
- printed sentiment,
-  watercolor brush,
- paper glue.


First I cut the gnome and the cottage. I left the cuts on the cutting plate and colored it with different watercolor pencils. I used watercolor brush to mix the colors. When everything was dry I glued the parts together. Because of the cutting plates I didn't use the heat gun.


Then I cut the papers for background.


I printed the sentiment on white card stock and cut it. And then I just glued everything together.


This is all from me today. Stop and check the store before you go. There's some lovely goodies waiting for you.

Have a nice Sunday.
Anja Z.


Cottage Cutz die I used: