Monday, December 18, 2017

Feel Better Bear

Hi, Lois here today with another card using dies from the Get Well release from CottageCutz.   The cute dies were released for Black Friday.  Again, I've made something other than an A2 card -- it's a Z Box Fold card, using both Bear Patient die and the Ouch with Tooth die, as well as a Double-Stitched Square die.


As I wasn't sure which of the images from the Bear Patient die I was eventually going to use, I cut all the pieces out of white cardstock so that I could color them.  I knew I was only going to use one sentiment from the Ouch with Tooth die, so I just cut it out of red cardstock.


Using various Copic markers and a couple of Wink of Stella brushes, I colored the bear pieces and constructed the various images.

I then cut the cardstock for the base of my card -- a 4 1/4" x 5 1/2" piece of dark brown and a 9 3/4" x 4" piece of kraft.


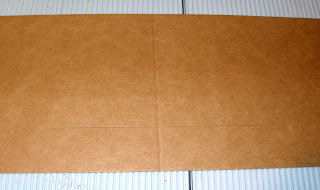
I scored the long piece at 5 1/4".   With the short edge of this piece at the top of my paper cutter and the long edge at the 1" mark, I cut a slit from the 3" mark to the 7 1/2" mark.   IMPORTANT:  If you decide to make a similar card, be sure that the larger section of the cardstock strip is at the top before you cut the slit.  (Ask me what happens when you don't place it in your paper cutter the correct way!)


I placed  the strip on my Scor-Pal with the long edge across the top and the larger section toward the left.  I then scored at the 3" mark down to the slit.  At the end of the slit (at the 7 1/2" mark), I scored down to the edge.  (I slightly folded on the score lines so that you can see them.)


Fold on the score lines to make the "box."


Apply Scor-Tape to the back of the 4 3/4" x 4" section, as shown.


Now it was time to cut the background panels of the card.  I wanted to use the Double-Stitched Squares and Rectangles on my card, but the rectangles weren't quite the right size.  So I just cut the front panel with the die and the rest of the panels as listed:
Cream cardstock - 2 1/2" Double-Stitched Square, 4" x 2 1/2" rectangle
Dark brown cardstock - 2 3/4" square, 4 1/4" x 2 3/4" rectangle, 3/4" x 5" strip, and (2) 3/4" x 2" strips
Patterned paper - 1/2" x 4 3/4" strip and (2) 1/2" x 1 3/4" strips


I layered the panels and adhered them to the front of the card.


I then glued the die cuts to the front and inside panels . . .


. . . removed the protective covering from the Scor-Tape and glued the back panel to the dark brown card base, carefully centering it.


And my card was complete.


CottageCutz dies used on my card are:

http://www.scrappingcottage.com/cottagecutzbearpatient.aspx

http://www.scrappingcottage.com/cottagecutzouchwithtooth.aspx


http://www.scrappingcottage.com/cottagecutzdouble-stitchedsquaresetbasics.aspx


Sunday, December 17, 2017

Festive Penguins

Hi!

Anja here. I can't believe how quickly this week went by. I'm still waiting for my new Cottage Cutz dies to come, so I used a few holiday dies and combined different pieces together to make a cute penguin card. It's so cool how different Cottage Cutz dies go so well together.


For this card I used:
- Cottage Cutz dies (Penguin With Present, Snowglobe Friends, Vintage Holiday Car, Sweet Baby Lamb),
- Distress Oxides (Black Soot, Faded Jeans, Broken China) and Inks (Black Soot, Wild Honey, Fired Brick, Peeled Paint, Forest Moss),
- smooth watercolor paper for background (13x13 cm),
- white card base (14x14 cm),
- white card stock for die cuts,
- black pen,
- Zig watercolor brush (pink shade),
- watercolor brush,
- adhesive foam pads,
- paper glue.

First I colored the background. I used smooth watercolor paper which is great for coloring with Oxides. It allows you to blend the colors really well. I started with black and then went to light blue. I just circled around the paper with round blending tools. I prefer the round ones over the rectangular ones. When I had the color I wanted, I spritzed it with a few drops of water and dried it.


Then I die cut the  penguins from two different dies. I colored them with Distress Inks. I added eyes and cheeks with black and pink pen.


Instead of the skates I used another die to make penguin feet.


I die cut the wreath from Vintage Holiday Card die.


I used adhesive foam pads to add a bit of dimension.


And this is the finished card.


Have a peaceful Sunday.

Anja Z. 


Cottage Cutz dies I used: 


Saturday, December 16, 2017

We Three Kings

Hello Scrapping Cottage friends! Thanks for taking the time to stop and visit today. It's Mary Marsh here bringing you the Saturday edition of the Blog.

Well, it's 9 days until Christmas and I have just a few more Christmas cards to finish. I plan on getting them out in the mail this weekend. I have several that will be traveling across the country but I am sure they will make it on time. Nothing like the last minute rush (LOL)!!!

Today for your viewing pleasure, I created a card using the Nativity - Three Kings die. I had this idea to use this Three King's die and a background of sheet music. Well fortunately for me, Pam my DT sister, directed me to where I could get these vintage printables for free. And, my card came to life. So let's get started with some details on how I created this card.

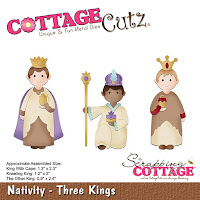
Step 1: My first step was die cutting the 3 Kings. I wanted them to have colorful outfits so I used bright colors for their Kingly attire.
I colored two of the faces with Copic E00 (skin white) and E02 (fruit Pink) for some shading. For the 3rd King I sponged a medium brown ink on white cardstock and then die cut from there.
The die pieces were adhered with Ranger Multi Medium Matte. I like this adhesive when using die cuts because it dries clear.
Step 2: The vintage song sheet can be sized however large you need it. I used my photo editing software to size it to 4 x 6 and then printed on parchment paper. Then I cut it down to 3 7/8" x 5 1/8". If you are interested here is the Pinterest link for this song printable. I used gold foil as my layering panel and the card base is a berry shade. It's the same color I used for the Kings garments.

Berry Card Base: 4 1/4" x 5 1/2"
Gold Foil Layer: 4 1/8" x 5 3/8"
Song Panel: 3 7/8" x 5 1/8"
Step 3: Time for card assembly and I used double sided tape to attach the panels.
 The Kings were attached with dimensional adhesive. I wanted them raised up from the panel for depth.
Once they were on the panel I decided the Bethlehem Star would look good. I wanted something small as an embellishment. So I used the Three Kings Peace ornament and cut just the star. I wanted more depth here as well so I cut 2 more and layered them.
That complete my card for this week. It's a simpler one, but I like how it turned out. We celebrate the 3 Kings day on January 6. If you haven't finished your Christmas cards yet, this would be one you could re-create and send out for the New Year. And the die is on sale right now for 25% off.

See you next Saturday!!

Dies I used to create card:
http://www.scrappingcottage.com/cottagecutznativity-threekings.aspx

http://www.scrappingcottage.com/cottagecutzthreekingspeaceornamentelites.aspx


Friday, December 15, 2017

Gingerbread Gift Card Holder

Happy Friday!  It's Jeanne posting today after taking a week off for a business trip.  We're getting down to the wire for Christmas and if you're like me, your go-to gift (especially for teenagers) is a gift card!

The Fancy Pocket Plus die makes the perfect gift card holder.  It comes with accessory dies or you can decorate it for any occasion using other dies.  Here I used the Gingerbread Man Cupcake die.
I cut all of the cupcake pieces from various colors of card stock.
I used Crumb Cake ink and a sponge dauber to shade the edges of  the gingerbread man and icing.
I cut the pocket from a coordinating color and used a hole punch in the top so that I could make a tag type holder.
Next I assembled the cupcake and used foam tape n the back so it would sit up off of the pocket.
After assembling everything I added Nuovo drops for the sprinkles on the frosting.

I love this pocket because it makes gift card holders so easy!  I made this into a tag but you can easily use it to add to a card.
http://www.scrappingcottage.com/cottagecutzfancypocketplus.aspx

http://www.scrappingcottage.com/cottagecutzgingerbreadmancupcake.aspx

Have a fun and creative weekend!