Tuesday, August 22, 2017

Love Doves

Hi!

It's Anja here. I'm still inspired by the wedding theme, that's way I have another wedding card for you today. This time I used Fancy Doves die and new Distress Oxides colors.


- Cottage Cutz Dies (Fancy Doves with Vine, Nested Stitched Scallop Oval Set, Love Phrase),
- Distress Oxides (Abandoned Coral, Twisted Citron, Antique Linen, Peeled Paint),
- white card base (15x15 cm),
- white card stock (for die cuts, 14,6x14,6 cm square),
- black pen,
- soft brush,
- Sizzix Impressions pad and Silicone Rubber,
- paper glue,
- foam adhesive pads.

First I cut a square from white card stock and embossed the largest oval from Nested Stitched Scallop Oval Set on it. I sprinkled a bunch of drops on the paper. I used Abandoned Coral mixed with water. I dried it with heat gun. I also cut a smaller oval from white card stock.


The I die cut all the pieces and colored them with Distress Oxides. I used a brush to color the vines. I wanted a softer touch of green and the brush is great for that. I cut two doves of each. Later I glued them together on one side (where the head is). 


When I had all the pieces colored I put the card together. I glued the smaller oval and the doves with adhesive foam pads. 


Have a nice week and see you again on Sunday.
Anja Z.


Monday, August 21, 2017

Holly Swag

Hi, Lois here with a little change of pace card.  It's 90 degrees outside, but I'm here to cool you off a bit with a Christmas card today.  I'm still playing with the new Nested Shapes release from CottageCutz -- this time the Nested Stitched Eyelet Square set, as well as one of the Expressions Plus sentiments.


A little twist to this card is that the "Happy Christmas" sentiment is actually on the inside of the card.  It shows through a strip of acetate on the front.

To start my card I cut the 8 1/2" x 5 1/2" card base from some heavyweight white cardstock.  In addition I cut two strips of red (1" x 5 1/2"), two strips of green (1/2" x 5 1/2"),  a white 2 1/2" x 2 1/2" square and a strip of clear acetate 2 1/2" x 5 1/2".


After scoring the card base at the 4 1/4" mark, I trimmed a 1 1/2" strip from the bottom and adhered it to the acetate strip.  I trimmed that same side of the card 1 1/4" from the top, adding Scor-Tape to the top of the acetate and the edge of the card.


After removing the Scor-Tape, I lined up the acetate/cardstock piece to the bottom of the card and pressed down on the taped sections -- creating the card base.


Next I cut the die-cut pieces from red and green cardstock . . .


. . . adding some darker color to the pieces.  I sponged around the edge of the white square with red distress oxide ink.


Using a scallop punch, I trimmed down the red strips, adding some 1/8" Scor-Tape to the backs.


I then constructed my holly swag, using small foam pop dots to give dimension to the swag.


I then stamped the inside of the card, making sure that the sentiment was placed so that it would show through the acetate strip.


I then added the red/green strips to the outside of the acetate and constructed the swag panel and glued it on either side of the acetate strip.  The "celebrate" sentiment was centered at the bottom of the card front.


CottageCutz dies used on this card are:

http://www.scrappingcottage.com/cottagecutznestedstitchedeyeletsquareset.aspx

http://www.scrappingcottage.com/cottagecutzhollybranchwbow.aspx

http://www.scrappingcottage.com/cottagecutzexpressionspluscelebratephrase.aspx


Sunday, August 20, 2017

Wedding Cake and Butterflies


Happy Sunday CottageCutz fans! It's Janet and it's my turn to share some creative inspiration with you.


Today's project is a card featuring the beautiful new Tiered Wedding Cake die. I had a lot of fun putting it together. It has a lot of small pieces but I found a way to make them easier to manage and color. I share this tip with you in the video and show you how well it works. You may have seen it before but you'll get to see it in action in the video.


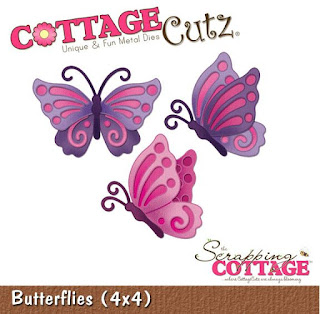
The card also features the new Nested Stitched Eyelet Oval Set, the Celebrate Expressions Die, Butterflies, and the Leafy Foliage dies. 


I cut all the pieces in white card stock and used my Spectrum Noir markers and clear Wink of Stella so that each of the die cuts complemented each other as a set.

For full instructions and a look at how it was put together, click on the video link below.


It was great spending a little time with you today. I hope the rest of your weekend is great!

- Janet   
SugarShine Designs

Dies Used In This Project:


Saturday, August 19, 2017

Chapel in the Woods

Hello Scrapping Cottage friends! Thanks for taking the time to stop and visit today. It's Mary Marsh here bringing you the Saturday edition of the Blog.

Hope you have been enjoying all of the beautiful creations that the DT has been showing over these past weeks with the wedding dies. If you haven't seen them, just page back through the Blog for some delightful eye candy.

Today I am using one of the wedding dies, Little Chapel, but I turned it into a chapel in the woods for a Christmas card. So let's get started on how I created my card for today.

Step 1:  As I was thinking about my post for this week, I knew I wanted to do something different with the little chapel die. Then my mind went to Christmas and then to a scene in the woods. I knew I wanted snow and evergreens and also a white card with just a hint of another color.
I pulled out a falling snow embossing folder and started my background.
Step 2: To embellish the snow banks, I used the winter wonderland die for the sledders and the small house, for the pine trees I used the snowglobe winter accessories die and for the smaller trees on the hills I used the winter cabin border (2016 Christmas) die. I snipped these border dies to just use the parts that I wanted in my scene.
Then for my snowy hills, I decided on the jolly snowman die. That had a perfect snowdrift that would work for a hill in my scene. You could also cut your own hills. I covered my hills with glitter.
Step 3: To complete the last of the scene elements, I die cut my little chapel. This is the inspiration die for my card today I sponged some fossilized amber distress ink to give a soft glow to the inside of the church.
Step 4: For the oval frame that surrounds my scene, I used the stitched eyelet die(largest) and also the stitched oval die (2nd largest). I cut one at a time. That works better for me as far as placement. I cut the largest oval first. Then I take the next oval die and place it on that one and run it through my die cut machine. And now you've got your oval frame. It's easy enough.
 
Step 5: With all the elements cut it is now time to start the assembly of my scene. I secured the die cuts with glue dots, multi medium matte and dimensional adhesive. Attached my frame and then the 2 larger pine trees.
Image Panel: 4 1/8" x 5 3/8"
Card Base: 4 1/4" x 5 1/2"
Step 6: I wanted just a touch of color on this all white scene. So I chose to use the Merry Christmas Ribbon (Christmas 2016) die and cut it in red. I snipped off the ribbon part because it was just a bit too large for the corner of my card. Secured this with the multi medium matte. I also did a die inlay technique by placing the Christmas letters back into the die.
 
And, that completes my card for this week. I hope I have given you some inspiration on a way to use a die in a different way. One that was intended for a wedding has now become a part of Christmas.
See you next Saturday.
 
Dies I used to create card:
http://www.scrappingcottage.com/cottagecutzlittlechapelpetites.aspx

http://www.scrappingcottage.com/cottagecutzwinterwonderlandborderelites.aspx

 http://www.scrappingcottage.com/cottagecutzwintercabinborderelites.aspx

http://www.scrappingcottage.com/search.aspx?find=merry+christmas+ribbon