Monday, March 06, 2017

Woodland Scene

Hi, Lois here, with a fun card today.  I have used quite a few CottageCutz dies and stamp/die sets on my card.  If you know me at all, you probably know that I love making fun-fold cards -- so it will be no surprise to see that my card is a Side-Step Card.


Supplies used on this card are:

Green cardstock - 5 1/2" x 8 1/2"
Pale blue cardstock 1 3/4" x 3 7/8" and 1 3/4" x 3 1/4"
White cardstock for stamp/die sets
Scraps of brown and two shades of green for shrubbery
Copic markers
Liquid glue and tape runner
Fiskars paper trimmer
Scoring board
CottageCutz stamp/die sets - Woodland Animals, Woodlands, Garden Gnomes 1

To make the card base, I placed the 5 1/2" x 8 1/2" piece of green cardstock into the paper trimmer with the long edge at the 3 1/2" mark.  With the cutting blade at the 1" mark, I cut a line down to the 6 3/8" mark.  Placing the long edge of the card base at the top of the scoring board, I scored the wide section at 1", 2", 3 1/8", 4 1/4" (all the way across the center of the card), and 6 3/8" and folded on the score lines so that my card looked like this:


Using my Copic markers, I colored and cut the various stamps from both the Woodlands and Woodland Animals sets.


Then I cut the shrubbery from the scraps of green and brown, using the Spring Grass, Spring Greenery, and Campfire Clothesline dies.


I stamped the sentiment at the top of the tall pale blue panel and assembled my card.  The Campfire Clothesline tree had only a few leaves, so I made branches out of some of the Spring Greenery die cuts.  Here is a close-up of the steps of the card.


And again . . . the finished card.


CottageCutz sets used on this card are:


Saturday, March 04, 2017

Easter Basket + Tutorial


Hello Scrapping Cottage friends! Thanks for taking the time to stop and visit today. It's Mary Marsh here bringing you the Saturday edition of the Blog.

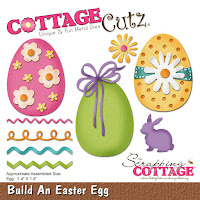
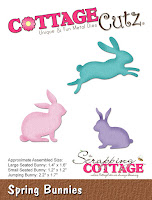
We have some fabulous new Spring dies in the store. Today for your viewing pleasure, I am featuring the Build an Easter Egg and Spring Bunnies dies. I made an Easter Basket with them.

I have seen quite a few baskets made using the Envelope Punch Board and I may try one of those soon. But, I realize that not all of you may have that tool. So my basket is made with dies and a scoring tool. I have loads of pictures for the process but here is a link to a video.

So let's get started on what I did for my project.

Step 1: The basket uses one sheet of 8 1/2" x 11" cut as shown in the following template.

 My first cut was at 4 1/2" x 11". Then cut this piece in half to measure 5 1/2" x 4 1/2". Used these pieces for my basket sides. The next piece used for the basket itself was cut at 4" x 6 1/2".  My last cut was 4" x 4 1/2". I used this piece to cut the basket handle.

Step 2: I used the largest Stitched Oval die for my basket sides. I cut 2 ovals using the 4 1/2" x 5 1.2" cardstock piece.  For the handle, I used the Oval die set -  Choosing the 1st and 3rd largest dies in the set. The cardstock piece is the 4" x 4 1/2" panel.


Step 3: I was now ready to complete the scoring on the 4 x 6 1/2" panel.  First score was at 1/2" on both sides of panel in portrait mode. The 2nd score is at 2". This was done on both sides of cardstock. Used a bone folder to crease all score lines. Also make cuts as shown in photo.


Scor-Tape added to top and bottom of panel
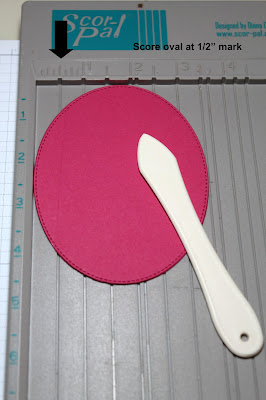
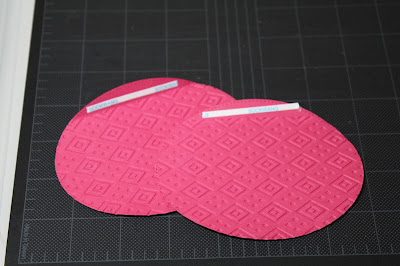
Step 4: I also scored the stitched ovals. This just made it easier to fold it under the basket base. Scored this at 1/2".  Used an embossing folder for added texture on the basket sides. I didn't emboss the 1/2" that was scored.

 
Scor-Tape added to oval panels
 
Step 5: Basket Assembly begins. The basket sides get secured to the base.
 
Both sides secured


Step 6: Die cut the elements for decorating the basket. Used lots of bright spring colors. Elements adhered with Ranger Multi-Matte medium and glue dots. Added the handles to basket with glue dots. I simply cut the oval that I made in  Step 2 in half.


Step 7:  Basket completed and time to fill with some goodies for gift giving.
That's it for me for this week. I hope I have inspired you to make a basket of your own for Easter or as a Spring gift. See you next Saturday!


 Dies I used to create card: 
 
http://www.scrappingcottage.com/cottagecutzbuildaneasteregg.aspx
 
http://www.scrappingcottage.com/cottagecutzspringbunnies.aspx
http://www.scrappingcottage.com/cottagecutzovalsetbasics.aspx
 
http://www.scrappingcottage.com/cottagecutzstitchedovalsetbasics.aspx


Friday, March 03, 2017

Sunflowers and Sunshine

Hello friends!!!

Welcome to the CottageCutz blog. this is Anita here, with another inspiration with the spring theme. Spring means sunflowers and sunshine and that is what my card brings in today.

The CottageCutz store has a wide range of spring theme dies and also stamps and die combos. You can view all of them here.

Here is my card with sunshine and sunflowers


So did my card bring a smile on your face!!!
Its very easy to make this card.

Instructions

1. Cut a white card stock a 5 inches by 6 inches and colour with water colour using shades of yellow and orange. Score the card panel on the score board at an interval of 1/8 inch. Adhere this on brown mat layer.

2. Cut four die cuts from double stitched rectangle die to get frames and adhere two frames together to get a thicker die cut. Add a sunflower picture at the back of one of the frames. To another frame , add a white backing paper that you get from cutting the frames. Add some water colour.

3. Adhere the two frames on the card panel as shown.

4. Cut die cuts in white water colour paper from Sunflowers die and colour the flowers and leaves as shown. Use any colouring medium of your choice. Add the dragon fly from Doodle Bugs Die

5. Adhere on the card panel with foam tape. 

6. Add sentiment, twine bow and some sequins to finish the card.

CottageCutz die used


See you again next week with more projects and inspirations from the CottageCutz.
Stay happy and keep crafting.


Wednesday, March 01, 2017

SPRING FLOWER-DAISIES AND 3D EFFECT OF STAMPING


Hello dear friends!!

A warm welcome to the Cottage blog !!! I 'm Anita here with lovely spring daisies from the new stamp and die combo sets from CottageCutz. I'm having so much using them to create my projects. The stamps and dies are of superior quality . you can check out the entire range here

For my card today, I feature the spring flowers -Daisies and I have used this set to create a 3D scene along with die cuts. We can use similar themed dies to create a raised or popped up scene along with the matching stamp. CottageCutz has many foliage dies that combines so well with many flowers stamps and dies.

Here is my card.
  

 To make this card, Cut die cuts from the CottageCutz Foliage die and CottageCutz Spring Greenery
set and colour with Distress inks. Emboss them a little on foam pad and arrange on a card panel 4" x 5.25" with silicon gel. 


Stamp two images from CottageCutz Spring Flowers - Daisies -April and colour with water colour. Cut with coordinating die. Arrange on the card panel with silicon gel as shown to create a raised 3D image.


Stamp the bees and a sentiment. Adhere the card panel on two matte layers.


Cut a  Wide Rectangle Stitched frame diagonally and adhere at the two corners. Mount the finished panel on a card base that measures 5.75" x 4.5".

CottageCutz dies used


CottageCutz has a huge range of stamps and dies to create many wonderful projects. Do check them out here at the store. I am so thankful that you spent some time here.