Thursday, July 28, 2016

Pop-up card Once upon a Springtime

Hello Scrapping Cottage friends!
Yuliya here! Welcome to my new post where I will show you how to make this pop-up card  with the June's release of theCottageCutz dies - Home Sweet Home.


Here is list of all supplies I used:
CottageCutz Dies:
Other: Sizzix machine, glue, patterned paper, cardstock,scissors, distress ink "vintage photo"
Follow me!)
1. Size my patterned paper - 28 cm*14 cm. Fold it as it is shown on the picture.
2.From a white cardstock cut out rectangle. I use CottageCutz Build-A-House Set 1 (Includes 2 Dies)
3.
4.
5.

6. Prepare some die-cuts. I use CottageCutz Build-A-House Set 1 (Includes 2 Dies)CottageCutz Garden Accessories
7.
8.
9. Prepare  patterned paper for base. Size 30 cm*15 cm
10.
Assemble the card


I would like to remind you on our challenge #4 - greenery
You still have time to share your projects with us.
I hope you have been inspired by my card today.

Wednesday, July 27, 2016

Christmas In July + Sale

Hello Scrapping Cottage friends! Thanks for taking the time to stop and visit today. It's Mary Marsh here bringing you the Wednesday edition of the Blog. I am back from our beach vacation all tanned and relaxed. Last week I showed you a beach card and this week I have gone with Christmas, my favorite time of the year. 

Today for your viewing pleasure, I am featuring the Santa's List die that is part of the Christmas In July sale going on over at the Scrapping Cottage Store. The sale ends tonight at 9:00 pm Pacific time and there are some great deals to be had. You can save between 50%-80% on some Christmas dies.
 
Now lets get started with the details on my card.
 Card Base:  4 1/4" x 5 1/2"
Striped Paper: 4 1/8" x 2 3/4"
Vanilla embossed panel: 4 1/8" x 3"
 
My thought process on this card is to show Santa in a room checking out his naughty or nice list. I decided to create my wall background with some striped patterned paper for the wallpaper and a vanilla dry embossed layer to represent wood beadboard. The scalloped panel is the chair rail. And, that was part of an old Christmas scrapbook kit.
 
I found this striped patterned paper in my stash and thought it might be good colors for Santa's room. I used a vertical striped embossing folder on the vanilla cardstock.
 
 
After I die cut the Santa silhouette in black, I decided to make a night sky for the window. I sponged 3 shades of blue distress inks and then made a stencil to add some stars to the night time sky. I sponged those in a silver ink. I cut the sponged panel down to the size of the window and used glue to attach.
 
 
I wanted Santa's gifts to stand out so I die cut them in red card stock. A few little snips to separate them from Santa's stool and they are ready to be paper pieced over the black. I also paper pieced the moon with some silver cardstock. I attached them with Tombow mono adhesive and ranger multi-matte medium.
 
I attached the entire image to the background panel using 3D foam squares to give it dimension. My olive green carpet is actually a sneak peak of a new snow bank die coming soon.
 
 
To complete my card, I stamped my "naughty or nice" sentiment on vanilla cardstock and cut with the 3rd largest stitched circle die. Layered that onto a red circle cut with the 4th largest circle die.  
 
And that is my card for this week. Hope it gave you some inspiration. Let me know your thoughts, I read all of the comments you leave. Also, don't forget about our current challenge. It's all about greenery and you can get more info here. Until next time........inky hugs.
 
 
http://www.scrappingcottage.com/cottagecutzsantaslistelites.aspx
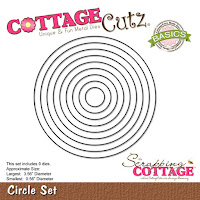
http://www.scrappingcottage.com/cottagecutzcirclesetbasics.aspx

http://www.scrappingcottage.com/cottagecutzstitchedcirclesetbasics.aspx


Tuesday, July 26, 2016

In the color of lavender

Hi, Janja here!

Stunning scent of Mediterranean bush is expanding far and wide. Tiny flowers with its violet blue color catches the eye. Lavender is fully blooming.
I tried to catch some of its color and romance on a birthday card.
Let's see how it is made.


For the card we need:
- white card base: 5.3 x 5.3" (13,5 x 13,5 cm)
- patterned paper: two sheets in size of - 5.24 x 5.24" (13,3 x 13,3 cm) and four sheets in size of - 5 x 5" (12,7 x 12,7 cm)
- white and violet cardstock
- ribbon

We prepare two cutouts from a white cardstock with the die oval doily & frame. Also cut out two oval holes in a patterned paper with the die in which we will later insert white ovals.


From a white cardstock cut out birds with the die bird trio and 4 lace borders with the die fancy floral lace border.
For more contrast cut birds also from violet cardstock and the basic of two flowers. The upper part of the flowers and leaves is cut out from a white cardstock with the dies: doodle flowers set 1 , doodle flowers set 2, and leaves & stems.


Glue patterned papers with double-sided adhesive tape between themselves and insert white ovals in oval holes. On a card base we attach a ribbon.


Assemble the card.


Look on a spread card with a space for greetings and an inscription happy birthday.


Exterior of a card.


I would like to remind you on our challenge #4 - greenery
You still have time to share your projects with us.

I hope you have been inspired by my card today.
Janja

 List of dies used:


Monday, July 25, 2016

Home Sweet Home

Hello everyone,

It's Donna with another card from the new release from June's "home sweet home" collection. This release is really nice, it's all about the home. I am using the Build-A-House Set 2, The first die in the set is to build your house and the second one is accessories for the outside of your house.   The words are from  "Home Sweet Home Phrase set." which includes three words , so if you wanted to use the "home's" or "sweet" separately you can.

My card is an A2 card (4 1/4 x 5 1/2).


I have die cut all the pieces that I need to build my house.  The pieces that I cut out and I don't use, I like to keep them because I can use them later if I want to use the die.


I sponged all the pieces I needed to, to give the dies some dimension.


I cut out the clouds from the Clouds and Sun die cut set to use the largest cloud to make clouds in the background of my card.  I saved the pieces that I did not use to use at another time.


Here is how I used the largest die to make the clouds.


Dies used: