Saturday, March 15, 2014

Birthday Gift Bag

Hi, Everyone! Today I have a new post
for you, using some of the CottageCutz Elites Collection!
  Here's a lovely mini Birthday gift bag.
Take a look:

 to create this lovely mini gift bag. 

These are the dies I used:


Hugs, 

Friday, March 14, 2014

Easter Cupcake Peepers

Cupcake Peepers Candy Bag 
♥♥♥♥♥♥


Today's Candy bag is made I using the CottageCutz dies for my Easter Cupcake Peepers , CottageCutz Garden Delight Butterflies , and CottageCutz Garden Floral for the front of my Candy bag. The Candy bag is one from American Crafts, and so is the super darling Garden Party Paper. Ribbon,lace and flowers are from Really Reasonable Ribbon.

 Next I ran some design paper from Garden Party paper stack, and then the lace from RRR, and the layering was done after that. The sweet flowers are the Sweetheart Blossoms from Really Reasonable Ribbon .


I absolutely LOVE making these super fun candy gift bags using the CottageCutz dies.


Hugs to all,
Cheryl

Thursday, March 13, 2014

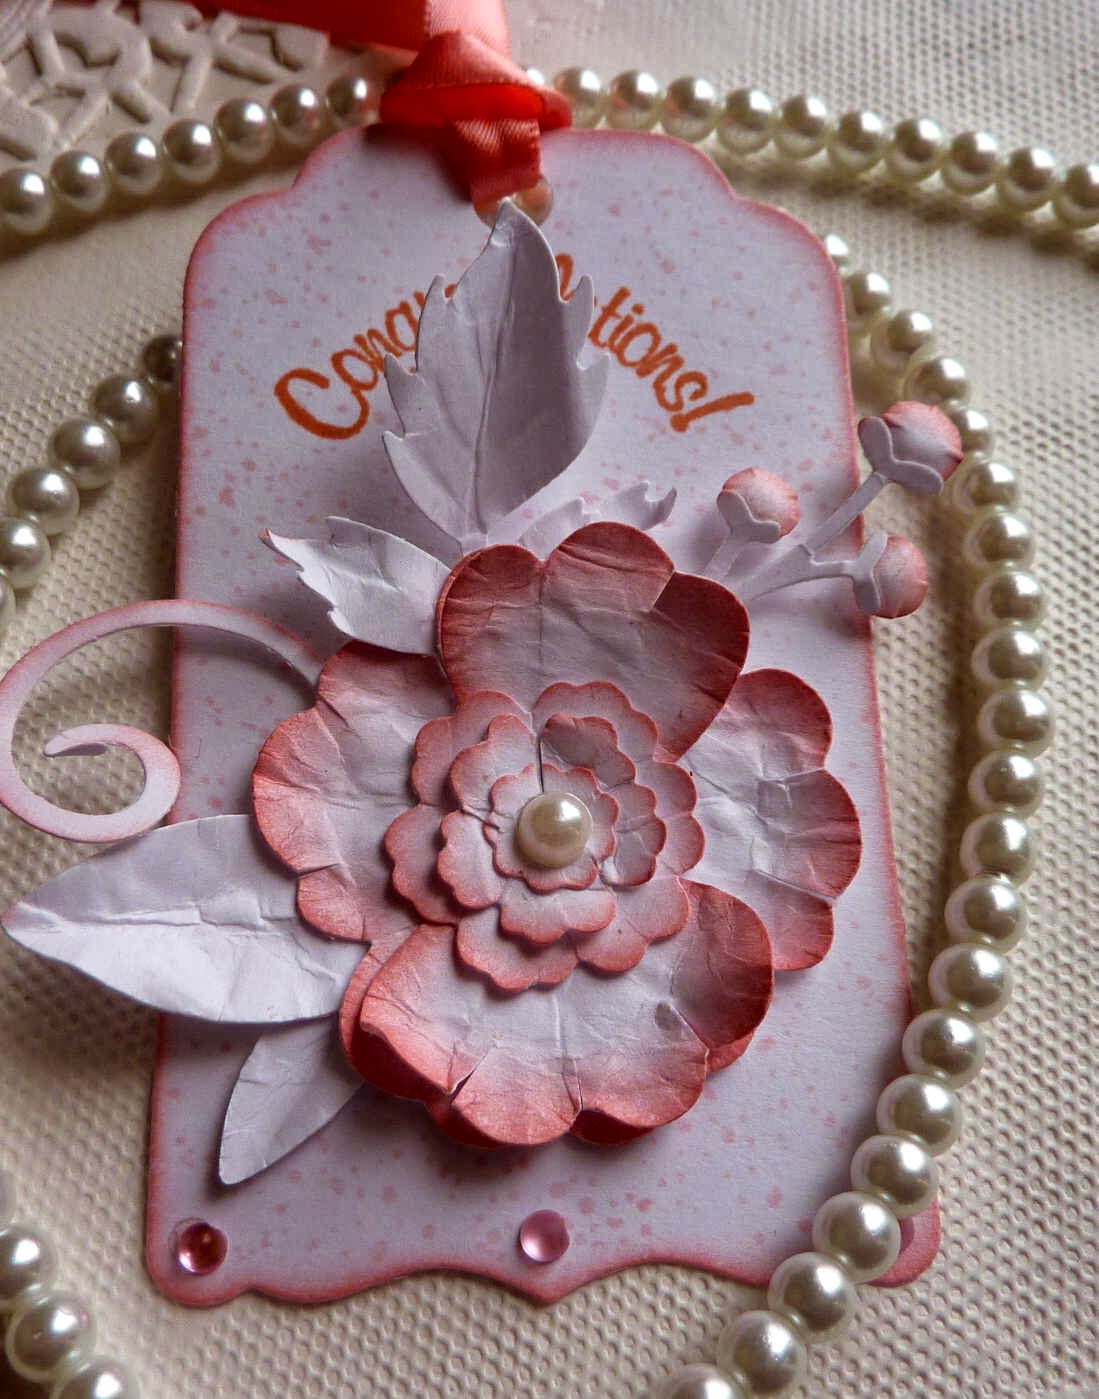
Wedding gift tag


  Today I am sharing with you my another Wedding gift tag I created with beautiful CottageCutz Collections of dies.
 
For my project I used Fancy Insert tag and Pink Peony Flower dies. 
Very easy to make this gift tag.


First, I cut tag out using white card stock. Than, I make a background using polka dots background stamp and sentiment stamp. Next, cut Peony flower images out using white card stock, sponges the edges with pink craft ink and glued together. Decorated gift tag with ribbon and pearls.

For this project I used:


Thanks and Have Wonderful Week! Olena


Wednesday, March 12, 2014

Happy Easter


Happy Wednesday!

Today I have an Easter card for you using 3 of the new Garden Delight Dies from The Scrapping Cottage!


I've used the Garden Floral FrameGarden Delight Butterflies, and the Garden Butterfly Vine.  All the pieces were die cut with white card stock and colored with chalk inks (Aloe Vera & Pink Grapefruit VersaMagic) and make up applicators.  This is a quick technique I like to use sometimes on the more "lacy" type dies.  It doesn't need to be perfect, just add some color wherever you like!

Here is a close up of the beautiful dies:


I glued the die pieces to a white mat that was stamped with a sentiment and embossed with a folder.  I then added a mat using Lime Granita (Coredinations) and popped it on a white card base.   The butterfly was slightly shaped with my fingers, glued down by the body only so the wings came up and decorated with a little bit of Diamond Stickles on the edges.  White Opal Pearls were also added to the butterfly body and flower centers.  To finish the card, I added a small bow and adhesive pearl.

These are the dies I used:


Tuesday, March 11, 2014

Rocking Horse


Hello again!


Today I (Simona) would like to share with you a little
 baby gift bag made for The Scrapping Cottage Blog.

I made a gift bag with WRMK gift bag maker 
and used the Rocking Horse die to decorate it.

Take a look...


The Rocking Horse die was cut out of white 
card stock and colored with Distress inks and Copics.


The sentiment BABY was stamped with a green
Distress Ink and colored with Distress Markers.
Then I cut out the squares with scissors.


I hope you like today's project. Thank you
for stopping by and have a lovely day!

Hugs,
Simona

The die used:


Monday, March 10, 2014

Garden Delight Thank you

Hello everyone, and Happy Monday to all! Today I 'm sharing a card made using the Beautiful CottageCutz Elite Dies from the "Garden  Delight" Release from the Scrapping Cottage here!


I love the CottageCutz Garden Delight Butterflies as they are super PRETTY and fun to decorate. On mine today I used copics, and distressed inks, then used some glitter glitz for the edges. The glitter i used is AC WOW glitter that comes in many colors.I love using this on the edges of the butterflies.

The design paper is Pebbles. I forget the names of them.

Next I used the the CottageCutz Garden Flourish to place under the Butterfly. It was cut in a green card stock.

Below are the CottageCutz dies I used:


Thank you for looking and have a lovely day!
Hugs to all,
Cheryl


Sunday, March 09, 2014

Hi everyone.  Today it's Carol here with a project for you.  This was created by making envelopes with the WeR Memory Keeperss Envelope Punch Board and decorating with the fabulous Cottage Cutz Dies.     Thanks to the wonderful crafter who created this tutorial it was a breeze.
 Today I am going to show you my cover using the dies from the Garden Delight release.  Of course, I used a few other ones in my Cottage Cutz collection that coordinate perfectly with this release.    The cover uses Springtime Bunny, Garden Delight Butterflies, Lace Flower Doily, Bella Leafy Branch, and Fancy Floral Background.
Blossoms and Butterflies from DCWV is the paper collection used in this project.  The edges of the paper have been distressed and inked with tea dye distress ink.   The flowers were created with a large and medium five petal Marvey punch.  The stamp is from Michael's $1 bin from a few years ago.
Please stayed tune to more reveal of my project this month.  My mini album was made with 4 envelopes created on the Envelope Punch Board.  It was so fun to make and holds lots of pockets and pictures.  I can't wait to show you the rest of the 22 Cottage Cutz dies I used to create this.  That's right---I used a total of 27 Cottage Cutz dies for this album.  I think that is a record for me....lol  Thanks for stopping by today to view my project.  Until next time, Happy Crafting!
Here are the dies I used:


Saturday, March 08, 2014

Spring Duckling

Hi all, Vladka with you again
All this animals from Garden Delight release are so cute and give you different opportunity to use them. I chosen more CAS version. I really like to search for different quotes on Pinterest and sometimes after I read some, I get the picture of whole card in my head. This was also the case this time. 
I used Spring duckling Scrapping Cottage die and coloured die cuts with different Distress Inks. Then I combined everything together with printed quote and card was finished. This is it for today. 
Have a nice day!