Sunday, February 10, 2013

CottageCutz Heart Shaped Box

Hi Everyone! It's Lisa here today and I am sharing a Valentines Heart Box with you.

This is a candy box purchased at the dollar store. I ate the candy **snicker** just so I could decorate the box! 


I used several beautiful CottageCutz dies on this. 


I did some punching and layered that on the top and bottom of the box. I also dyed some lace with glimmer mist to match.

The box was finished off with some chipboard accents. I covered the in gesso then stamped with a musical note stamp and embossed them in gold.


Saturday, February 09, 2013

CottageCutz Vintage Mini Tussy Mussy


Hello everyone, today I wanted to share My Vintage Mini Toilet Paper Tussy Mussy that I made. Carol was the Inspiration for these Toilet Paper Tussy Mussy's :) Thank You CAROL!!!!

On this one, I used CottageCutz "Fancy Perfume Bottles" from the Vintage Release. I ABSOLUTELY LOVE this RELEASE!!!!


I wanted a vintage look to my Tussy Mussy, so I went with Vintage Laces, and ruffles, and Vintage Seam Binding, all from my stash. Then I picked a dp that I thought could be vintage looking, and went off of those colors for my perfume bottle. 

The CottageCutz Perfume Bottle is cut out with a design paper, then distress with brushed Corduroy ink. Next I cut the hose and top pieces all with cream card stock and distressed it with tea dye. The bulb is airbrushed with copic YR61 and then distressed with old paper. My flowers were colored with copics R32, YR61 , for the greenery on the bottle I used YG95 & G99 copic markers.


The Lace I used on the bottom ,top, and handle are very very old. The ruffled behind the bow, Im not sure how old that is. I also used Really Reasonable Ribbon Brown Antique Gold Ribbon for my bow. Now behind the hearts is a peach seam binding, I just ruched it up. Lastly I added a string of pearls to the bottom :)


If you havent seen the NEW CottageCutz Releases you will have to take a moment and stop by The Scrapping Cottage Store HERE :)


*************************

Here is another MINI Tussy Mussy I did this past week
Thank you again Carol for the Inspiration to make these Toilet Paper Tussy Mussy's they sure are fun to make! I think PERFECT to hold some small candies :)


Thank you for looking and have a lovely day!!
Hugs to all,
Cheryl


Friday, February 08, 2013

CottageCutz Vintage Bag Tag


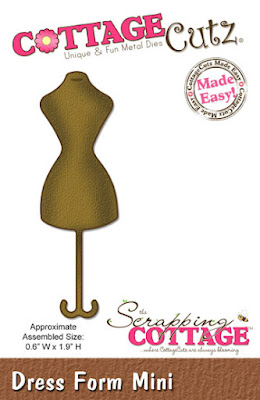
Hello friends.   It's Carol here and today I have what is called a bag tag made with the adorable Vintage Lamp and Dress Form Mini Dies from CottageCutz.  What is a bag tag?  It is a cute little paper bag that has been altered to hold a sweet tag.  It's almost like a card and envelope, but it's a bag with a tag and they are super fun to make. This was inspired by ILuvVintageScrap-Ms Juliana on YouTube.  Her's are gorgeous!

 So here you can see the tag outside the bag.  I went with a Shabby Chic theme.  I used a 3-1/2" x 6-3/4" White Paper bag that I had in my stash from Michael's.  I got some regular paper bags out (lunch bags) and used them for the background.  I don't have any precise measurements because I just played with my stuff and did what looked good to me.  Tear the paper bag to cover most of the white paper bag.  Crumple it up, then unfolded and hot glue it to the bag.  I used white paint and brushed some on top of the bag.  Tear a page out of an old book and glue it to the top of the bag.  Cut a piece of white cardstock, run it through a crimper and distressed the edges with Rangers Brushed Corduroy and glue that on top of the book page.
I chose lace, pearls, burlap, chipboard butterfly, buttons, eyelash yarn, feathers and a premade rose and arranged them like you see here.  I wrapped the eyelash yarn in the rose and attached with a little glue.  The top flower is made from a paper bag.  Cut two pieces with the smallest scalloped circle Spellbinders die and four of the next size up (You could use a scalloped punch if you have one).  I rolled and scrunched up the paper, then unfolded, glued together, and added a pearl in the center.  If desired, brush white paint on the flower.  All edges of flowers are stickled with Icicle stickles.  For the inside tag paper doilies and crochet flowers were used to decorate it.

For the lamp, I cut all the pieces on white cardstock and used copic markers to color it except for the lamp shade.  I just distressed it with some of the Brushed Corduroy distress ink on the edges.


The dress form was cut on kraft cardstock and attached to the top of the inside tag.  A little button was glued to the center and a bow was made from white crochet thread.  This is so much fun to make and I invite you to try your hand.  You will love it!


Thursday, February 07, 2013

XOXO!!

Hi, Friends!
Today I have a new card showcasing very pretty 


 Paper from Recollections by Michaels.
 Other: charm, button, ribbon and
rhinestones.
Hugs, 


Wednesday, February 06, 2013

Ornate Cross

Good morning everyone!


Hey, Vladka here again. This is my fourth post on the CottageCutz blog already.  This time with Easter theme; two cards, one main die and two dies for combination.  I really wanted to have one Cross die and with Ornate Cross I get three dies, how cool is that! :)  First card is fresher and brings a little spring on the blog :)  I combined it with tulips, which I cut out from Watering can and Tulips die.  I just love this one and here is another idea with it :)

 
On the second card I experimented a little bit with background and with both cross die cuts, brown and white.  To get a little color I used this beautiful wedding die Trellis and Vines and cut out vines and wrapped it around the cross.  Both cards can be also use like invitations for Baptism or Confirmation.  You just have to change the sentiments and here you go.

 
And here is another idea with foil.  Do you remember my last project with watering can?  Here I used two die cuts of each middle and smallest cross.  I glued it together, put the foil on and a little color.  It looks like silver and I thought it will be fun to put it on the necklace. :)  What do you think about it? 

And here are all dies, which I used:


Tuesday, February 05, 2013

Hidden Pocket Card

Hello Everyone!  Sorry for the late post.  I am so used to posting on the dates ending in 7 that I forgot that it was changed this month because of it being such a short month.  I have a hidden pocket card to share with you today.  It was so much fun to make and I have to say I am pretty happy with the results.  I used the CottageCutz Vintage Vanity and Stool die.
The pocket is behind the image.

I made the bedroom scene and traced and cut the oval out for the mirror with my detail scissors.  I cut the vanity mirror frame 3 times and layered them on top of each other.  I did this so the table of the vanity would lay smoother over the "woodwork" and not have a bump.
 This is the back of the pocket before adhering to the card base.

This is the card front with tag in pocket and below is a picture of the sentiment I stamped in the mirror window when the tag is removed.
And here is the final card.  I ended up cutting it down to fit a standard card base of 4 and 1/4 X 5 and 1/2.
If you have any questions please ask.  I love to help if I can.  Have a great day, and  I hope you enjoy the 2nd post of the day.

Hugs and smiles,
Janice

CottageCutz Accordion Pocket


Hello everyone, today is not my normal posting day but wanted to fill in for Janice. Sorry its late, but we have had something come up. I did this page a week or so ago, and didnt get to share it on the CottageCutz blog, so figured today would be perfect time to do so.

I made a accordion file for this page. and used the Beautiful Vintage Release Hand Mirror w/ Cameo, and also used the CottageCutz Shabby Chic Doily. LOVE these dies!!! They are a must have for layouts and mini albums. I used the CottageCutz Oval Doily and left it blank so wording could be added later :)

I do have a video on this post HERE showing briefly how to make the pocket


Thank you for looking and have a lovely day!
Hugs,
Cheryl