Sunday, July 11, 2010
Craft Queen
Friday, July 09, 2010
Bloom Page
Thursday, July 08, 2010
For my first trick....
For my first project I've done a fishing layout. (I do a LOT of fishing layouts!) Who likes to fish??? My grandkids do! And penguins do too, of course. I couldn't resist using the adorable snowskiing penguin on this page, giving him a fishing pole instead of snowskis. It's plenty warm so he doesn't need his hat and scarf on this trip. I also used the scallop/dot edger. Scallops and dots are two of my favorite things....could you tell by my choice of papers?
 Here the little penguin holds the fishing pole and net from the fishing set and, without his ski cap, you can see the cute little tuft of hair on top of his head (which is actually one of the lily pads from the boat and dock die).
I love this fishing pole. It's fun to embellish. I've used cork paper for the rod handle, silver paper for the reel, and invisible thread/monofiliment for the line. It seemed to work because Mr. Penguin has caught two fish and seems pretty happy with his catch!
For the net, I used mesh I've had in my stash for ages. It's perfect for this use! I love how it turned out. Cute, huh?
Then, to balance out the large embellishment on the bottom of the page, I've added a clump of cattails in the opposite corner. These are the cutest!
After finishing the layout, I used leftover scraps to make this quick card. Simple bracket shape embellished with flowers, bling, ribbon and Cottage Cutz scallop/dot edger.

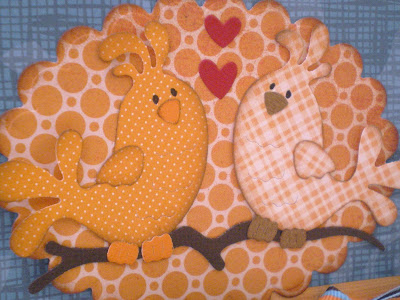
For this second layout, I used the cute little love birds and tall tree. I also used Ruth Ellen's idea and made the scallop/dot edger a 12 inch length. Great tip, Ruth Ellen.
Added a little stickles to the birdies to make them sparkly, like their adorable personalities.


Wednesday, July 07, 2010
Feeling a little "Krafty"
 It's been a long time since I made a card and didn't have at least 2 layers of cardstock and patterned paper behind my design. I just loved the look of these diecuts against the raw Kraft cardstock.
 For the trees I inked the edges in a mixture of Walnut ink and Peeled Paint Distress ink.
I cut the leaves out of a patterned paper that matched my cardstock.
 For the Whimsical birds I inked them with Walnut Stain also and added some white paint dots to the eyes and a few on the wings.
I thought this would make a cute, but simple Anniversary or Congratulations card for a newly engaged couple or even a baby card with the mini nest die inside the card.

Be sure to check out the blog each day of the week as we have a brand new Design Team that is sure to please!
Tuesday, July 06, 2010
Cat's in for the Day
 Funny thing how this idea came about, The Cat's in for the Day. A Friend asked me to make a sign for the door (that they could flip) so when she and her husband went off to work that they both knew that the cat was let back in for the day. I asked . . why, I thought you had a cat door? Well come to find out, they live on the edge of a wooded area and the cat had decided to bring home presents for them. Opp's twice the cat brought home. . . well. . I just will say it. . SNAAAAKE. The cat door has been closed . . for not.
  I started with A card shape, cut a window in both sides. I wanted to use the Cottage Cutz Die with the Cat Front & Back. I thought this was a perfect use. The outside was 4" x 6" and the window is 2" x 3 1/2". I used acetate in the window.
 By using acetate I could put both sides of the cat die in the window. I also used the Cottage Cutz Die, Half Daisy on the Front as a full daisy and the back as the half daisy. Mounted on a lattice stripe. The cat die turned out very cute as a orange tabby. I stated with a melon color card stock and highlighted in a burnt orange ink and dabbed a little white. The bow was done in burnt orange card stock. This all pops against the white door.
 The half daisy was also added to the cloth ribbon hanger at the top of the front. Remember when gluing card stock and other materials like beads or cloth ribbon, I have found Glossy Accents to hold the best.
  I added a dangle at the bottom of the sign using the Cottage Cutz Die, Fish Skeleton along with a few beads.
 Monday, July 05, 2010
Good Morning Friends!
For today's post, I am going to show you how I re-purposed the Shih Tzu die cut that I used on Thursday. I like to think outside the box and see other ways I can use a die.
I hope you like what I have made.


While looking at the die cuts I saw a hairstyle and a sweater. I cut the hair of the dog off to create the neckline of the sweater. I used several colors of die cuts to make the little girl. The snout of the die cut had the perfect shape for the little girls hair.

I will let the pictures speak for themselves. If you have any questions, please don't hesitate to ask.


I cut the green snowpants, added some black boots, and added a cute little Panda Bear to the winter sweater to cover the eyes of the dog die cut. I finished with a scarf, a bow in her hair and some white stitching, using a white gel pen. And of course, her cute little face was stamped with a Peachy Keen Simple Sallies face, PK-531.


Thanks so much for stopping by! If you re-purpose your die cuts and would like to share them, leave a link in the comments so I can come and see. Enjoy your day! It is in the 90's here. I will be staying inside today.
Friday, July 02, 2010
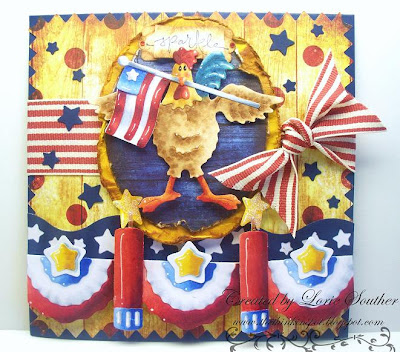
Something To Crow About (...see rooster below)

Wednesday, June 30, 2010
Hello Everyone! Happy Thursday! Let me introduce myself.


Thanks so much for stopping by. If you have any questions just leave a comment and I will do my best to answer. Have a great day!
Watch For It Wednesday #67
How about another fun challenge for today's WFIW post?
On April 26, I did a CottageCutz Edger giveaway. We had 23 replies. Now I want to see what everyone has done using their new CottageCutz Edgers.
Create a card, layout or altered item showcasing your favorite CottageCutz Edger and you are entered for a chance to win a new CottageCutz Edger of your choice. Email a copy of your card, layout or altered item within one week to scrappingcottage@cox.net. The winner will be announced in next Thursdays post(7/8/10).
I played along with this challenge. Here is my layout, showcasing this CottageCutz Edger.

For my layout, I cut craft foam using my CottageCutz Edger die to make my own foam accents(aka Thickers). For more info on using craft foam with your CottageCutz dies, see my 6/9/10 WFIW post. I took a close up photo so you can see the dimension.
Don't forget to send in your projects within one week.
I am sad to say this is my last post, my guest design team time is up. I have really enjoyed being part of the Scrapping Cottage design team and sharing my creations.
Take care!
Karen
Tuesday, June 29, 2010
May the 4th Be With You
 This USA Eagle can be made with or without the hat and the USA because they are separate pieces, but simple as well.
This American Eagle was also simple to put together with only 6 pieces. You can use the eagle and the AMERICA separate as well.


